

Invite users
Passwork's Invites feature lets new users register themselves using a link or an email invite. When creating an invite you can pre-assign groups, so the new user automatically inherits the correct vault access the moment they complete registration — no manual access configuration needed afterwards.
This is the recommended approach for onboarding multiple team members at once. It is faster and less error-prone than manually adding each user to individual vaults.
Invites are managed at the system level. Depending on your role permissions, you may be able to create invites directly, or you may need to ask your Passwork administrator to create them for you.
Create an invite link
A link invite generates a reusable or single-use registration URL that you can share via any channel (email, Slack, intranet).
- Go to Settings and users → User management → Invites tab.
- Click Create invite.
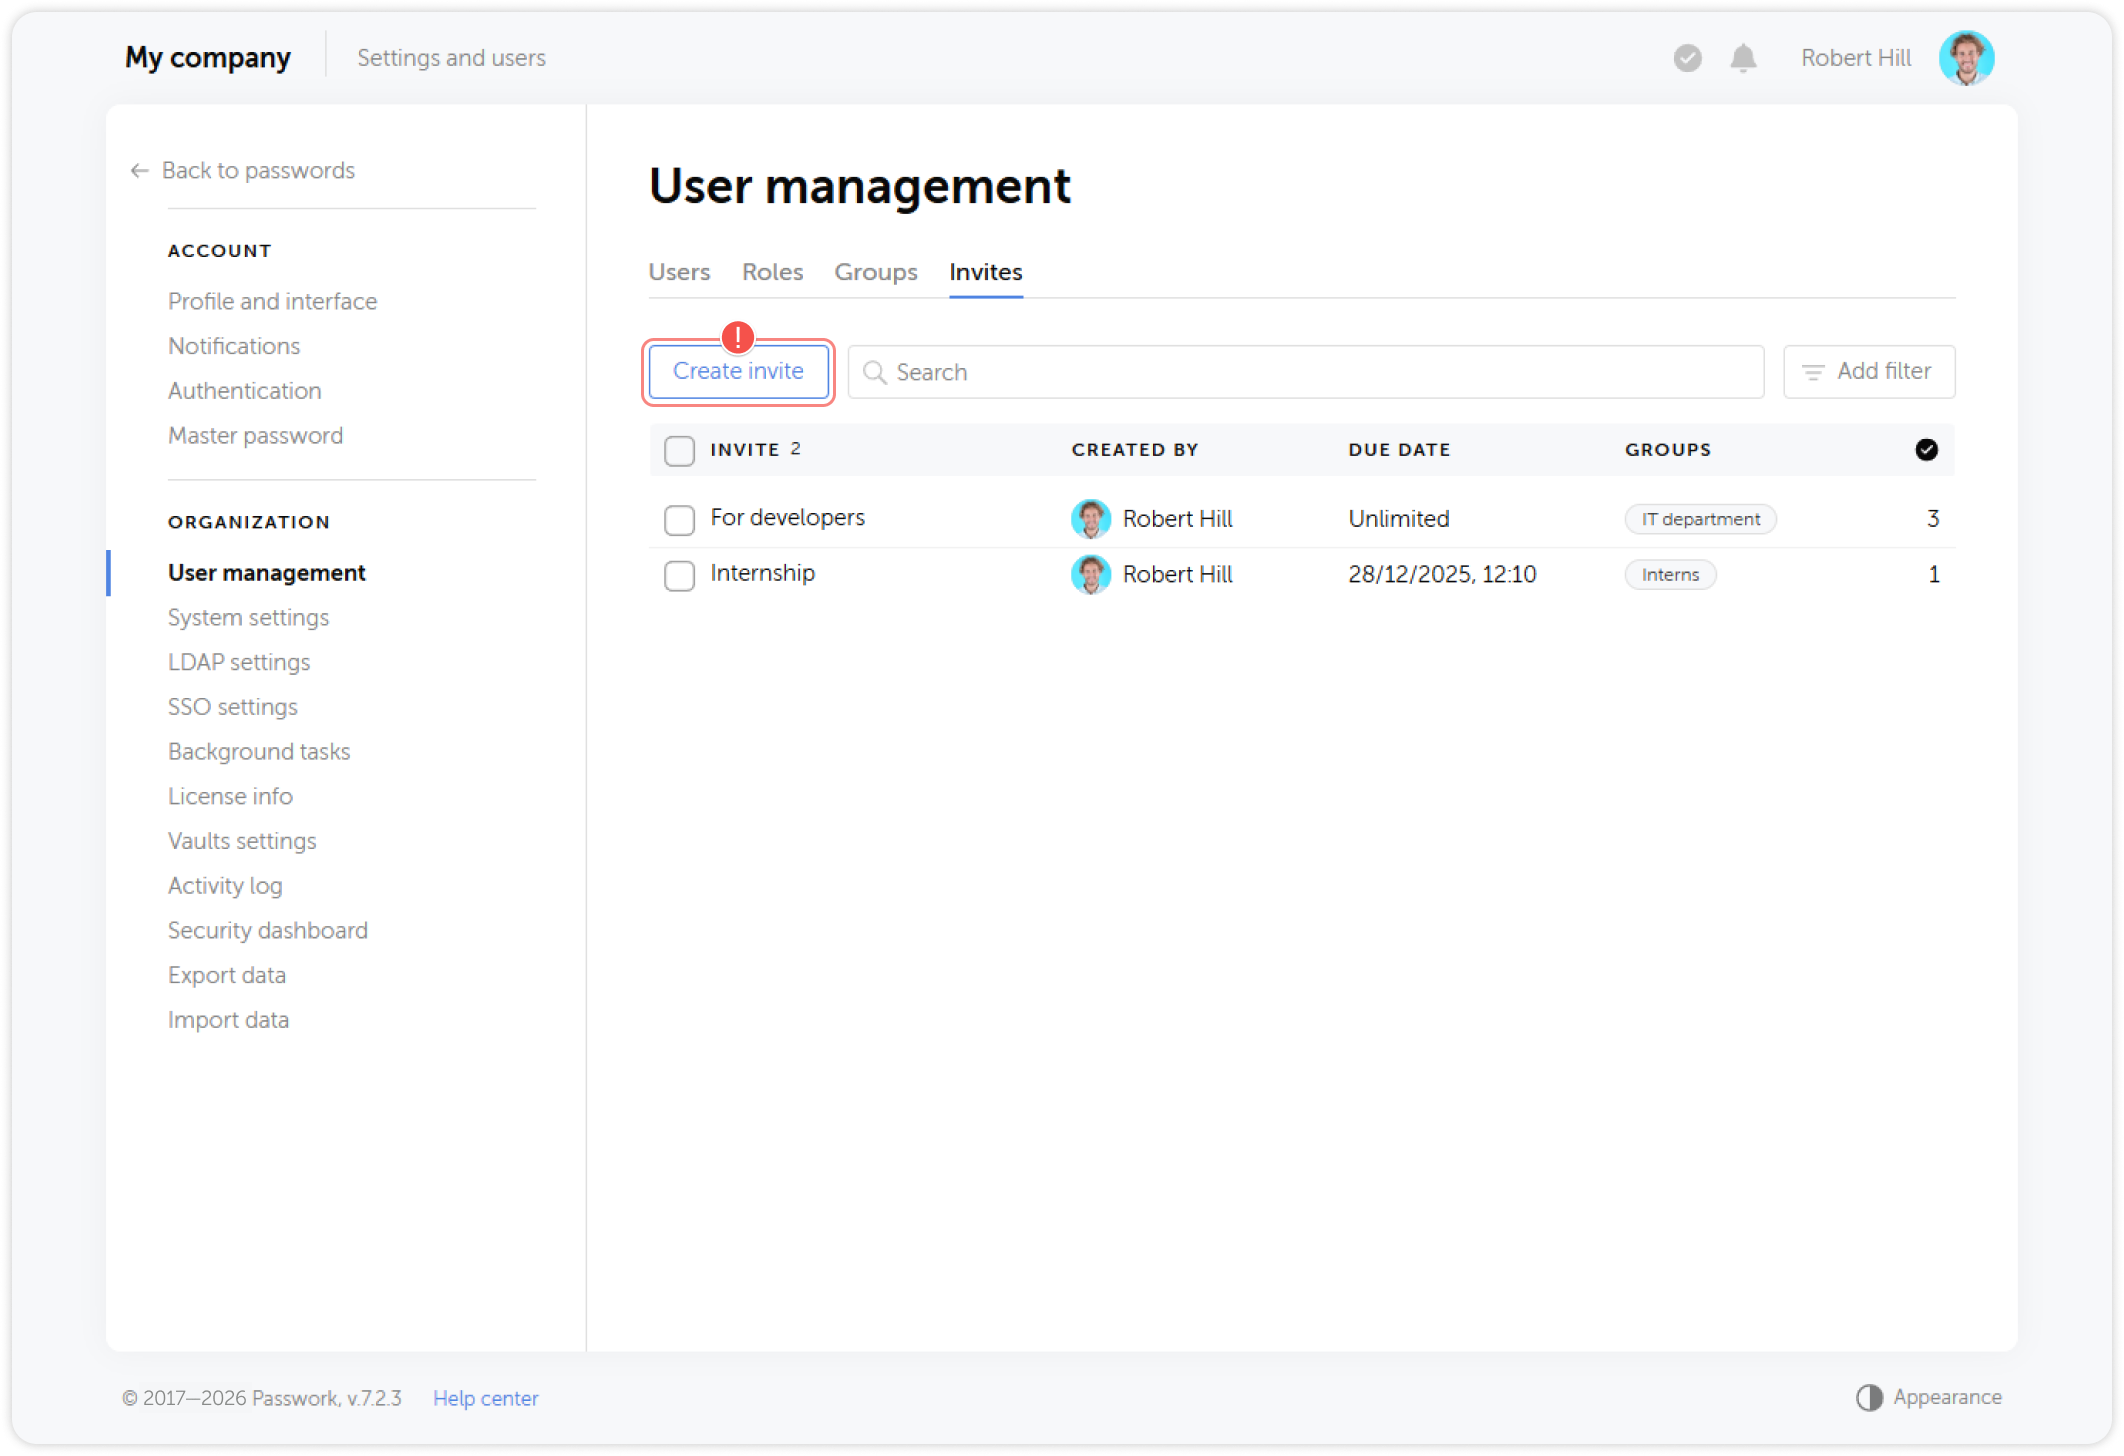
- Enter a name for the invite (for your reference, e.g. "Marketing Q3 2026").
- In the Groups field, add the Passwork groups the user should be automatically assigned to upon registration.
- Set an expiration date. Use a short window (one week) for security — expired links cannot be used.
- Click Create.
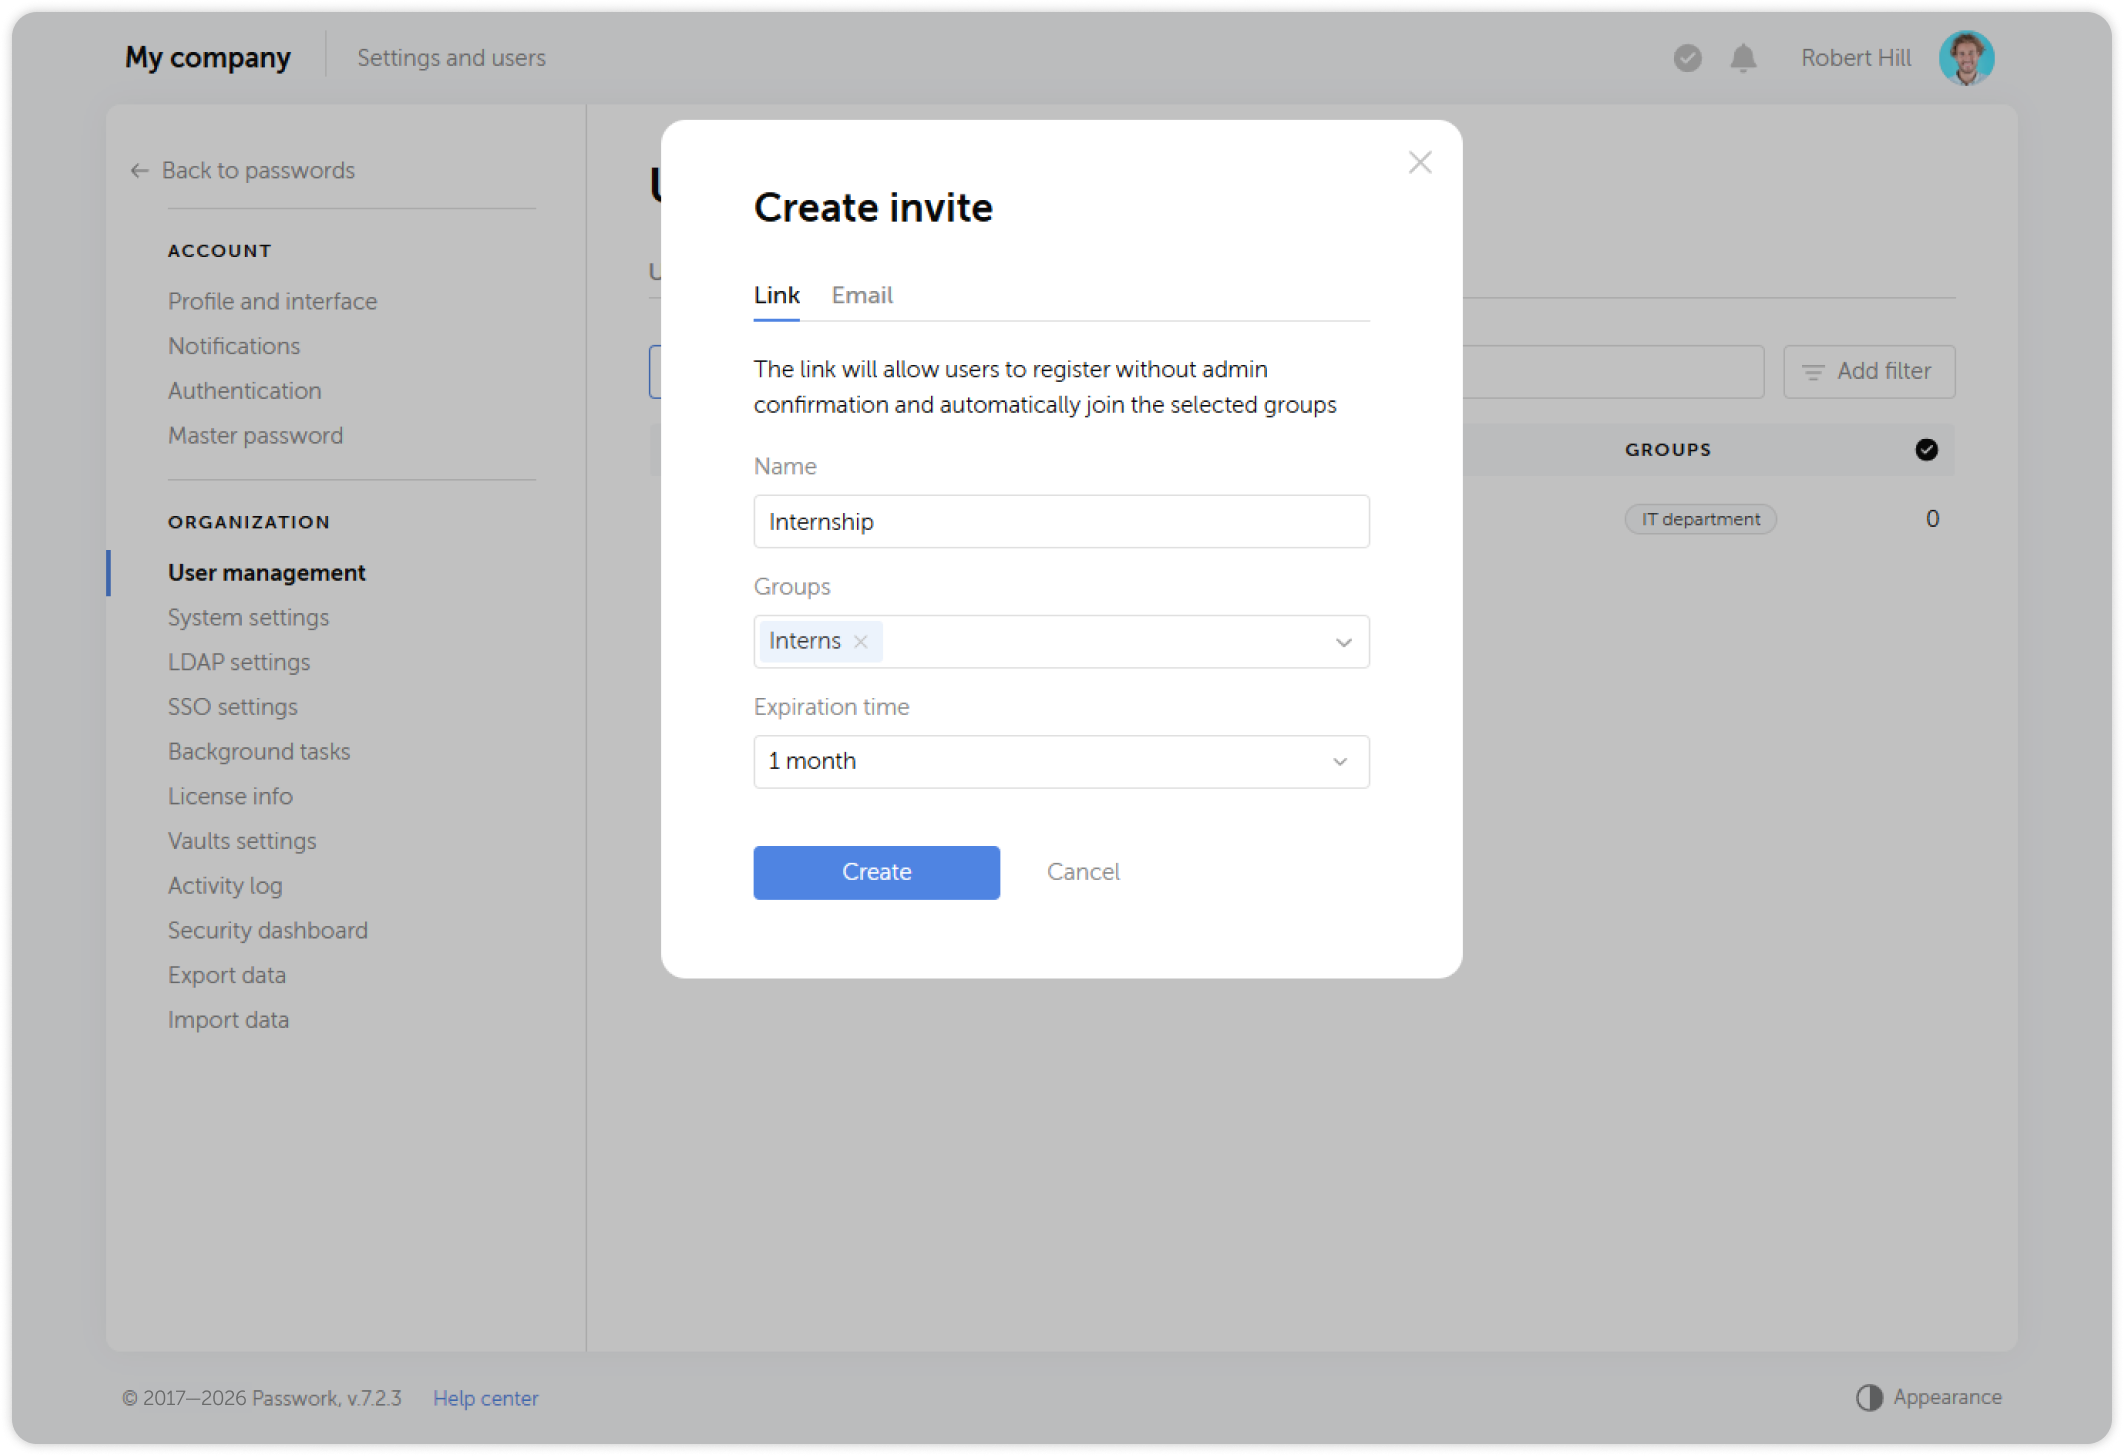
- Copy the invite link from the confirmation dialog. Remember to copy it before closing the dialog, as it is can't be viewed again afterwards.
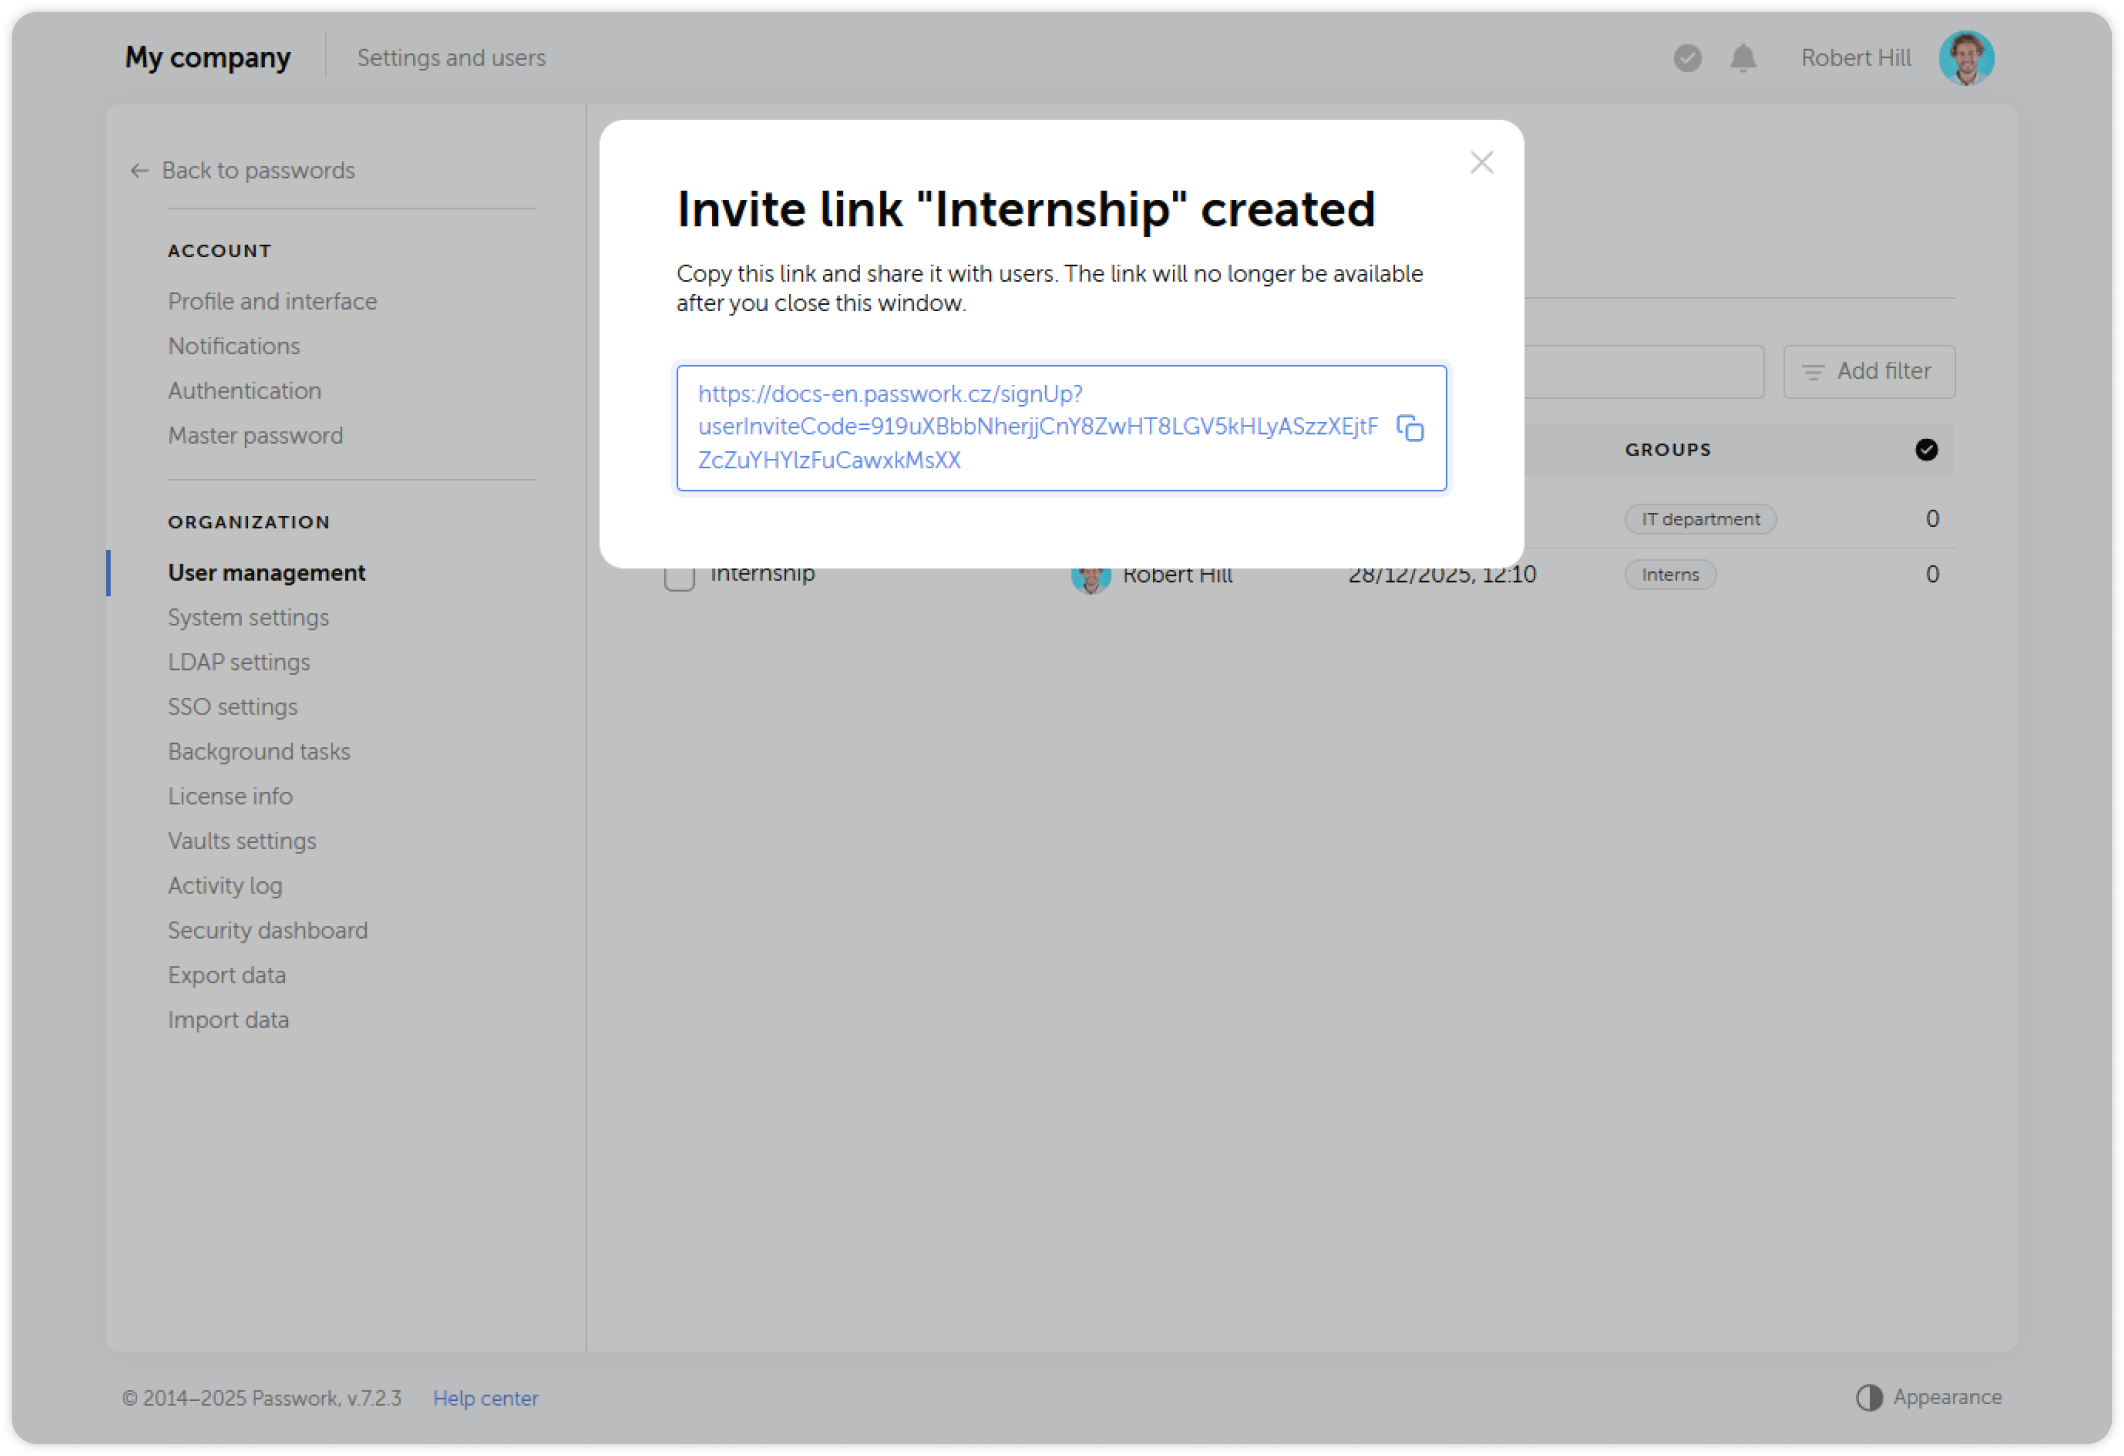
Send the link to the new team member. When they open it, they are taken directly to the Passwork registration page. After completing registration, they are automatically added to the pre-assigned groups and gain immediate access to the corresponding vaults.
Create an email invite
For a more formal flow, send the invite directly to the recipient's email address from within Passwork.
- Follow steps 1–2 above to open the Create invite dialog.
- Switch to the Email tab.
- Enter one or more email addresses.
- Optionally pre-assign groups.
- Click Create and send.
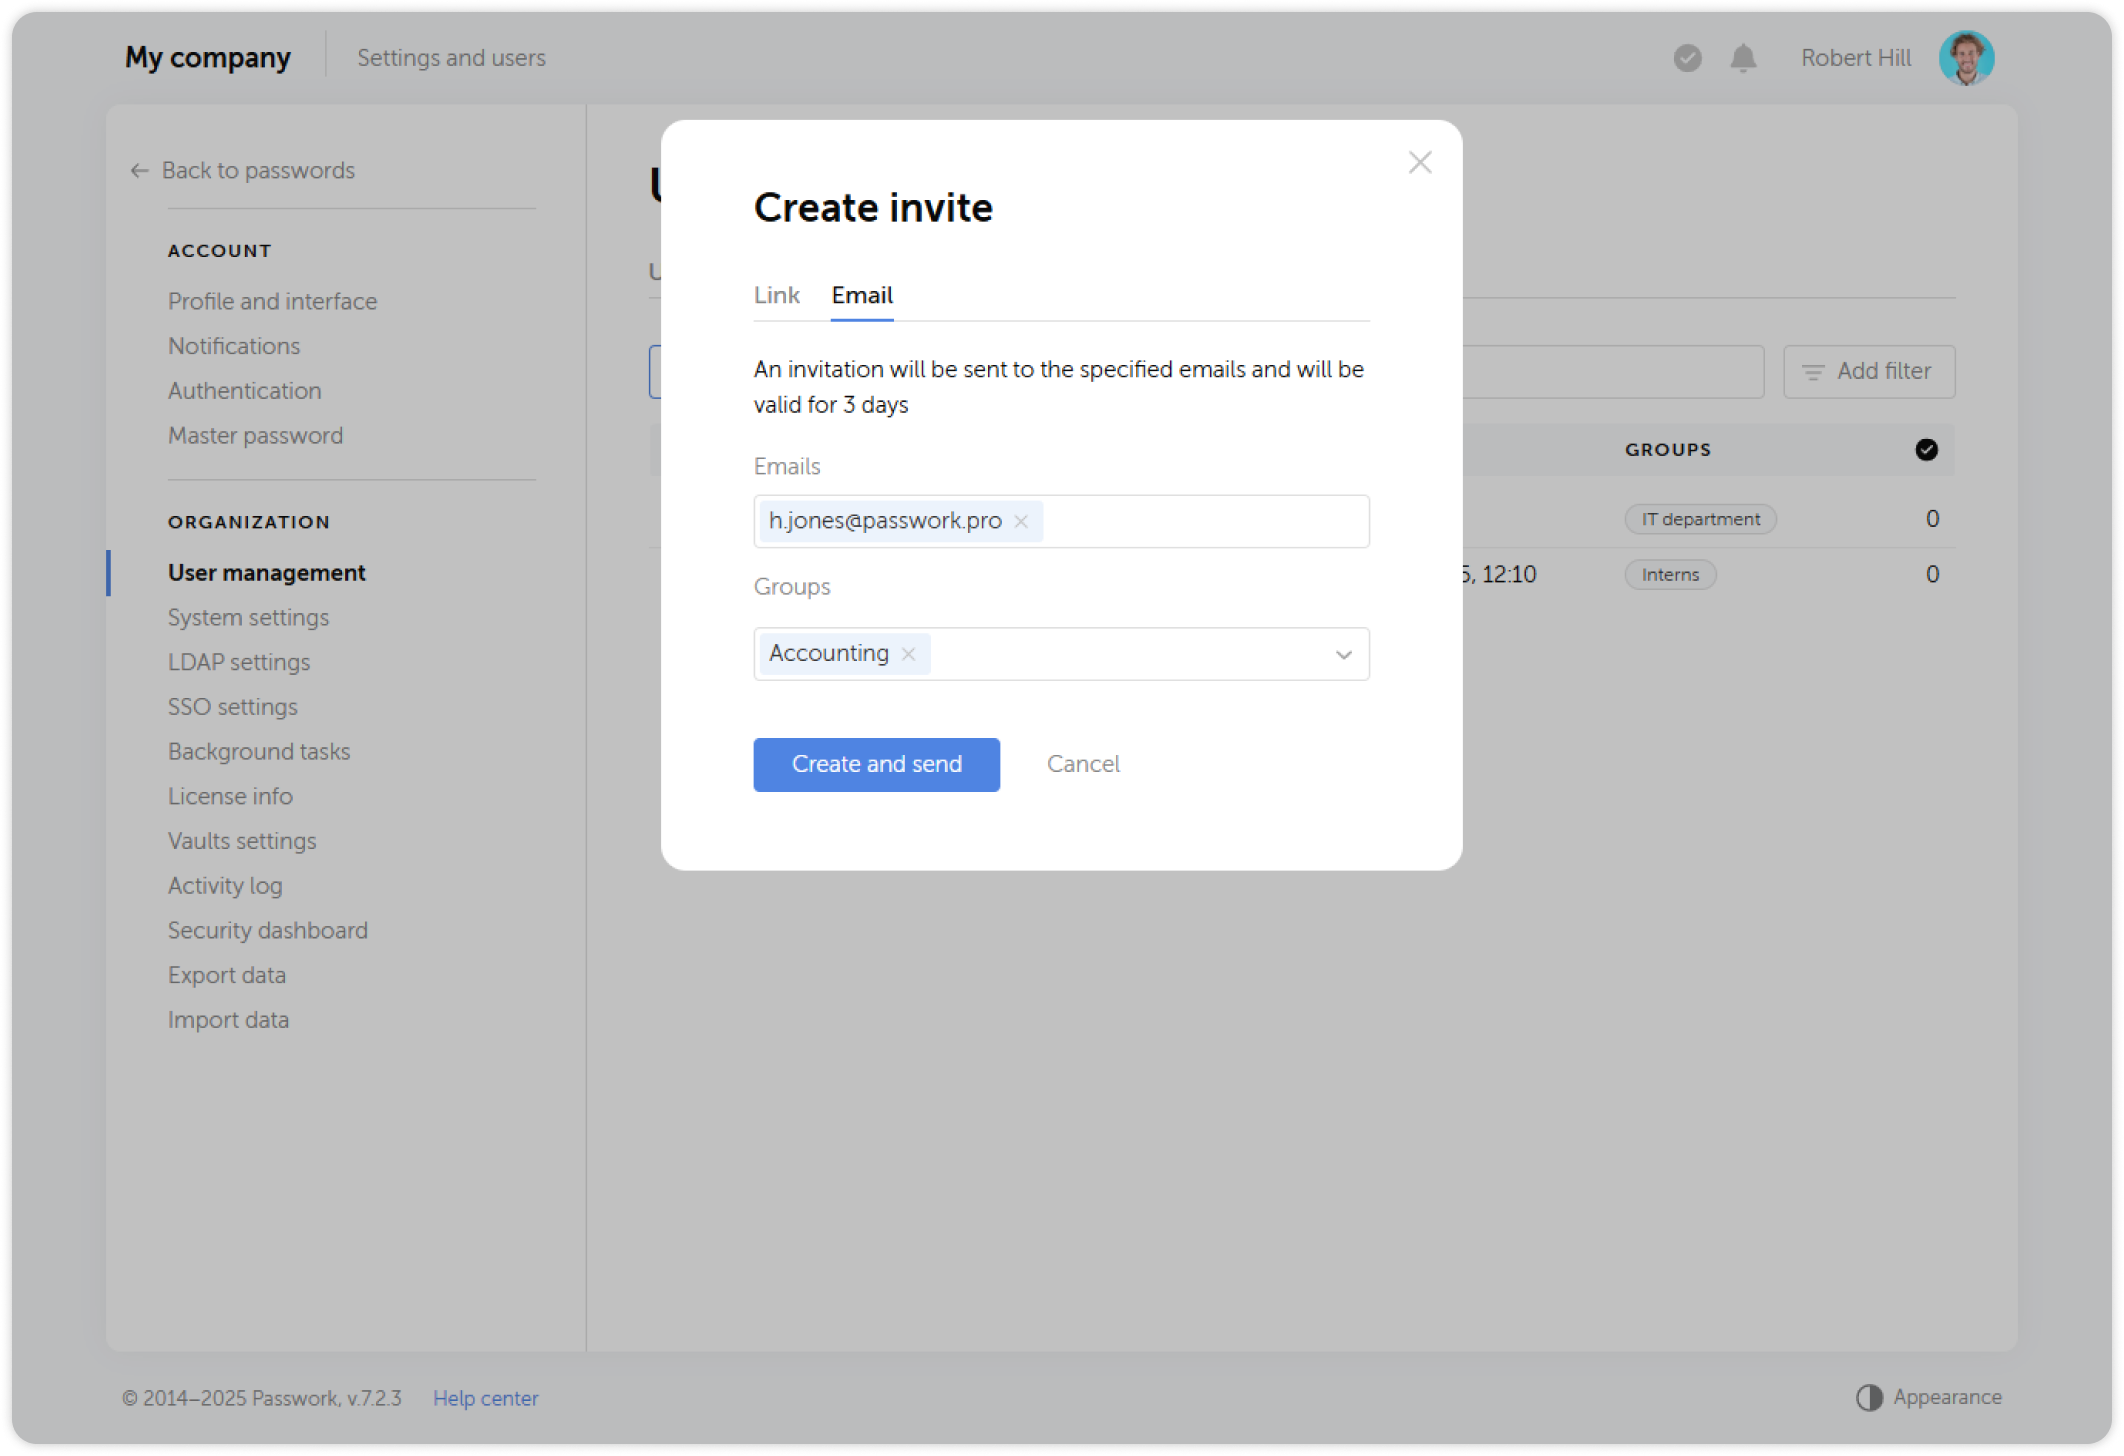
Email invites are valid for three days from the creation date. If a user does not register within that window, create a new invite.
Manage and revoke invites
All active invites are listed in the Invites tab. You can see the invite name, creation date, expiration, and usage count.
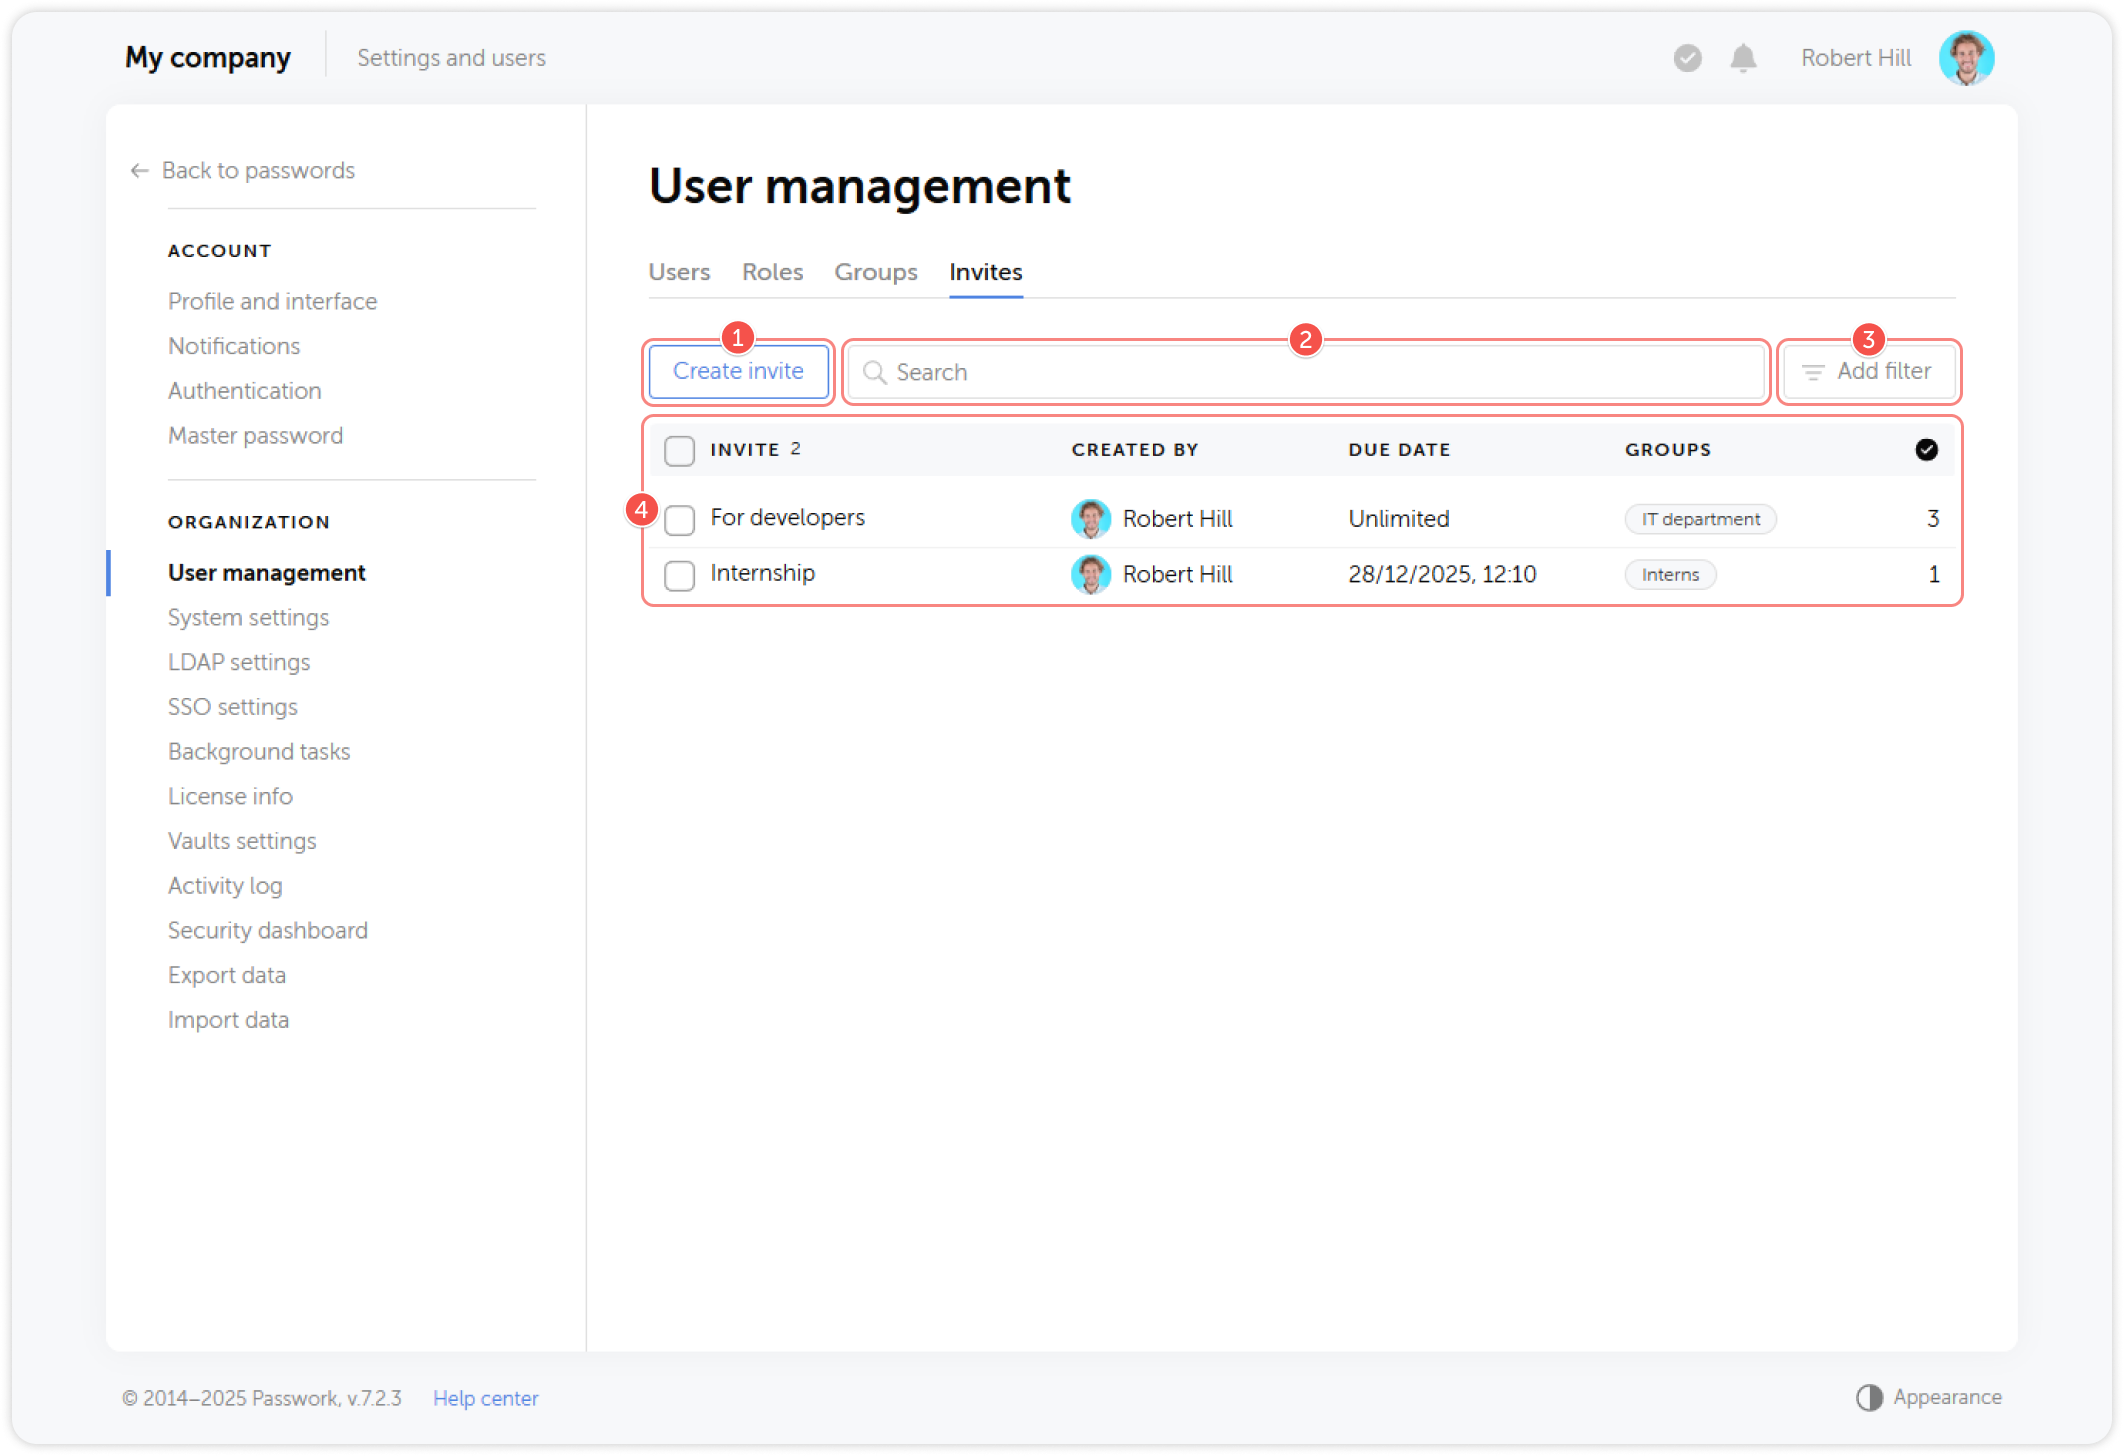
To revoke an invite before it expires (for example, if you sent a link to the wrong person):
- Select the invite in the list.
- Click Delete in the dropdown menu.
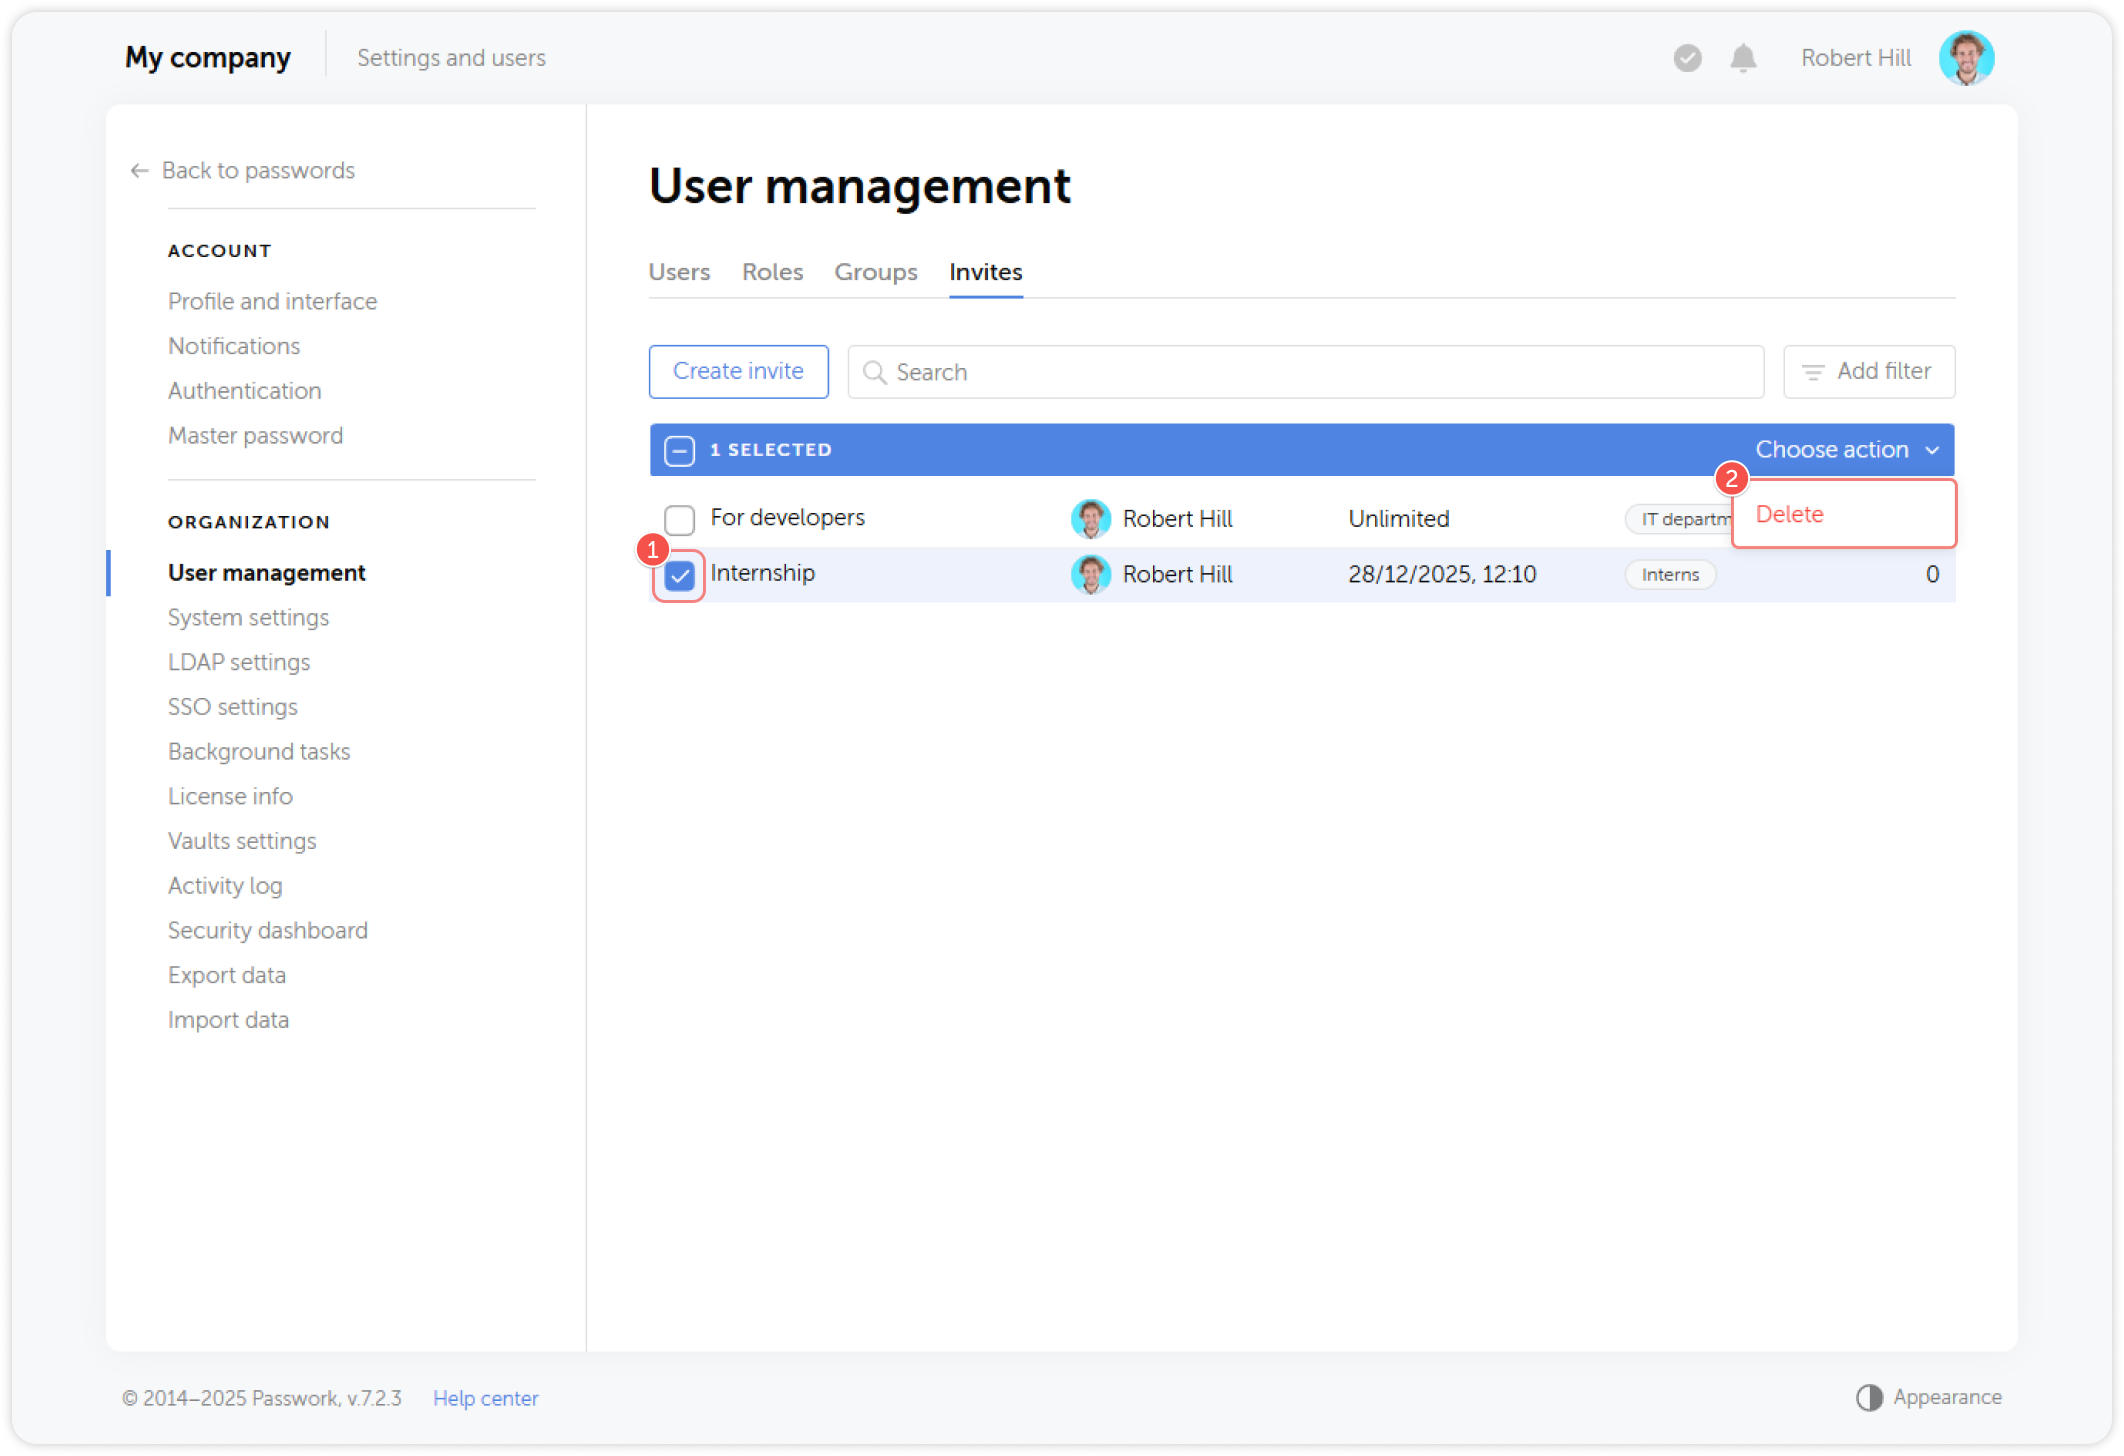
Once deleted, the link is immediately invalidated. Any user who tries to use it after deletion will see an error.
Invite vs. manual vault access grant — when to use which
| Situation | Recommended approach |
|---|---|
| Onboarding multiple new hires at once | Invite link with pre-assigned groups |
| Single new hire with a standard role | Email invite with pre-assigned group |
| Granting an existing user access to a specific vault | Vault access management (add user to vault directly) |
| Temporary contractor access for a defined project | Invite with short expiration + dedicated contractor group |
| Existing user needing access to one folder | Folder-level access grant from vault settings |