

Set up vault structure
Create a department vault
- In the navigation pane, click the Plus icon next to the corresponding vault type. For a department vault accessible to multiple users, choose Company vaults.
- Enter a vault name (see naming conventions below).
- Click Create.


Passwork supports multiple vault types. Company vaults are shared across teams with administrator-controlled access. Private vaults are visible only to the owner. The available types depend on your organization's configuration.
Design the folder hierarchy
Folders organize passwords within a vault. Use a logical, consistent structure that makes credentials easy to find without requiring browsing through long flat lists. Keep folder depth at 2–3 levels — deeper hierarchies become difficult to navigate.
Example structure
Marketing Department (vault)
├── Social Media
│   ├── Facebook
│   └── LinkedIn
├── Analytics Tools
│   ├── Google Analytics
│   └── Hotjar
├── CMS Access
└── External Contractors
    └── Agency Name
Create a folder
- Open the vault where you want to create a folder.
- Click Vault settings (the three-dot menu next to the vault name) and select Create folder.
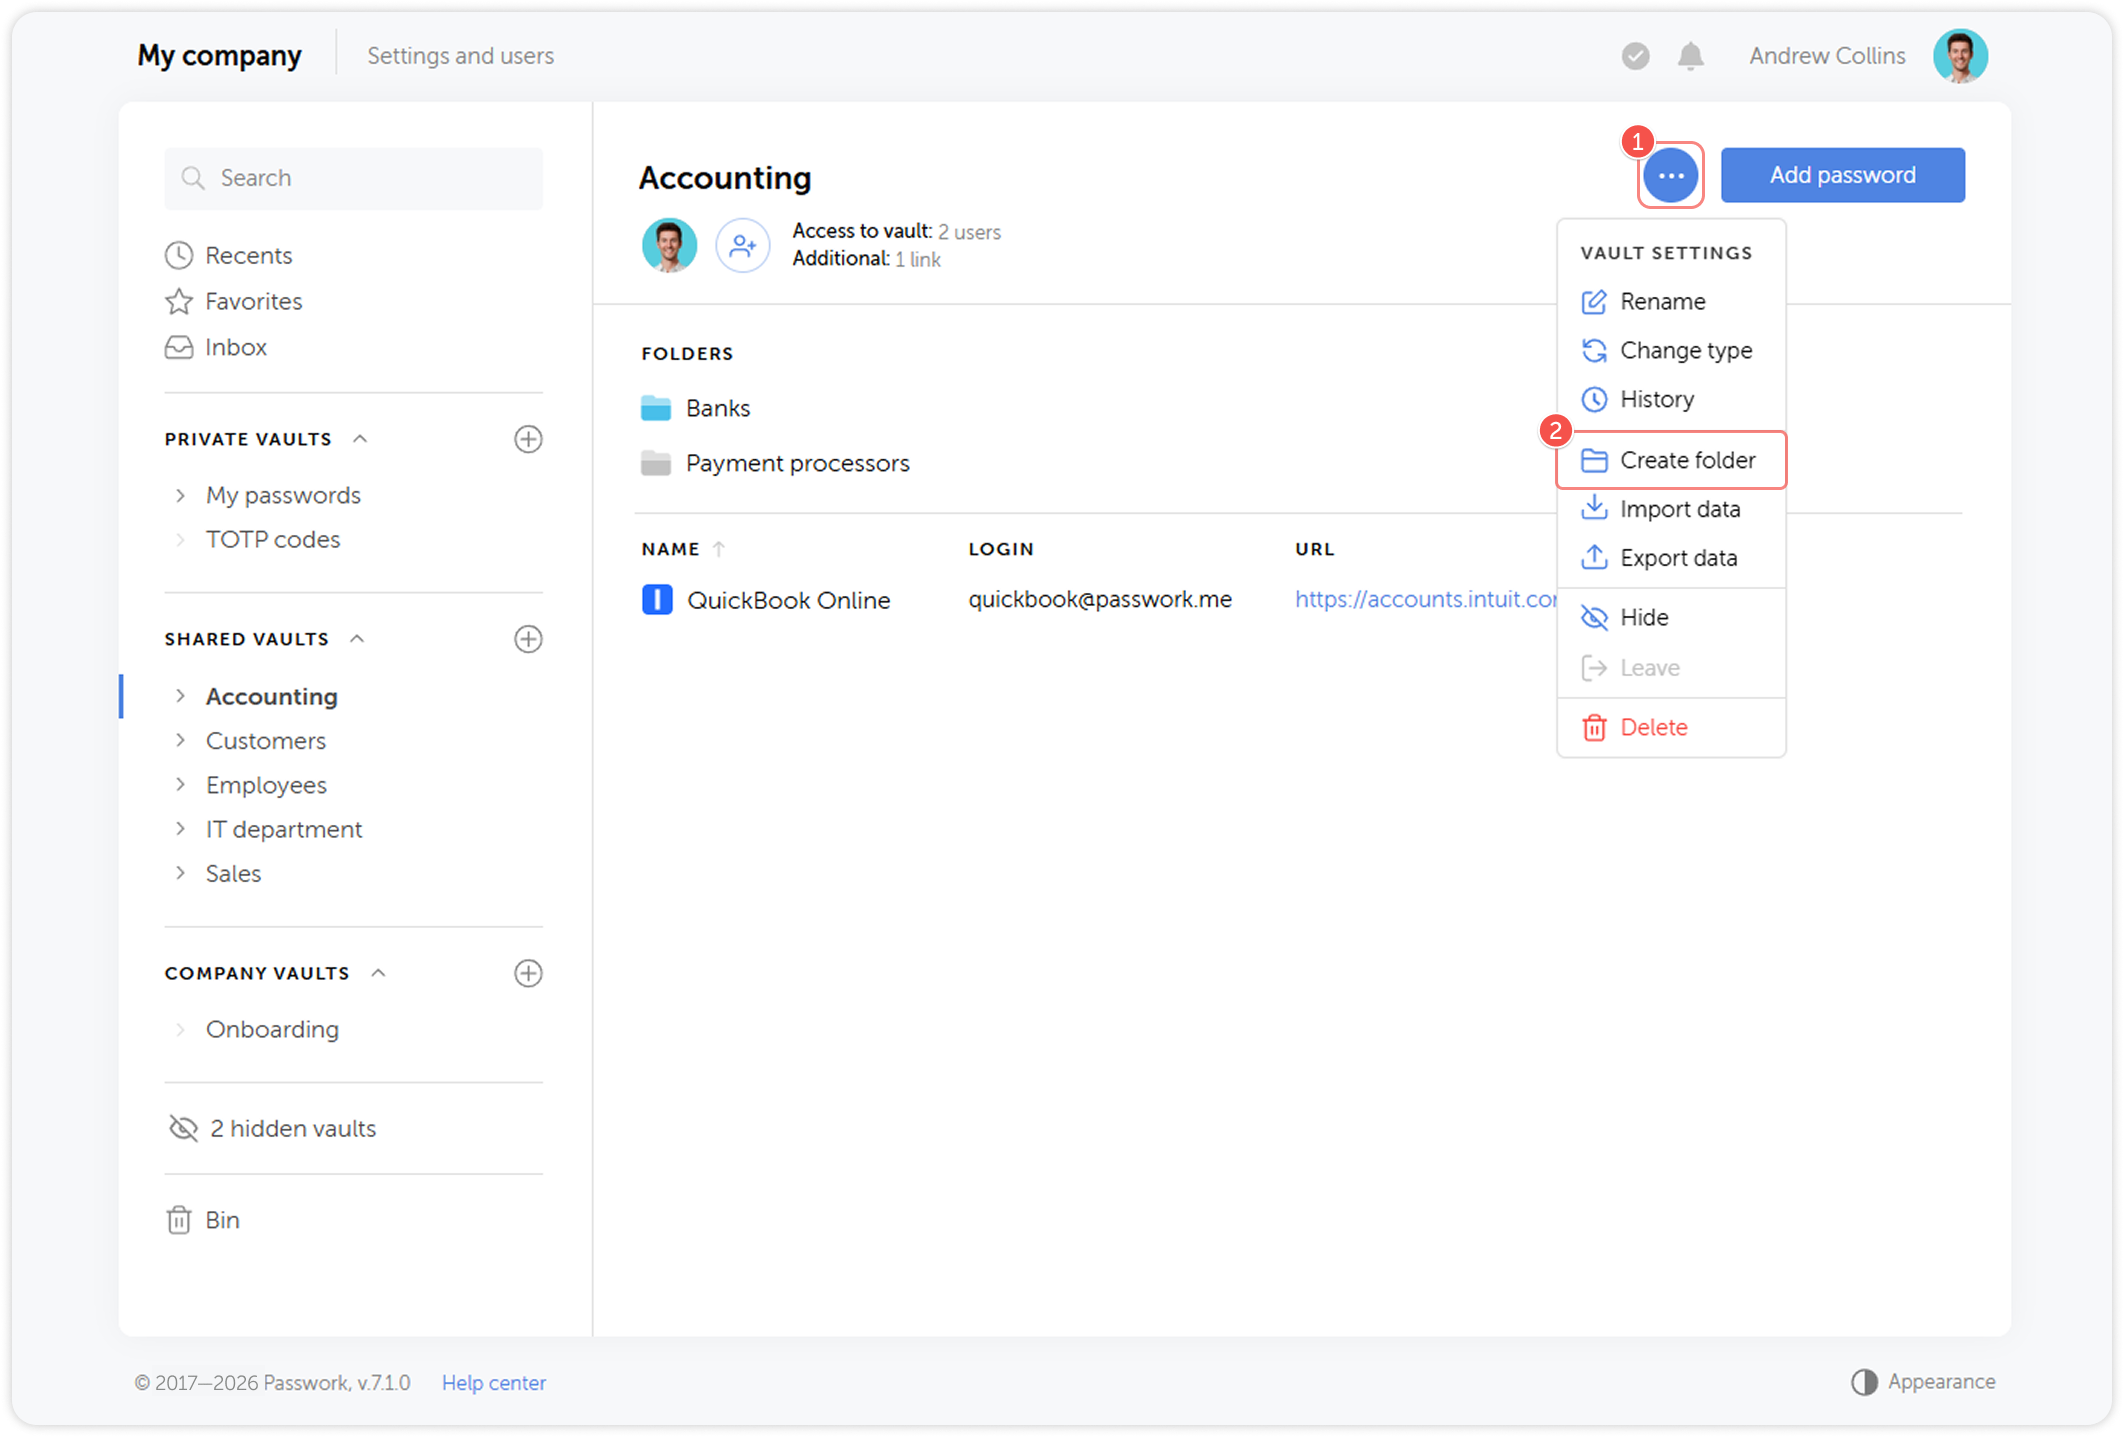
- Enter a folder name and confirm.

To create a nested folder, open the parent folder first, then use the same Create folder action.
Naming conventions
Consistent naming makes vaults and folders discoverable across teams, especially in larger organizations.
- Use the full department or project name, not abbreviations that are not universally known
- For service account credentials, include the service name and environment: AWS Production, AWS Staging
- For contractor access, include the company name and project: Agency Name — Project X
- Avoid generic names like Misc, Old, or Temp — create a specific folder for anything that would otherwise end up there
Next step
Proceed to Access management to invite team members and configure their permissions.