



Windows SMTP
Configuring parameters in Passwork
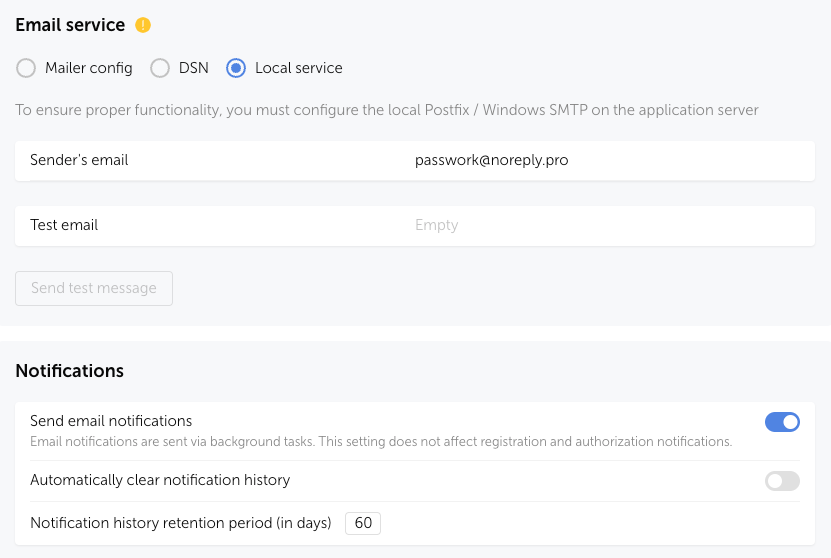
Open the Passwork web interface and go to Settings and Users → System Settings → Notifications section.
Activate the Send notifications by email option and in Mail Service select Local Service, specify the Sender Email and save the changes:
Installing the SMTP Server
Open PowerShell as "Administrator":
Using the Start context menu
- Right-click on the Start icon in the lower-left corner of the screen.
- Select "Windows PowerShell (Administrator)" from the context menu.
Using the Start menu
- Left-click on the Start icon in the lower-left corner of the screen.
- Type
powershell - Open PowerShell as "Administrator" by pressing
Ctrl + Shift + Enter
Install the SMTP server:
- PowerShell
Install-WindowsFeature -Name SMTP-Server
Enable automatic startup for the smtpsvc service:
- PowerShell
set-service smtpsvc -StartupType Automatic
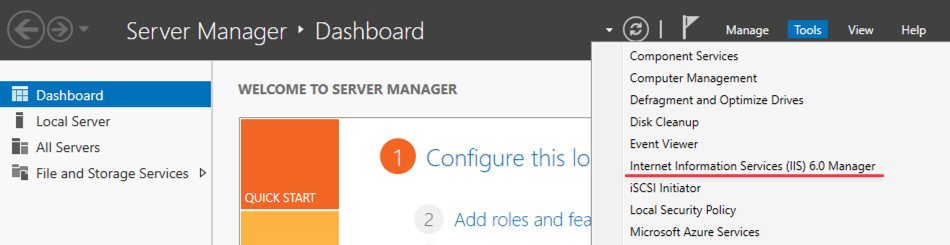
Open Server Manager → Tools → IIS 6.0 Manager:
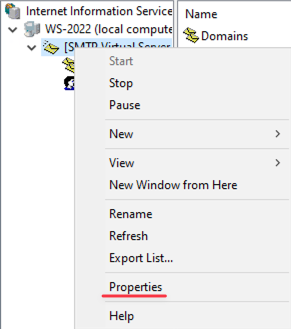
Open the SMTP server Properties:
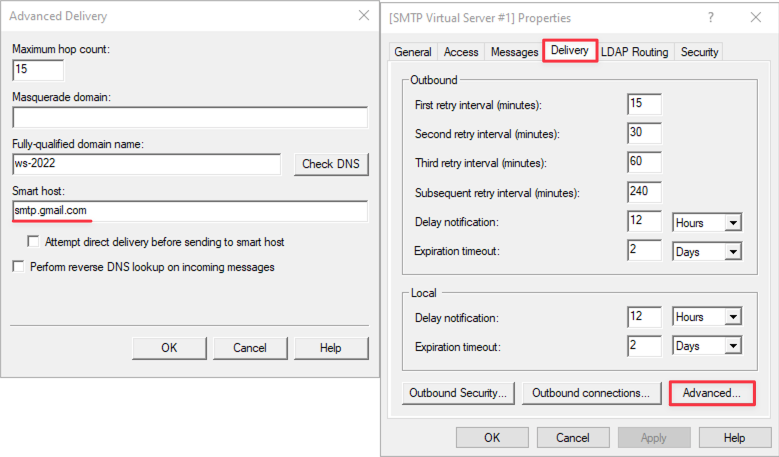
Go to Delivery → Advanced and fill in the Smart Host. For example, Gmail is used and you need to specify — smtp.gmail.com:
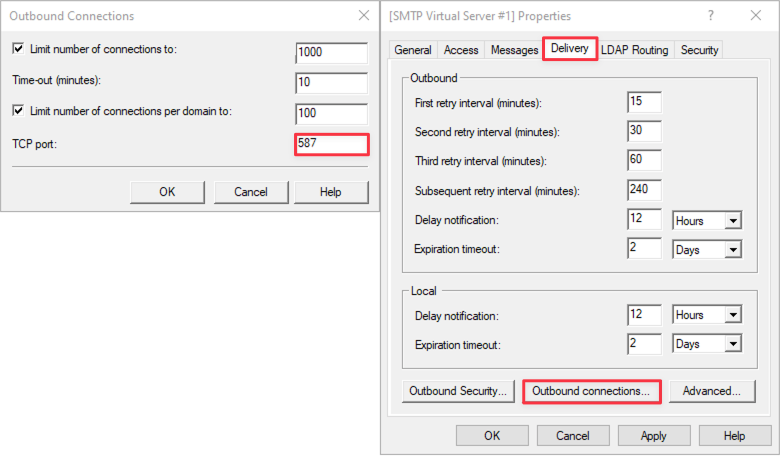
In Outbound Connections set port 587 for TCP:
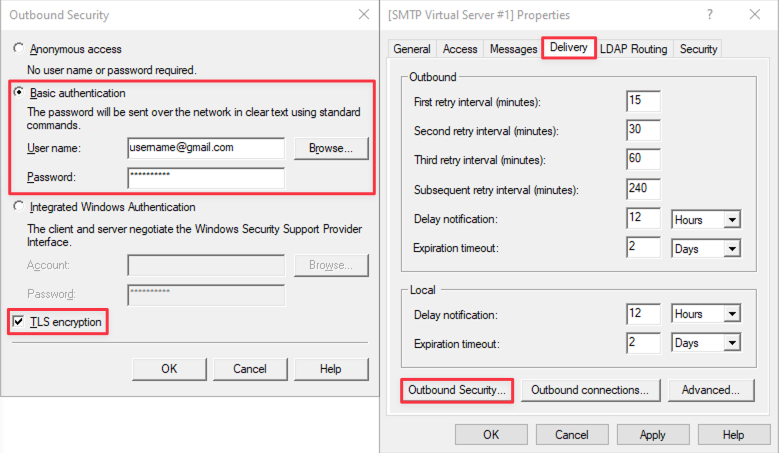
In Outbound Security perform the following:
- Select — Basic Authentication;
- Fill in — Username and Password;
- Activate — TLS encryption.
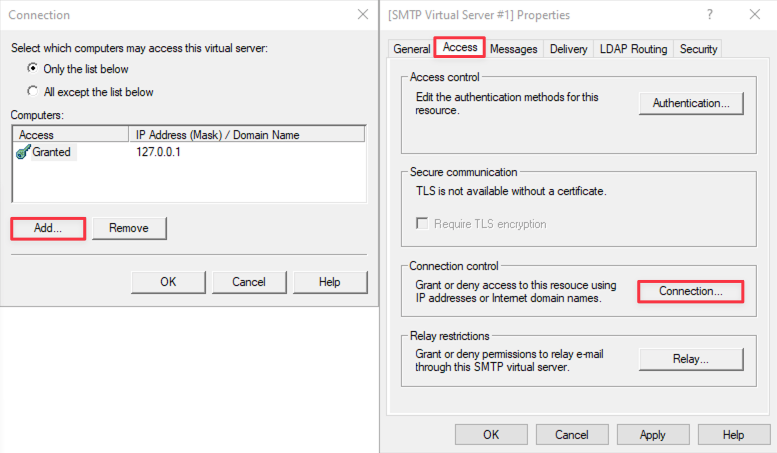
Open the Access section, in the Connection Control settings, add the IP address 127.0.0.1 to the allowed list:
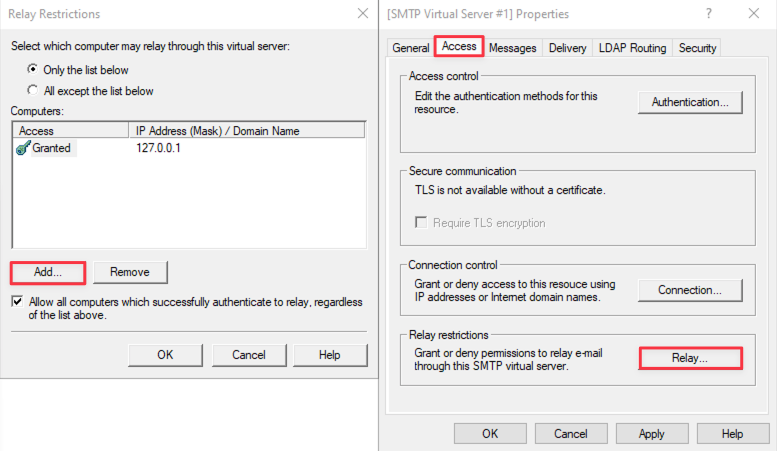
In the Relay Restrictions section add the IP address 127.0.0.1 to the allowed list:
SMTP server setup is complete.