Import from Bitwarden
Passwork 7 supports migration from Bitwarden using a Python script built on top of the official Python connector. The process is API-based and helps preserve your data structure while moving to an on-premise Passwork instance.
Before running the import, create a Passwork database backup and test the process in a staging environment.
What is imported and what is not
Imported
- Bitwarden items of type
loginandsecure note; - Bitwarden collections;
- folders from a Bitwarden personal vault export;
- item name, notes (
description), login, password; - URLs from
login.uris(as URL list); - TOTP (as a custom field with
totptype); - custom fields:
type 0andtype 2->text;type 1->password.
Not imported
- Bitwarden attachments;
- item types other than
loginandsecure note(they are skipped); - unsupported custom field types (warning is written to log).
Files
Step 1. Export data from Bitwarden
This guide uses Bitwarden Web Vault as an example because organization export is available in the web interface.
If you need to export an individual (personal) vault from browser extension, desktop, or mobile app, use the relevant section of the Bitwarden documentation.
- Open Bitwarden and go to Tools → Export.
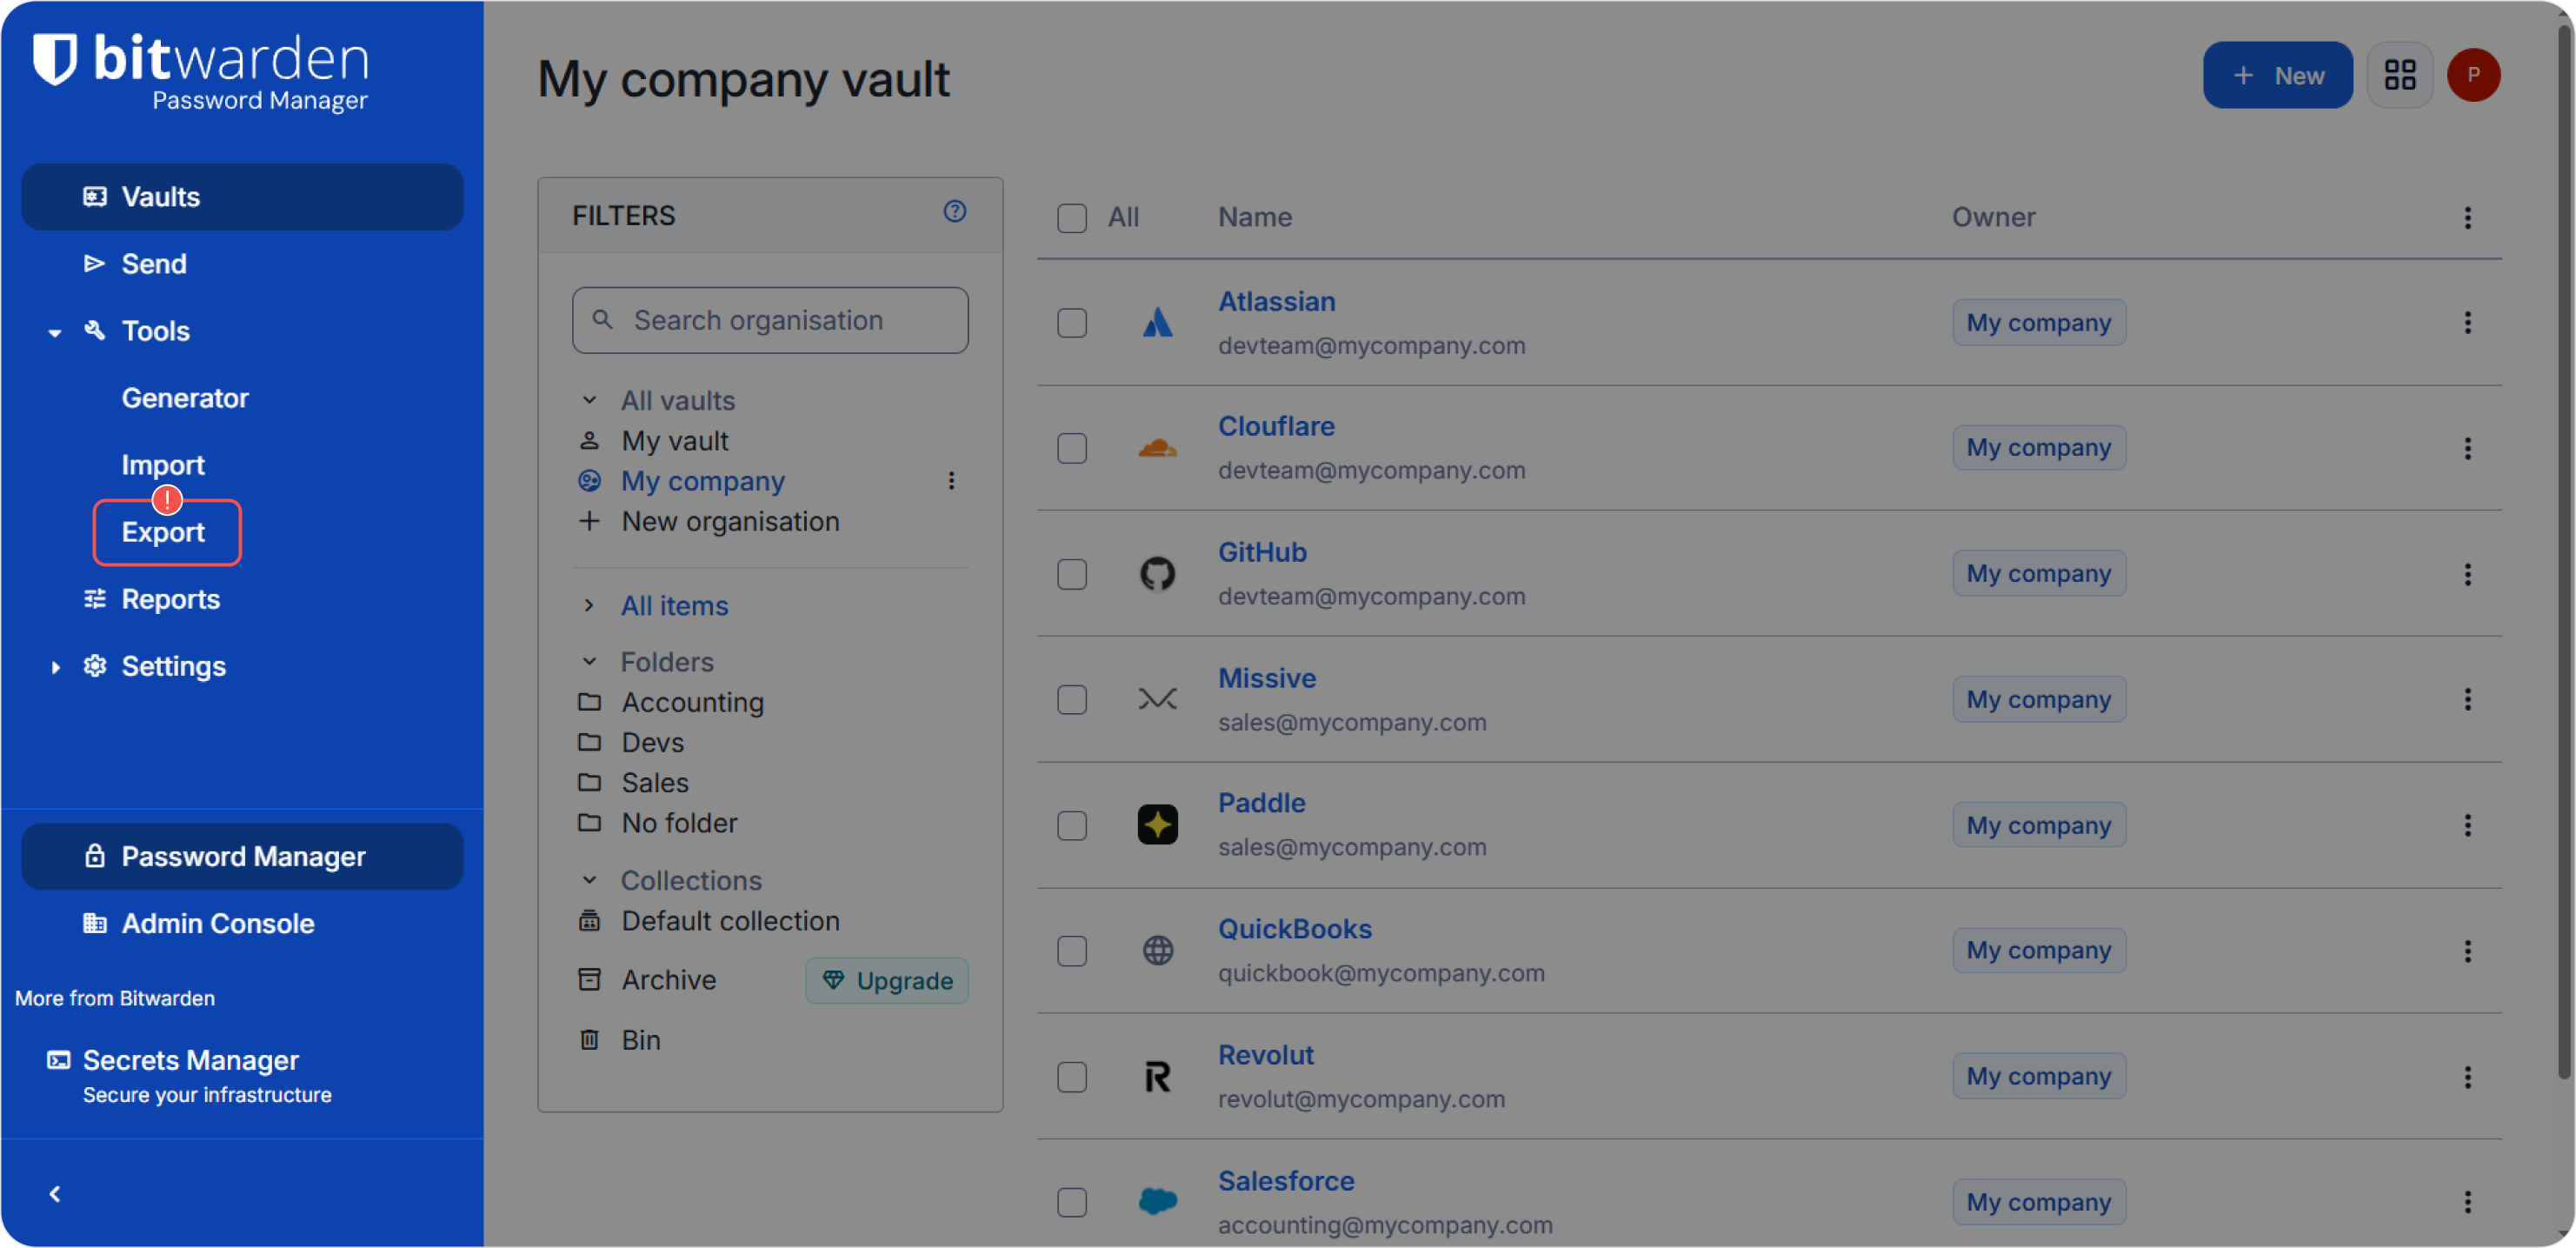
- Choose organization export or specific vault export, select JSON → Export.
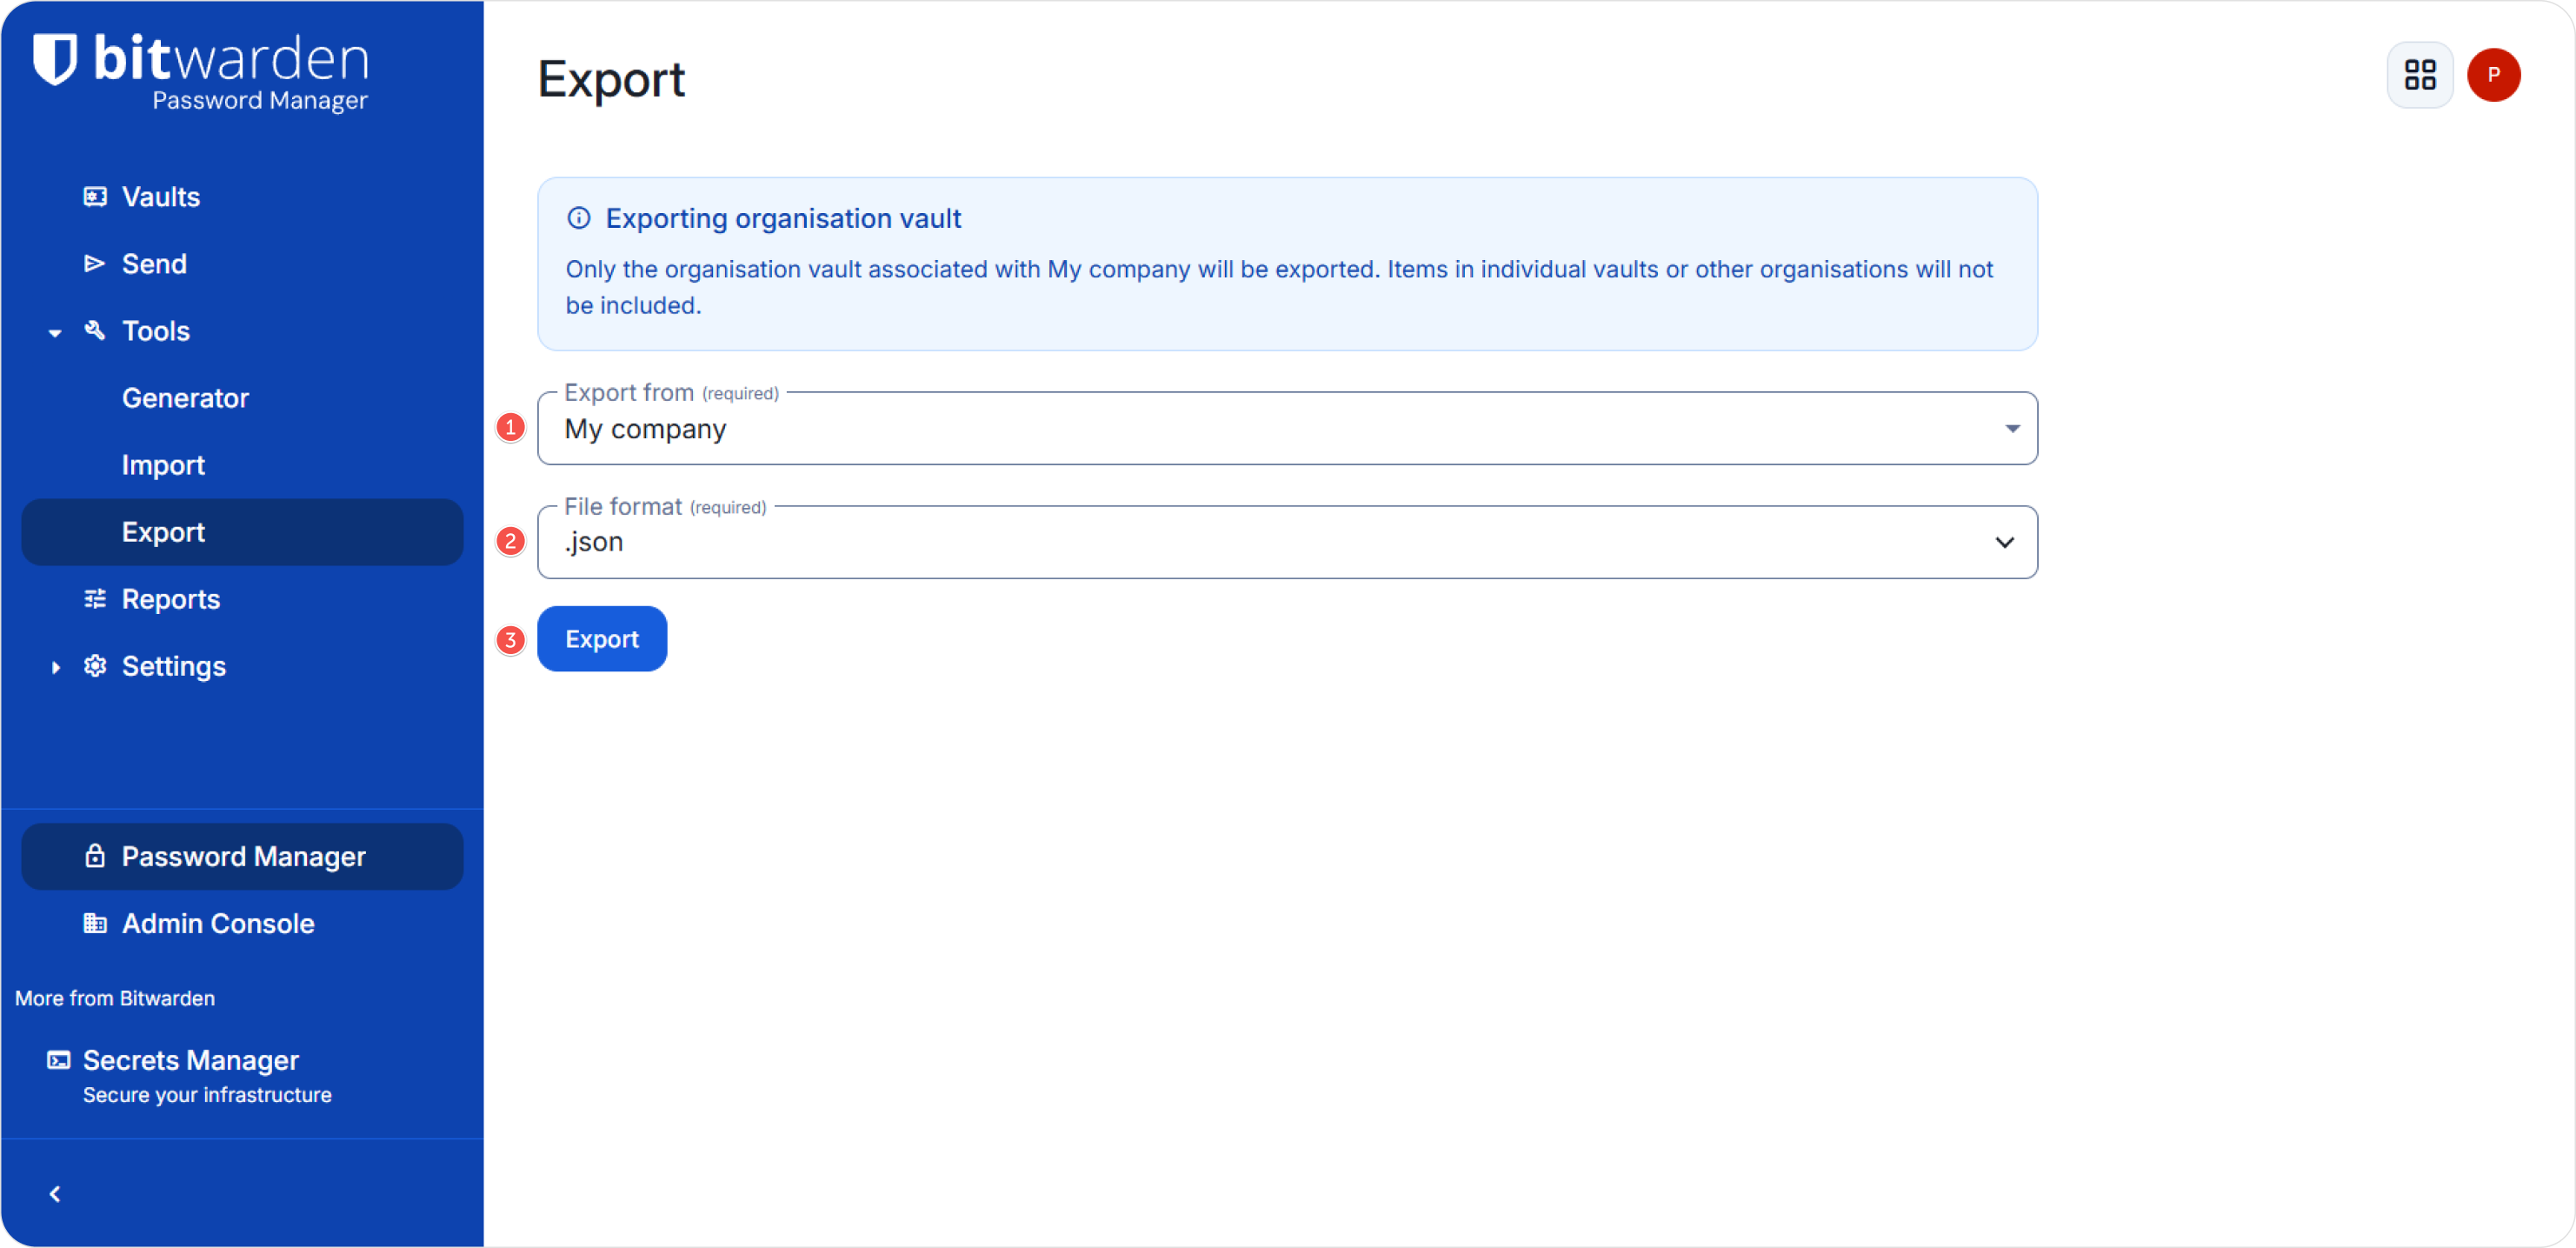
- Confirm export by entering your Bitwarden master password.
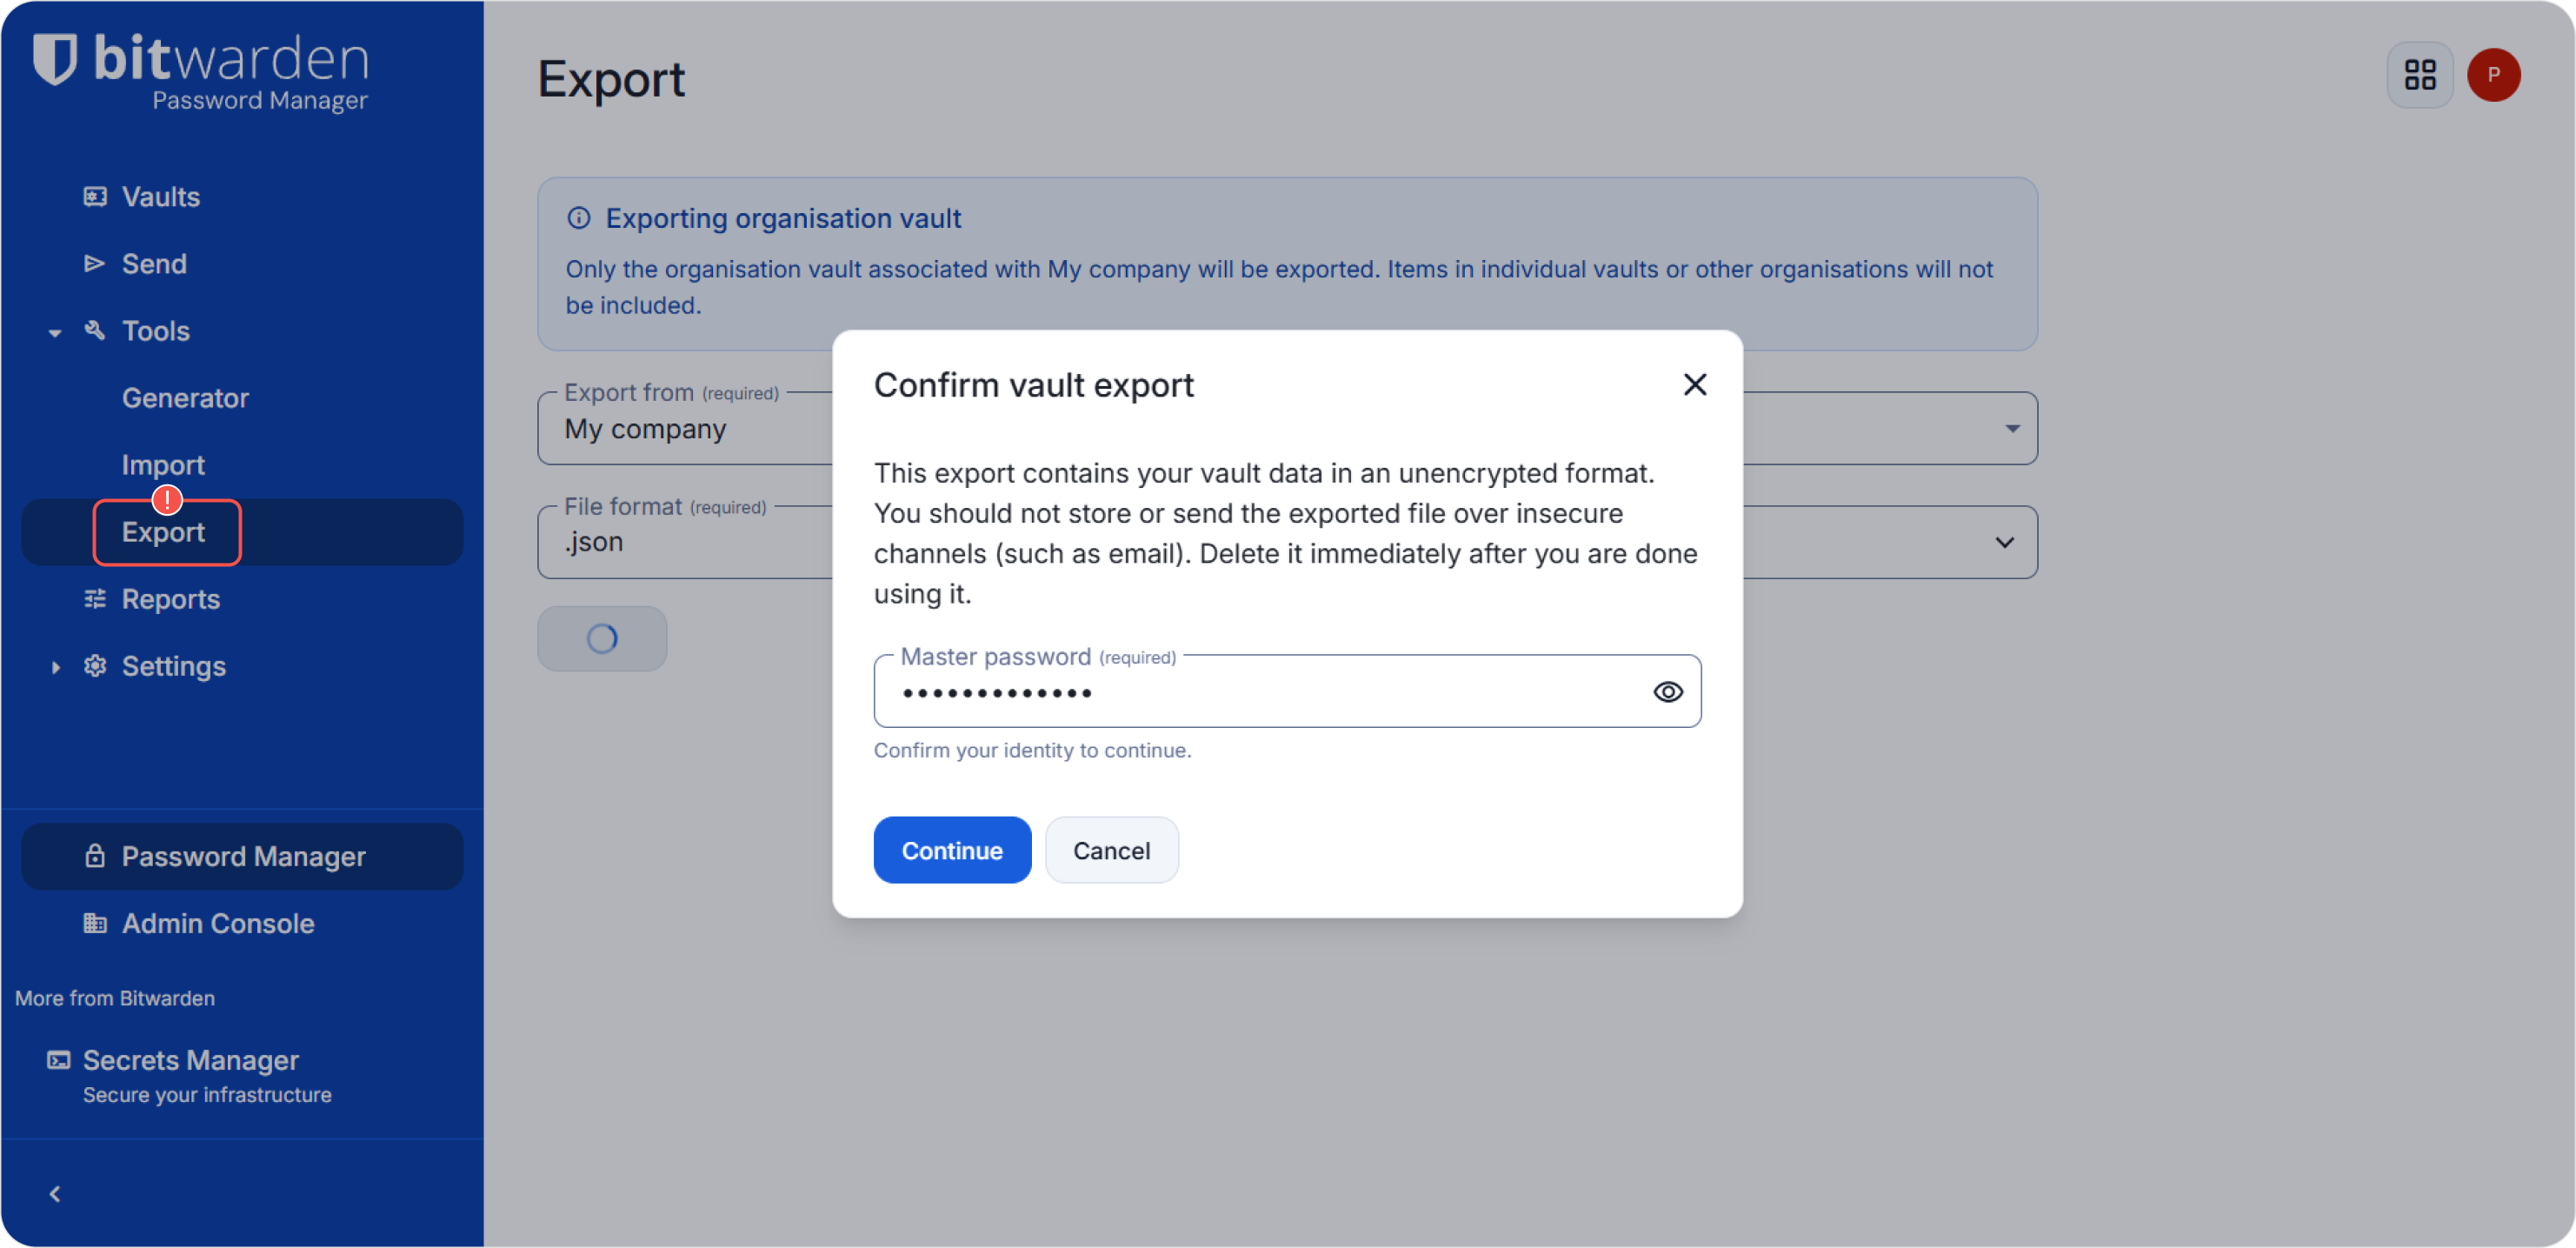
- Make sure the
.jsonfile was downloaded successfully. This file will be used as input forimport.py.
Step 2. Prepare environment and run script
- Linux / macOS
- PowerShell
python3 -m venv .venv
source .venv/bin/activate
pip install -r requirements.txt
python3 import.py ./bitwarden_export.json --host "https://passwork.example.com" --token "YOUR_ACCESS_TOKEN"
python -m venv .venv
.venv\Scripts\Activate.ps1
pip install -r requirements.txt
python import.py .\bitwarden_export.json --host "https://passwork.example.com" --token "YOUR_ACCESS_TOKEN"
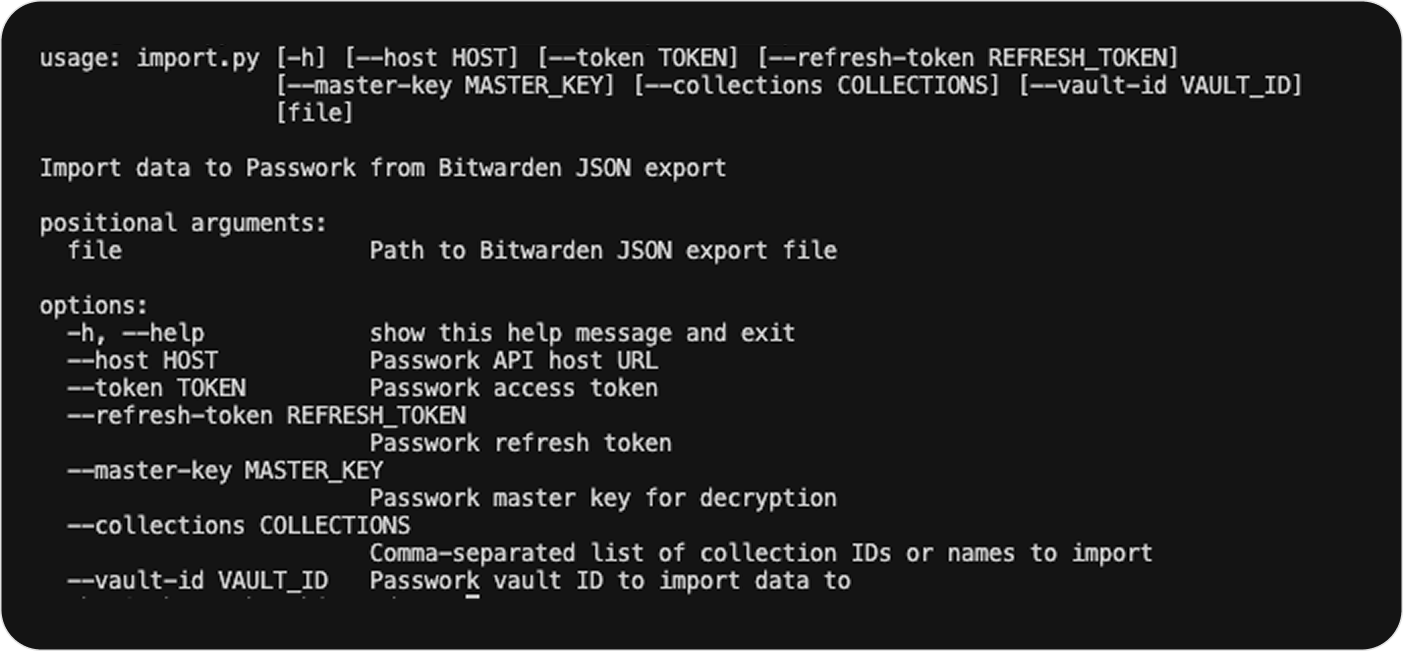
Script parameters
Required
file— path to Bitwarden JSON export file;--host— Passwork host URL;--token— access token (accessToken).
Optional
--master-key— master key (when client-side encryption is enabled);--refresh-token— refresh token (refreshToken);--vault-id— existing vault ID for import target;--collections— comma-separated list of collection names or IDs.
Run examples
Import into separate vaults (by collections)
- shell
python3 import.py ./bitwarden_export_org.json \
  --host "https://passwork.example.com" \
  --token "YOUR_ACCESS_TOKEN"
Import selected collections only
- shell
python3 import.py ./bitwarden_export_org.json \
  --host "https://passwork.example.com" \
  --token "YOUR_ACCESS_TOKEN" \
  --collections "Collection 1,Collection 2"
Import into an existing vault
- shell
python3 import.py ./bitwarden_export_org.json \
  --host "https://passwork.example.com" \
  --token "YOUR_ACCESS_TOKEN" \
  --vault-id "VAULT_ID"
Step 3. Interactive prompts
If optional arguments are not provided in CLI, the script may ask for them interactively:
Input comma-separated list of collection IDs or names to export (optional):
Input Passwork vault ID to import data to (optional):
Press Enter to skip a prompt.
Step 4. Confirmation and logging
Before import starts, the script prints a summary and asks for confirmation:
The following collections will be exported: Private vault
Continue operation? (Y/N):
During execution, the script creates a log file in the current directory:
import-YYYY-MM-DD_HH-MM-SS.log
The log includes created vaults/folders, item import steps, and skipped data warnings.
Arguments
To print all available arguments:
- shell
python3 import.py --help