

Migration to the new Cloud version
We have released a major update for the cloud version of Passwork based on the on-premise solution: key features of the main version of Passwork are now available in the Cloud. To switch to the new version, migration is required. Support for the current version will be discontinued soon.
During the migration, the following data will be transferred:
- Users
- Vaults
- Folders
- Passwords along with attachments and revision history
- Color tags
- Action history (only events that occurred since 01.01.2026 are transferred)
Only the owner of organization can perform the migration
Stage 1. Preparation for migration
Open your current version of the Cloud, go to Settings and Users, and click on the Migration to the new version section at the bottom of the list.

This section lists the steps that need to be completed to perform the migration.
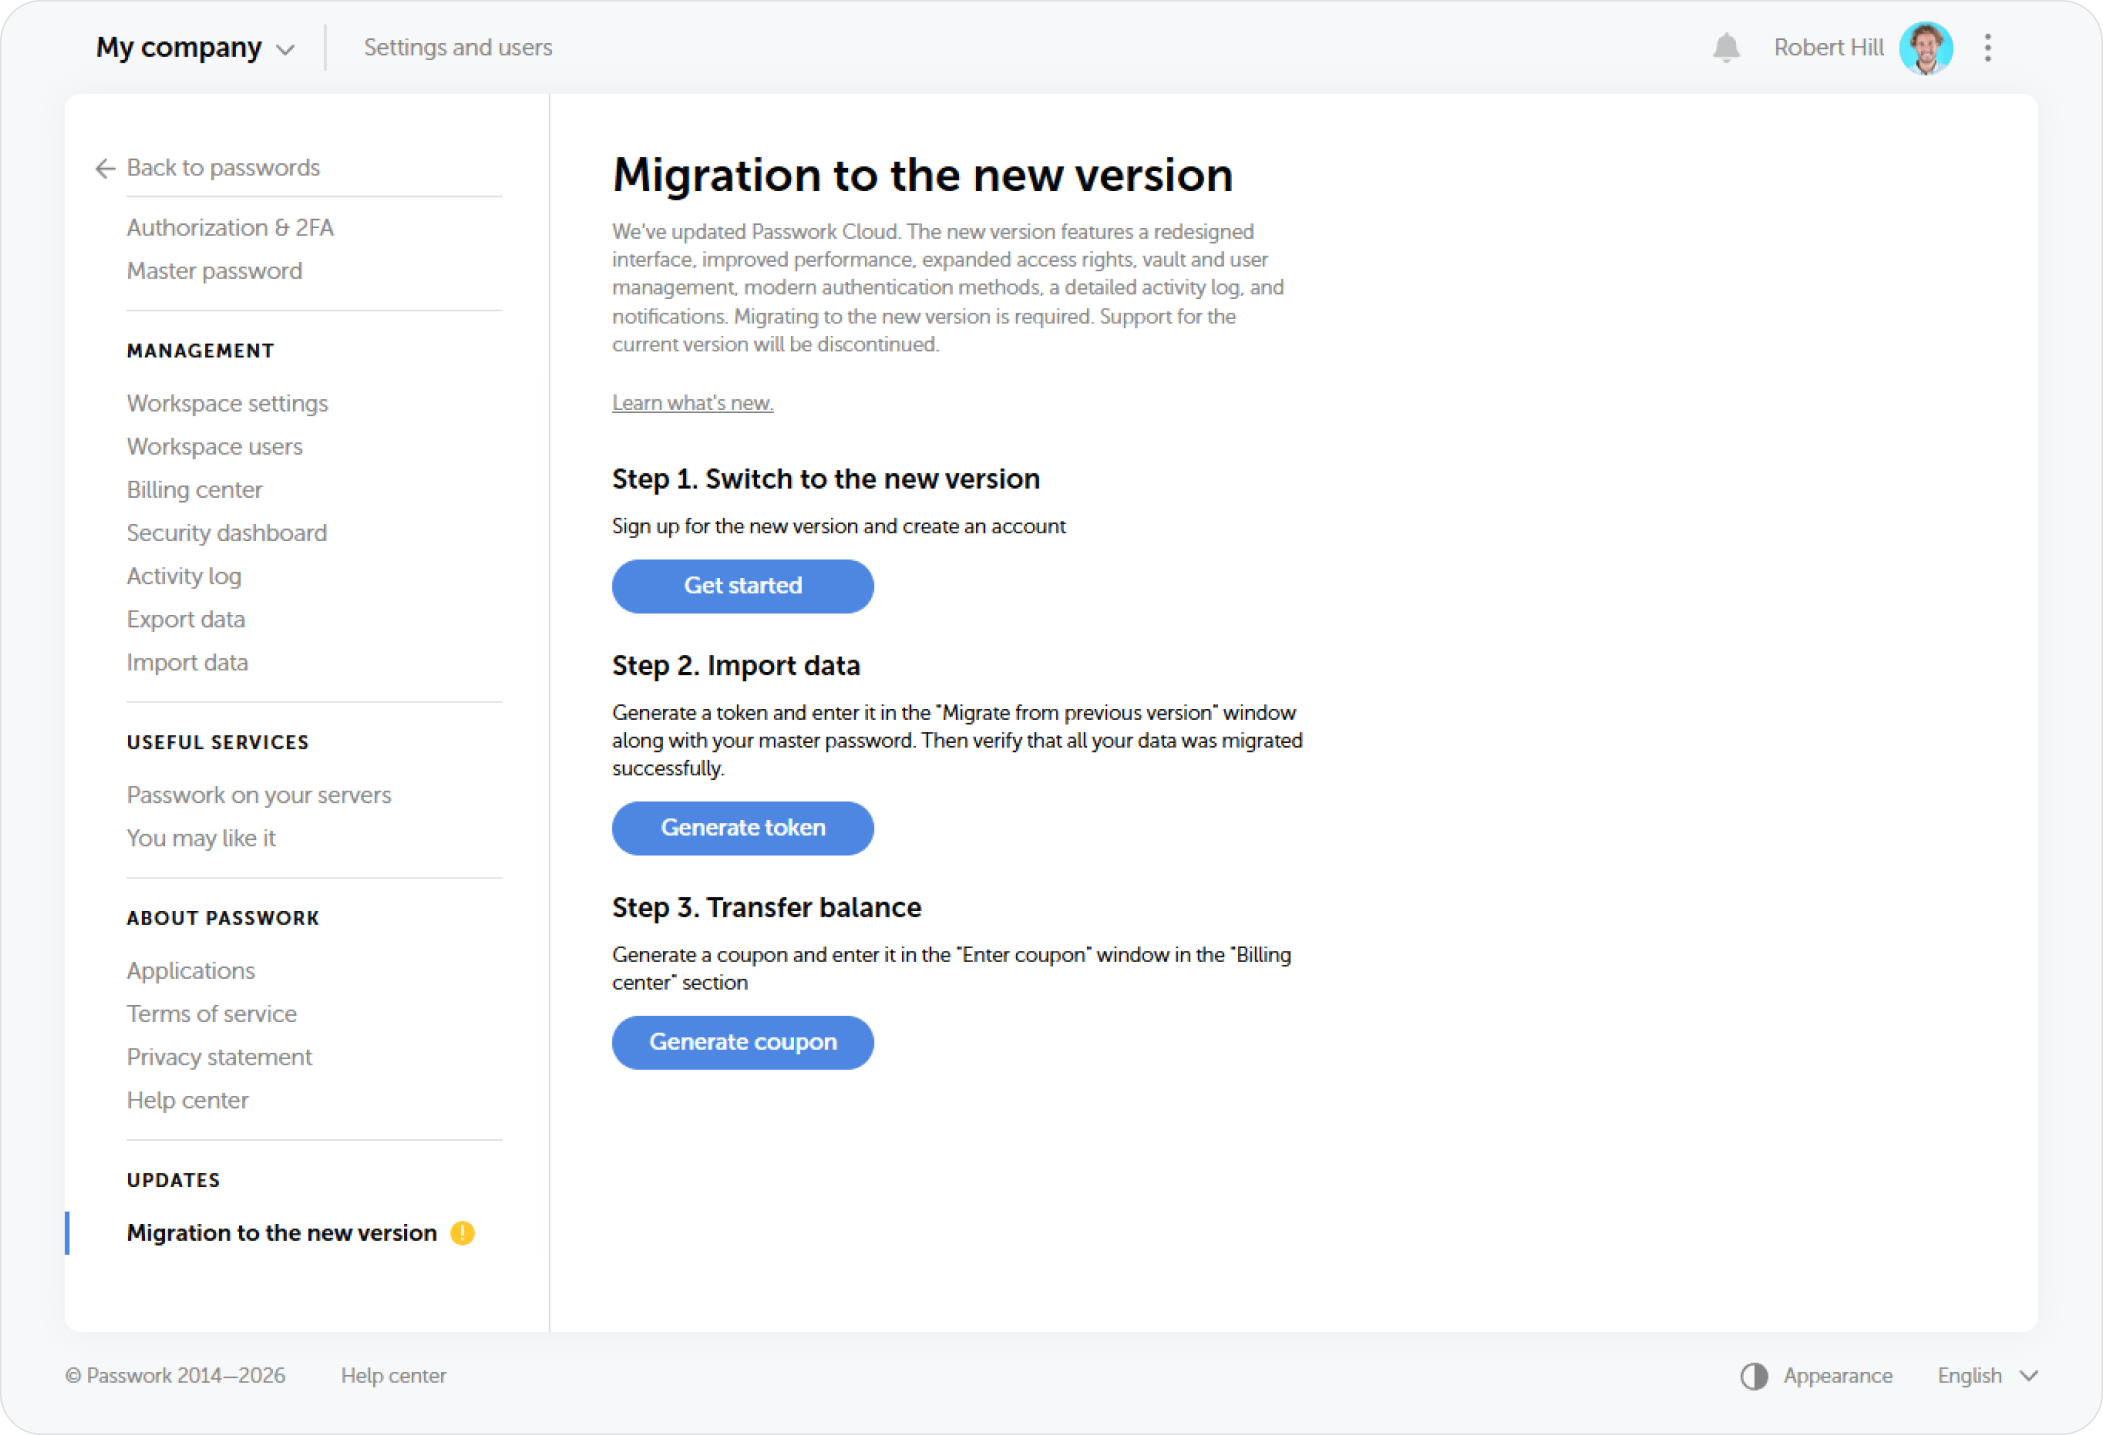
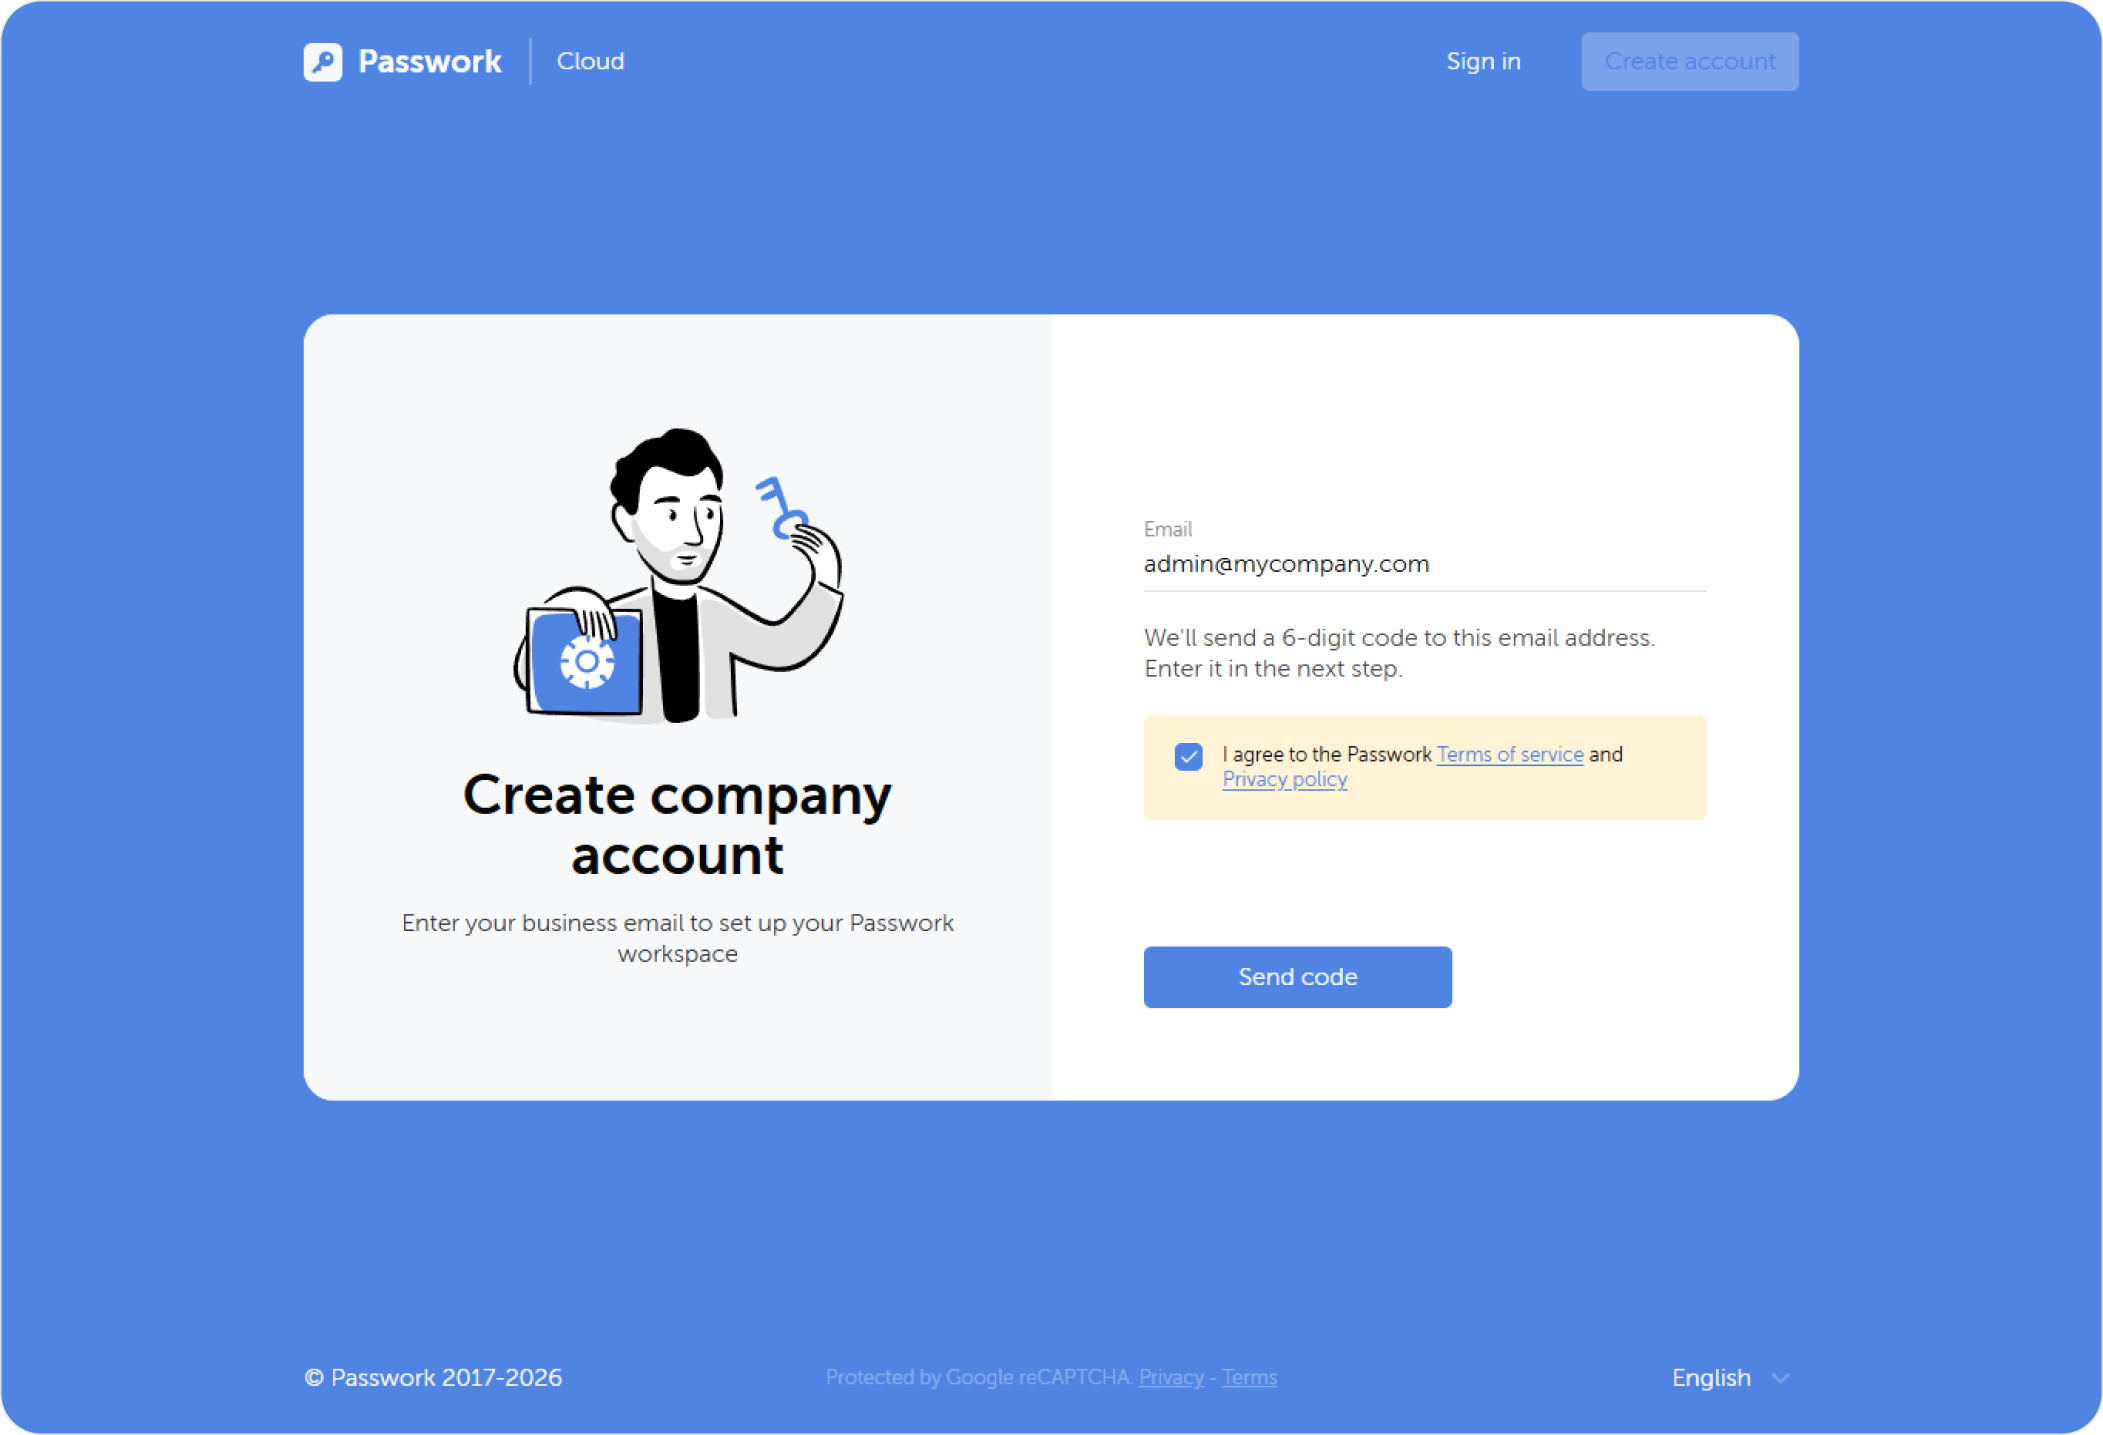
To start the migration, go to the new version of Passwork using the button in the first step and create an account.
Stage 2. Transfer data
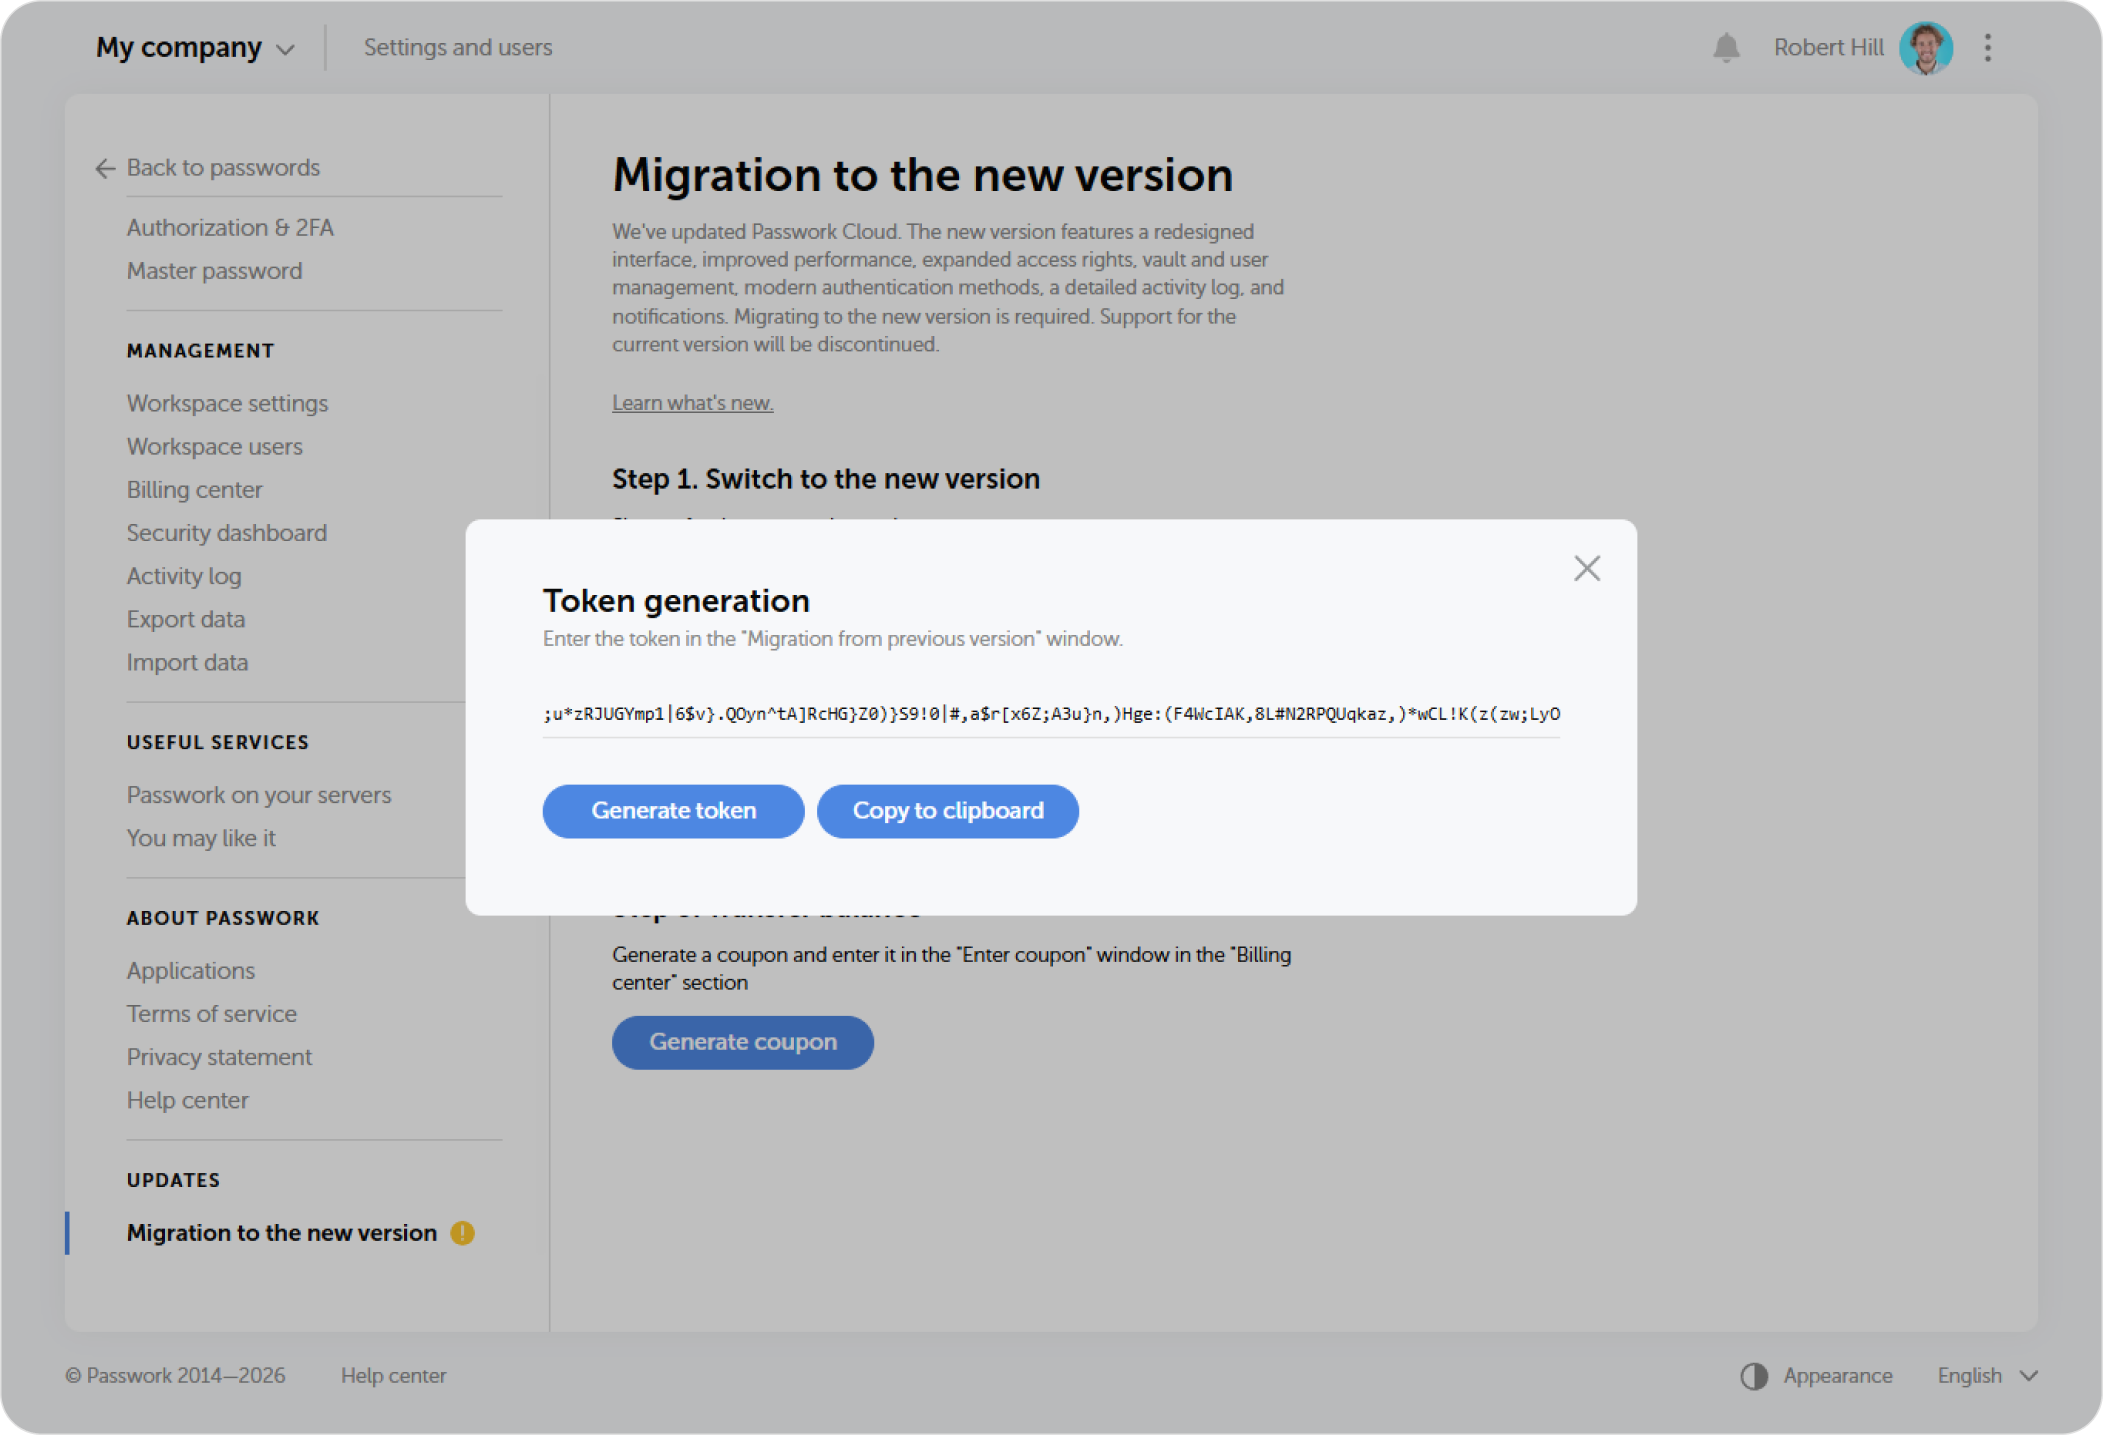
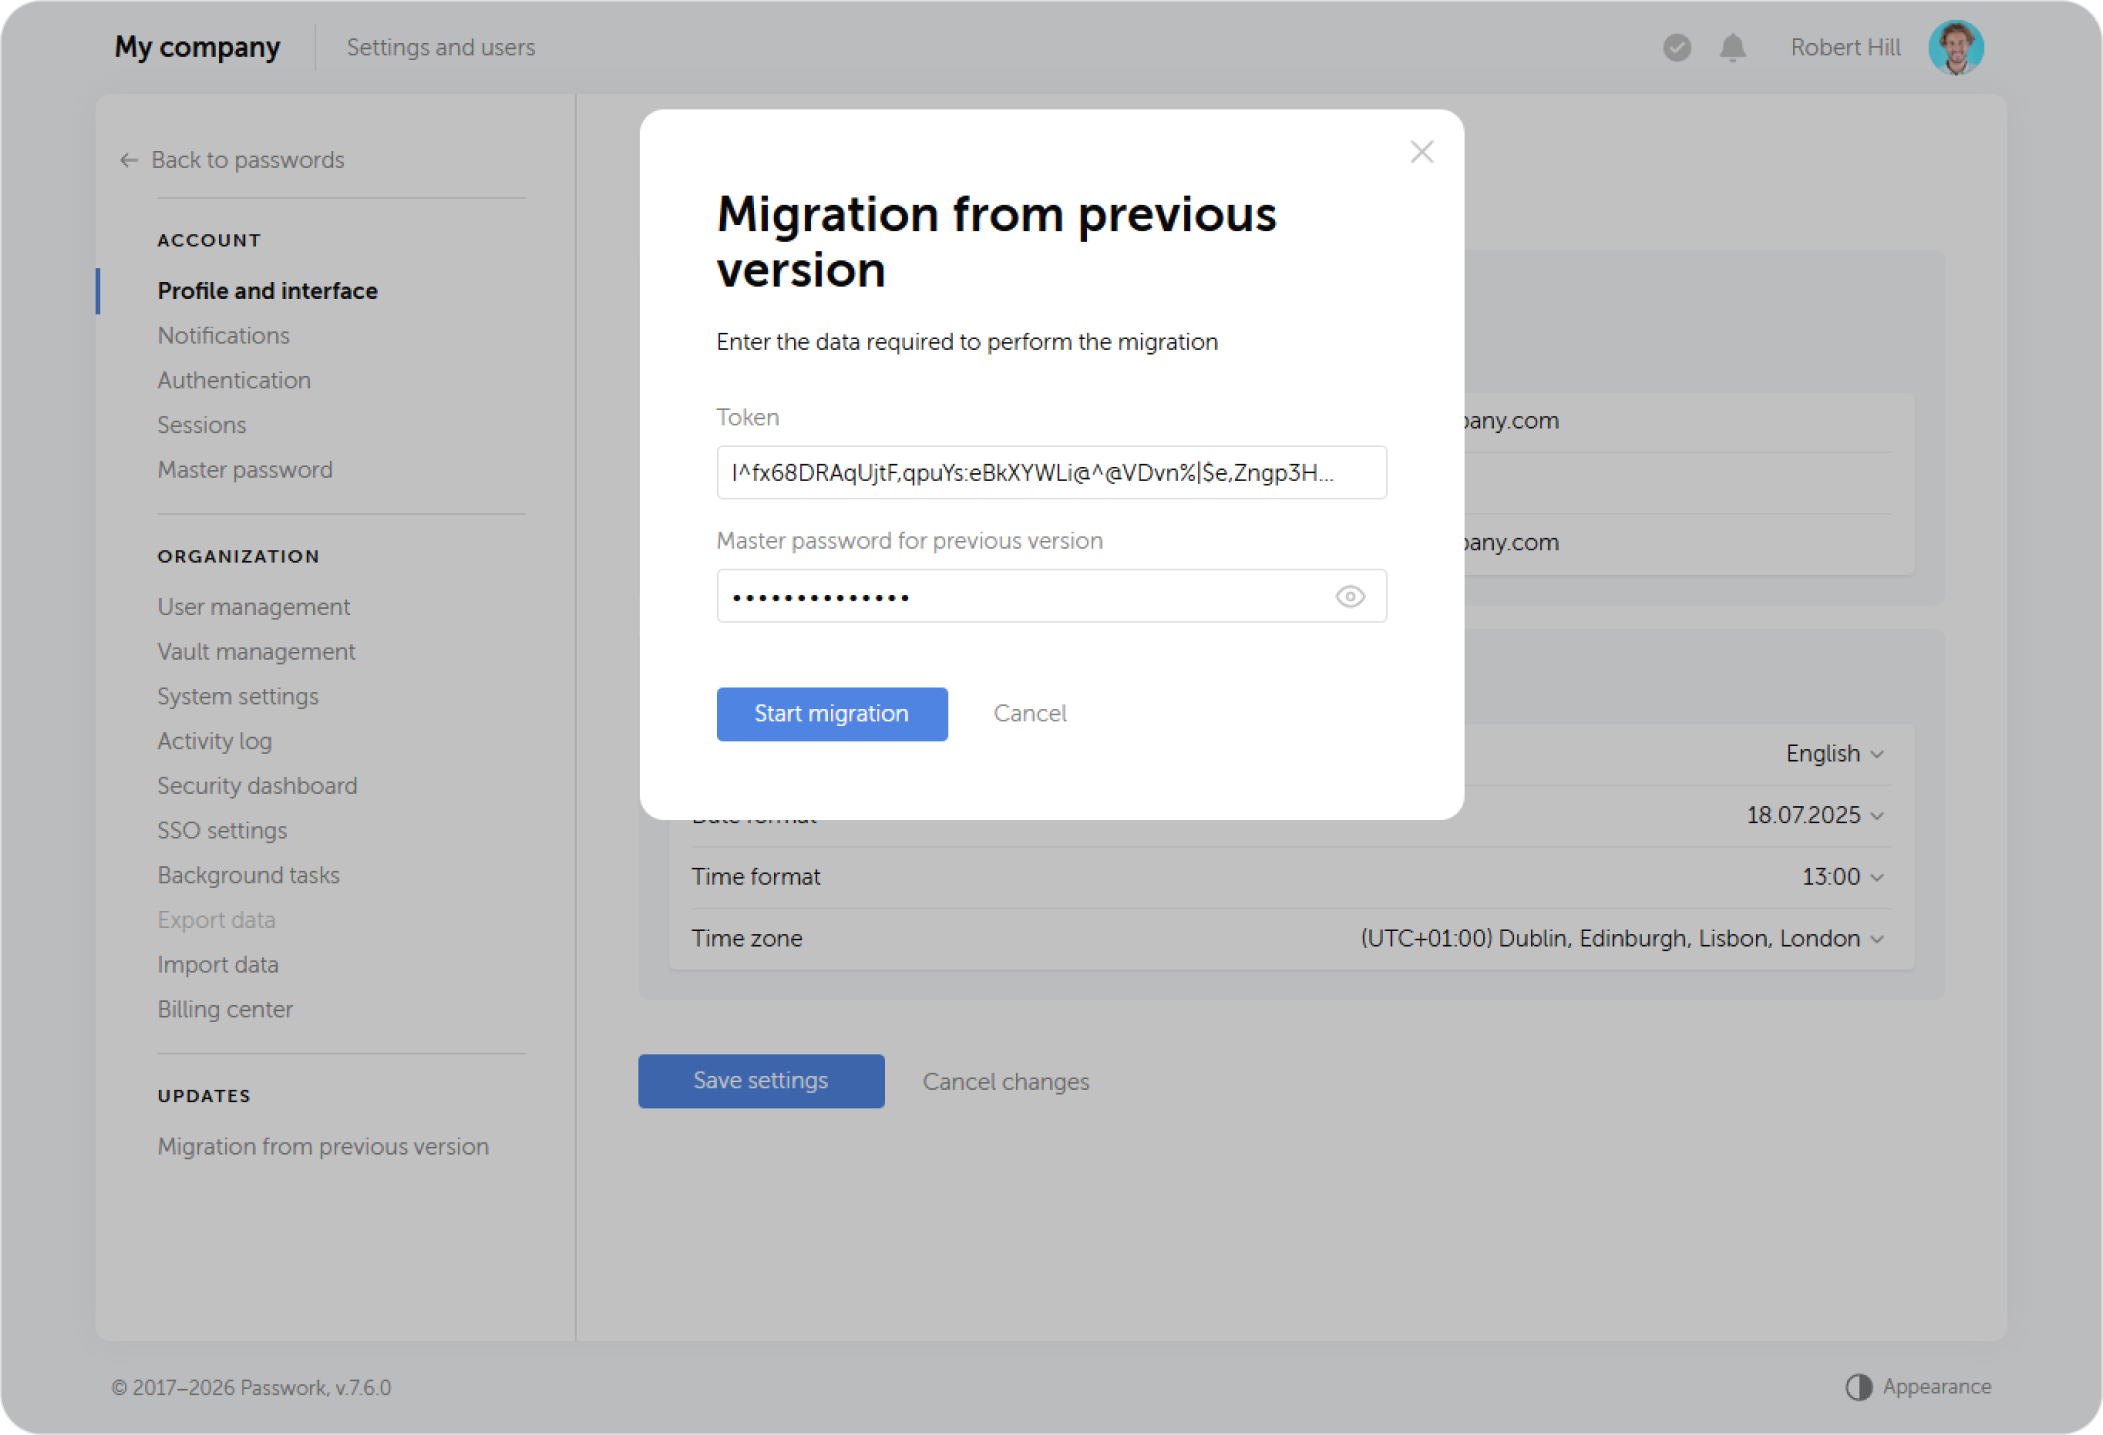
Return to the old version of the Cloud, generate and copy the token required for the transfer.
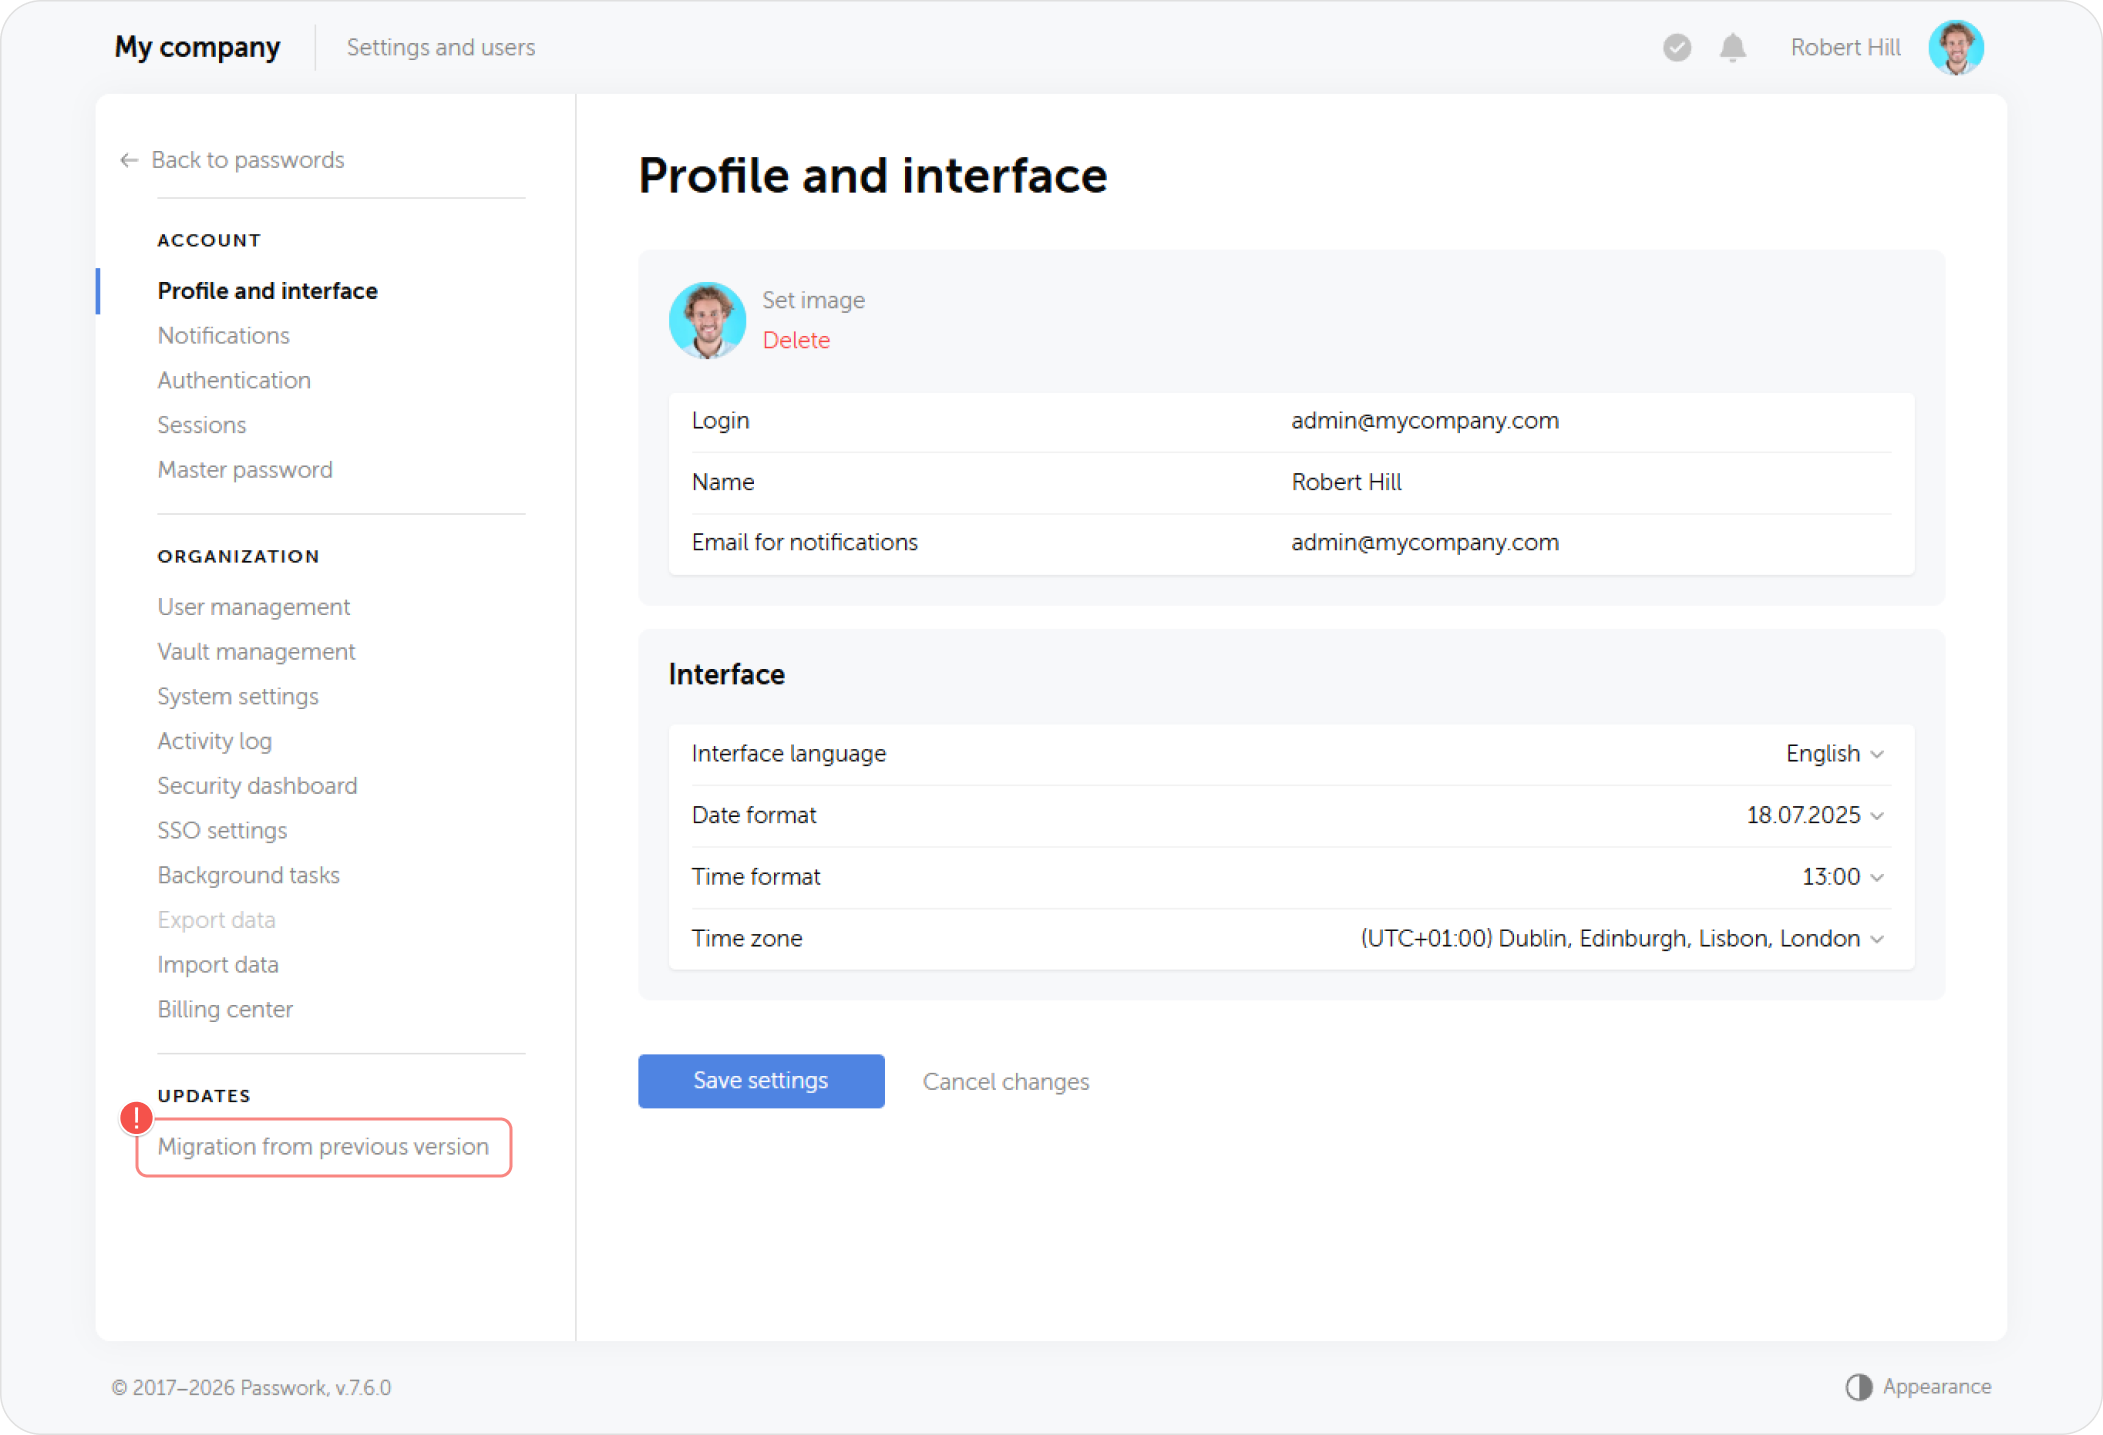
Go to the settings of the new Cloud and click on the Migration from previous version option at the bottom of the sidebar.
The generated token and master password from the old version will need to be entered in the pop-up window.
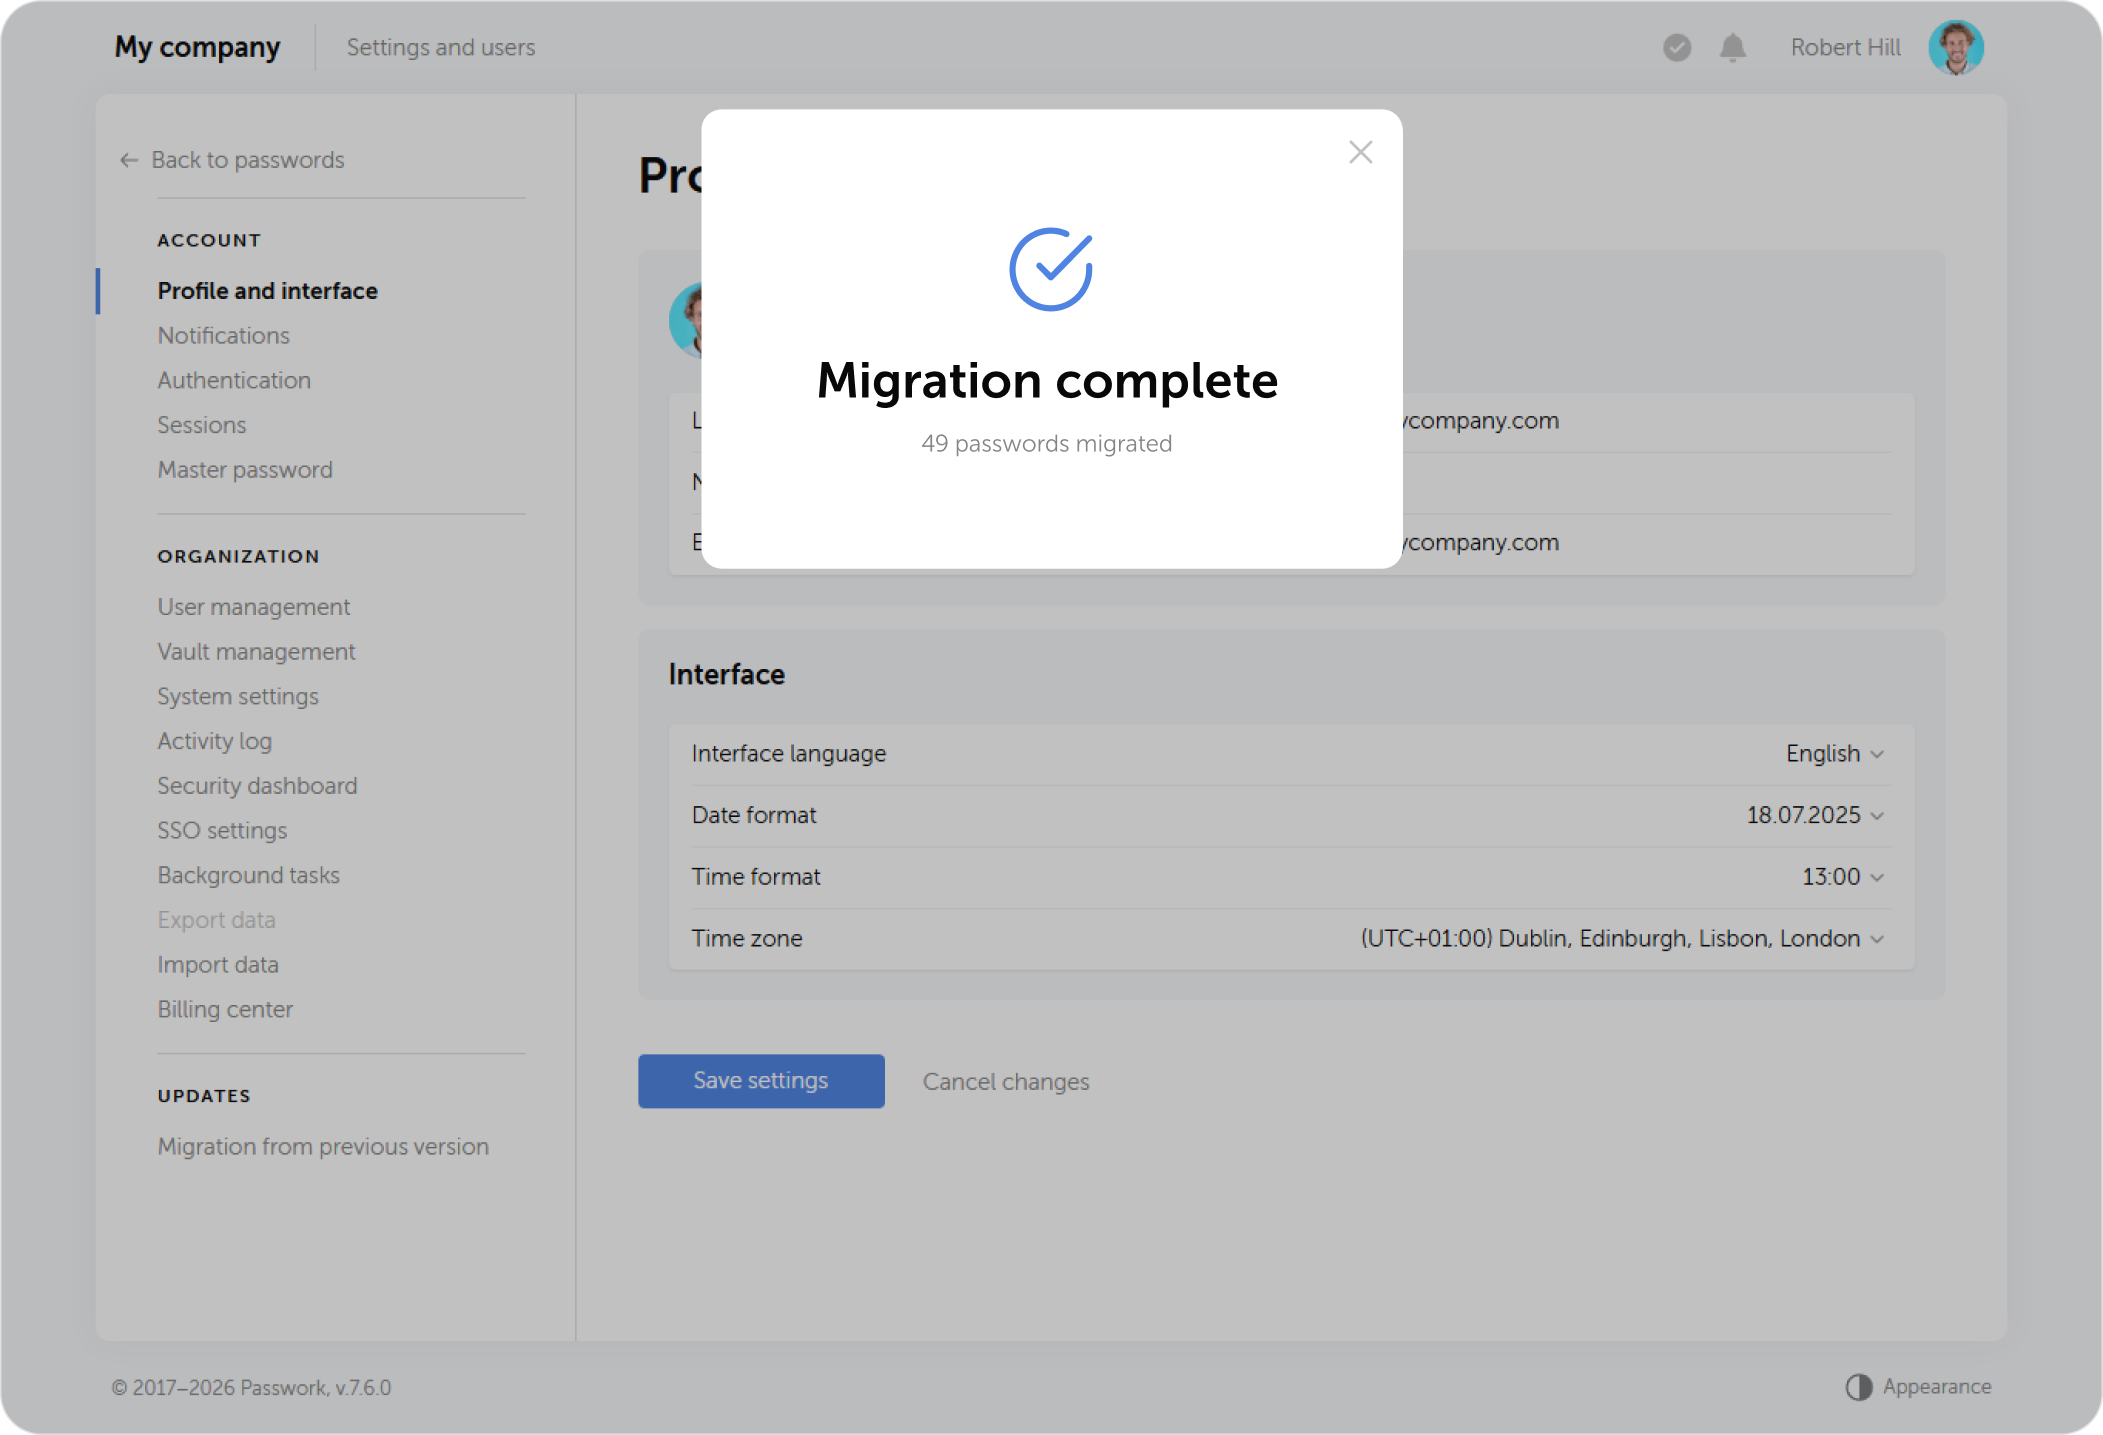
Wait for the migration to complete. If any data wasn't transferred, the system will notify you.
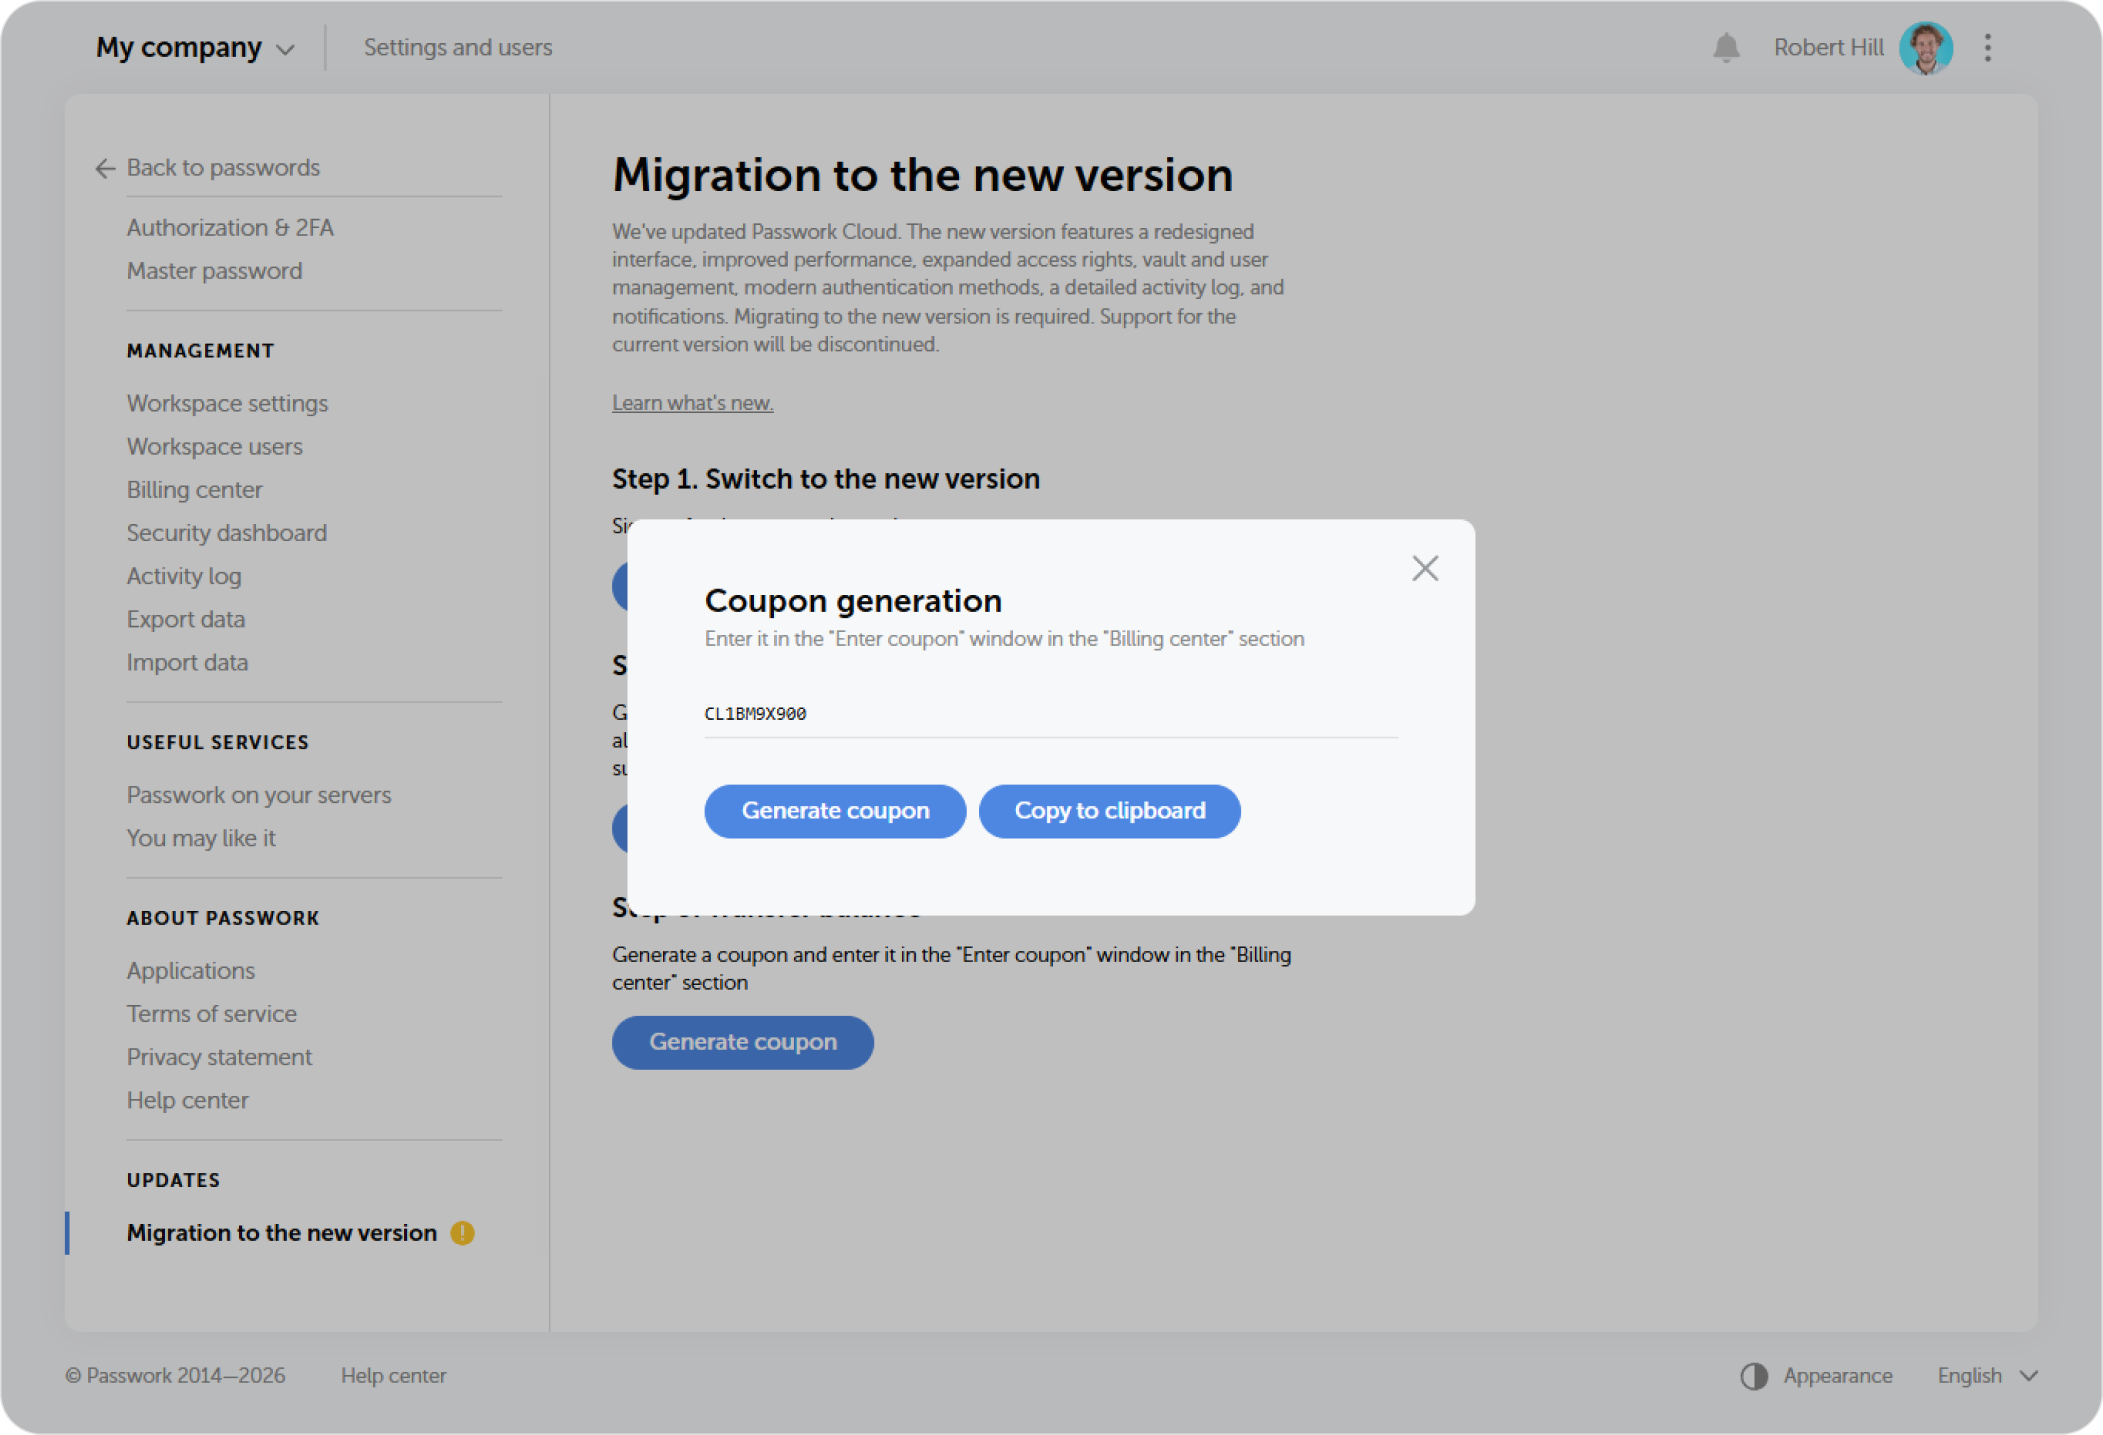
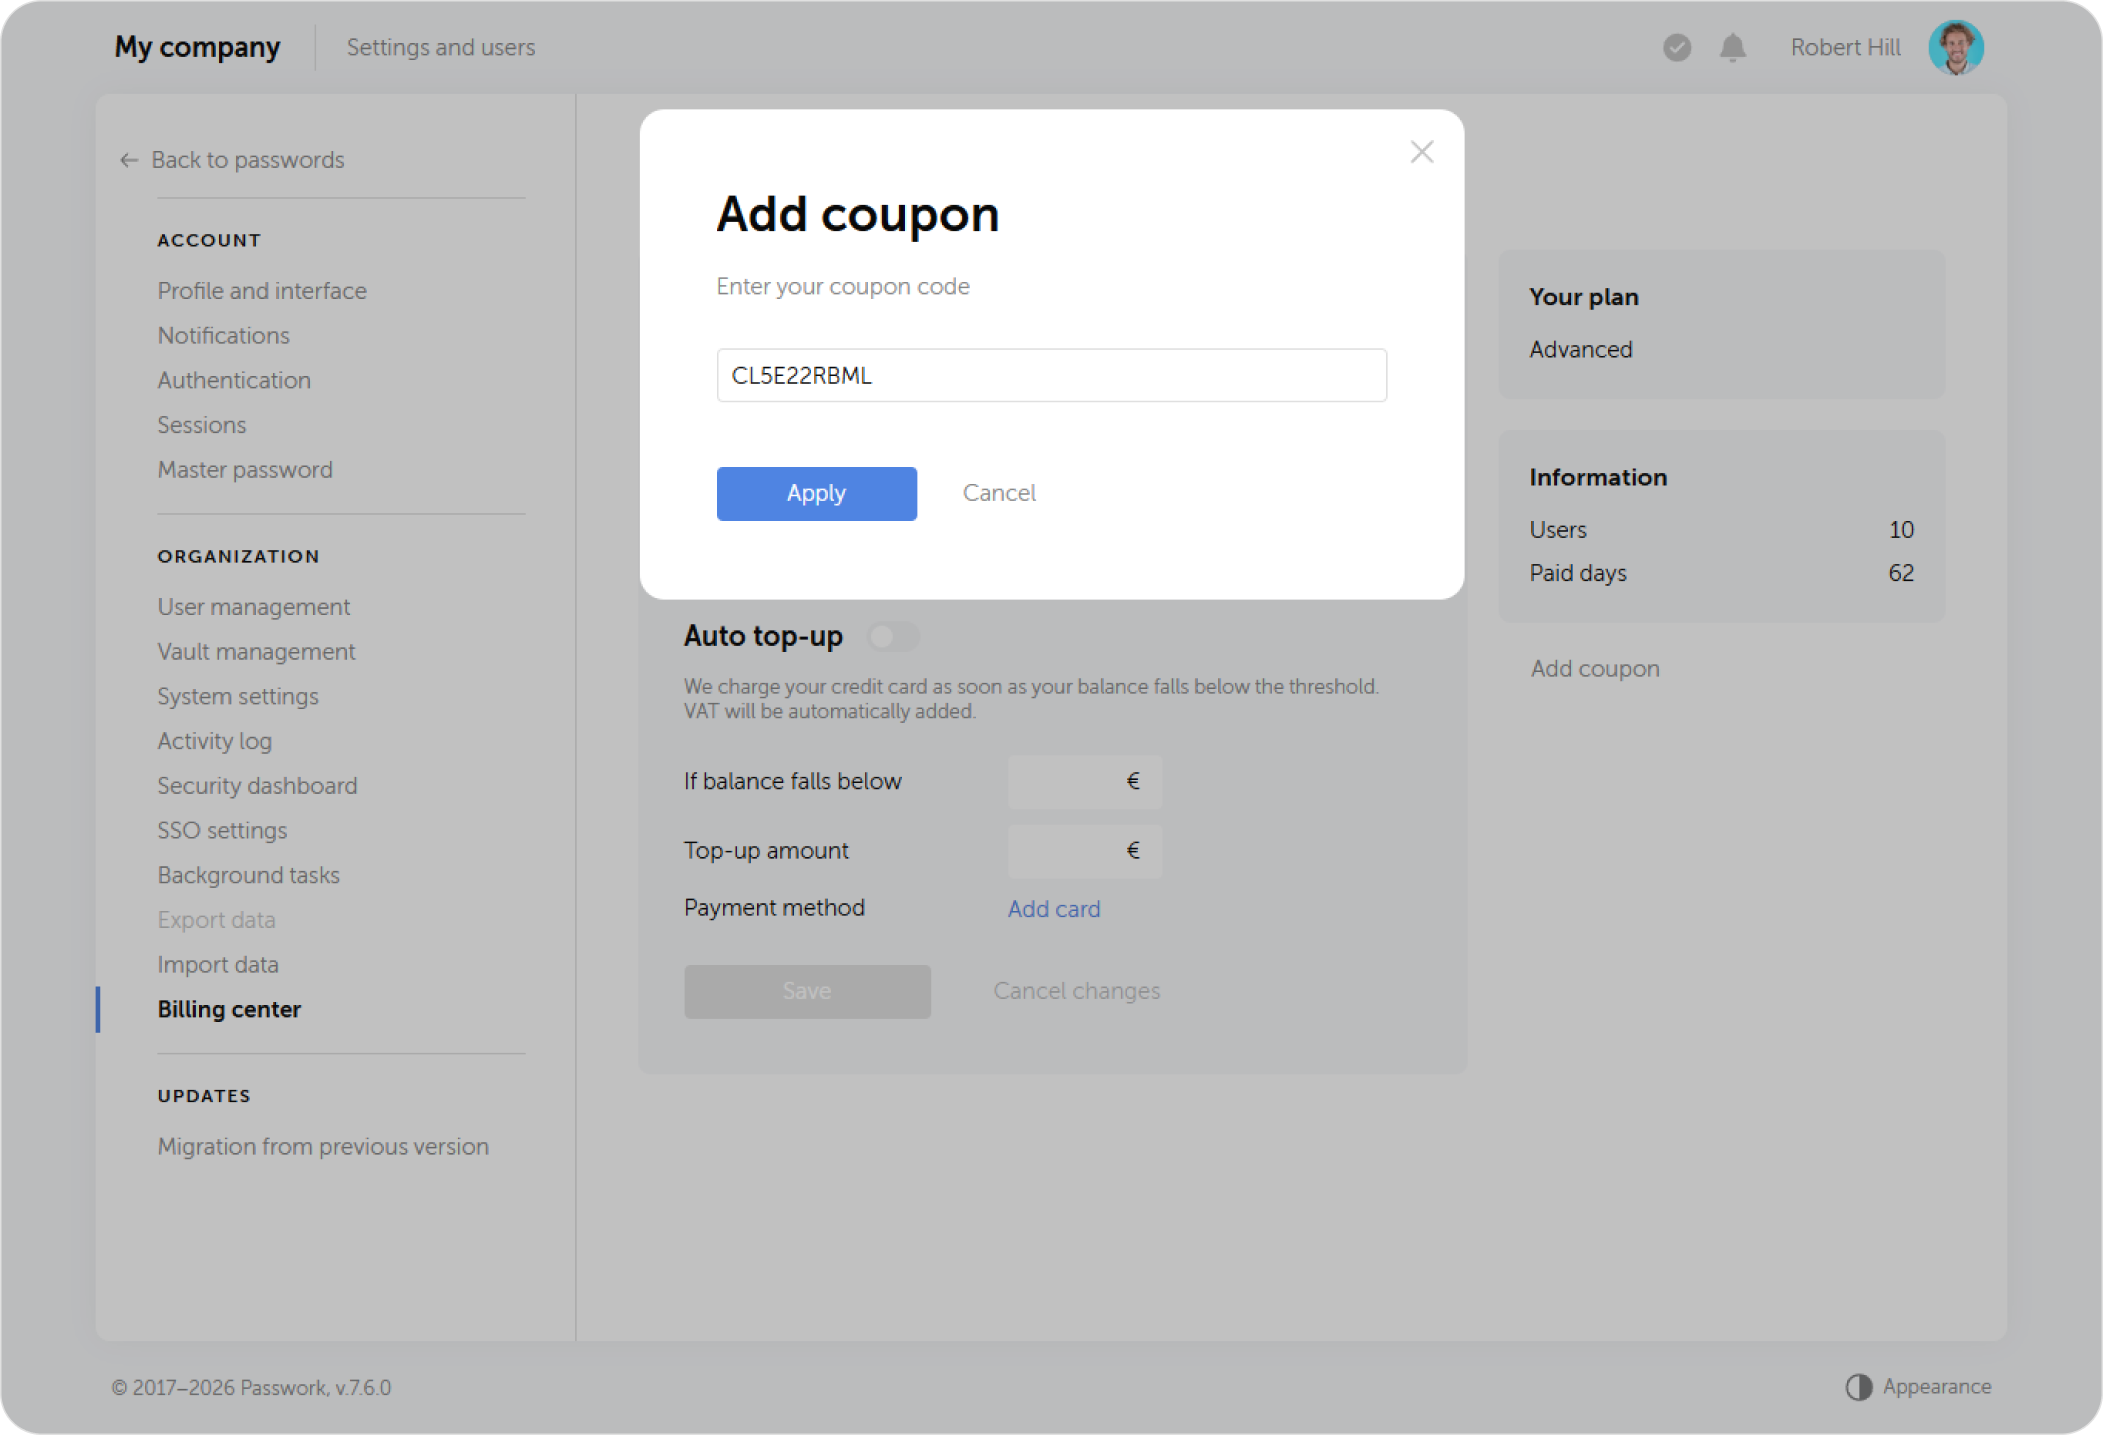
Stage 3. Transfer balance
To transfer your funds, you will need to return to the old version of the Cloud again and generate the corresponding coupon.
In the new version of the Cloud, open the Billing center section and click Add coupon on the right side of the page.
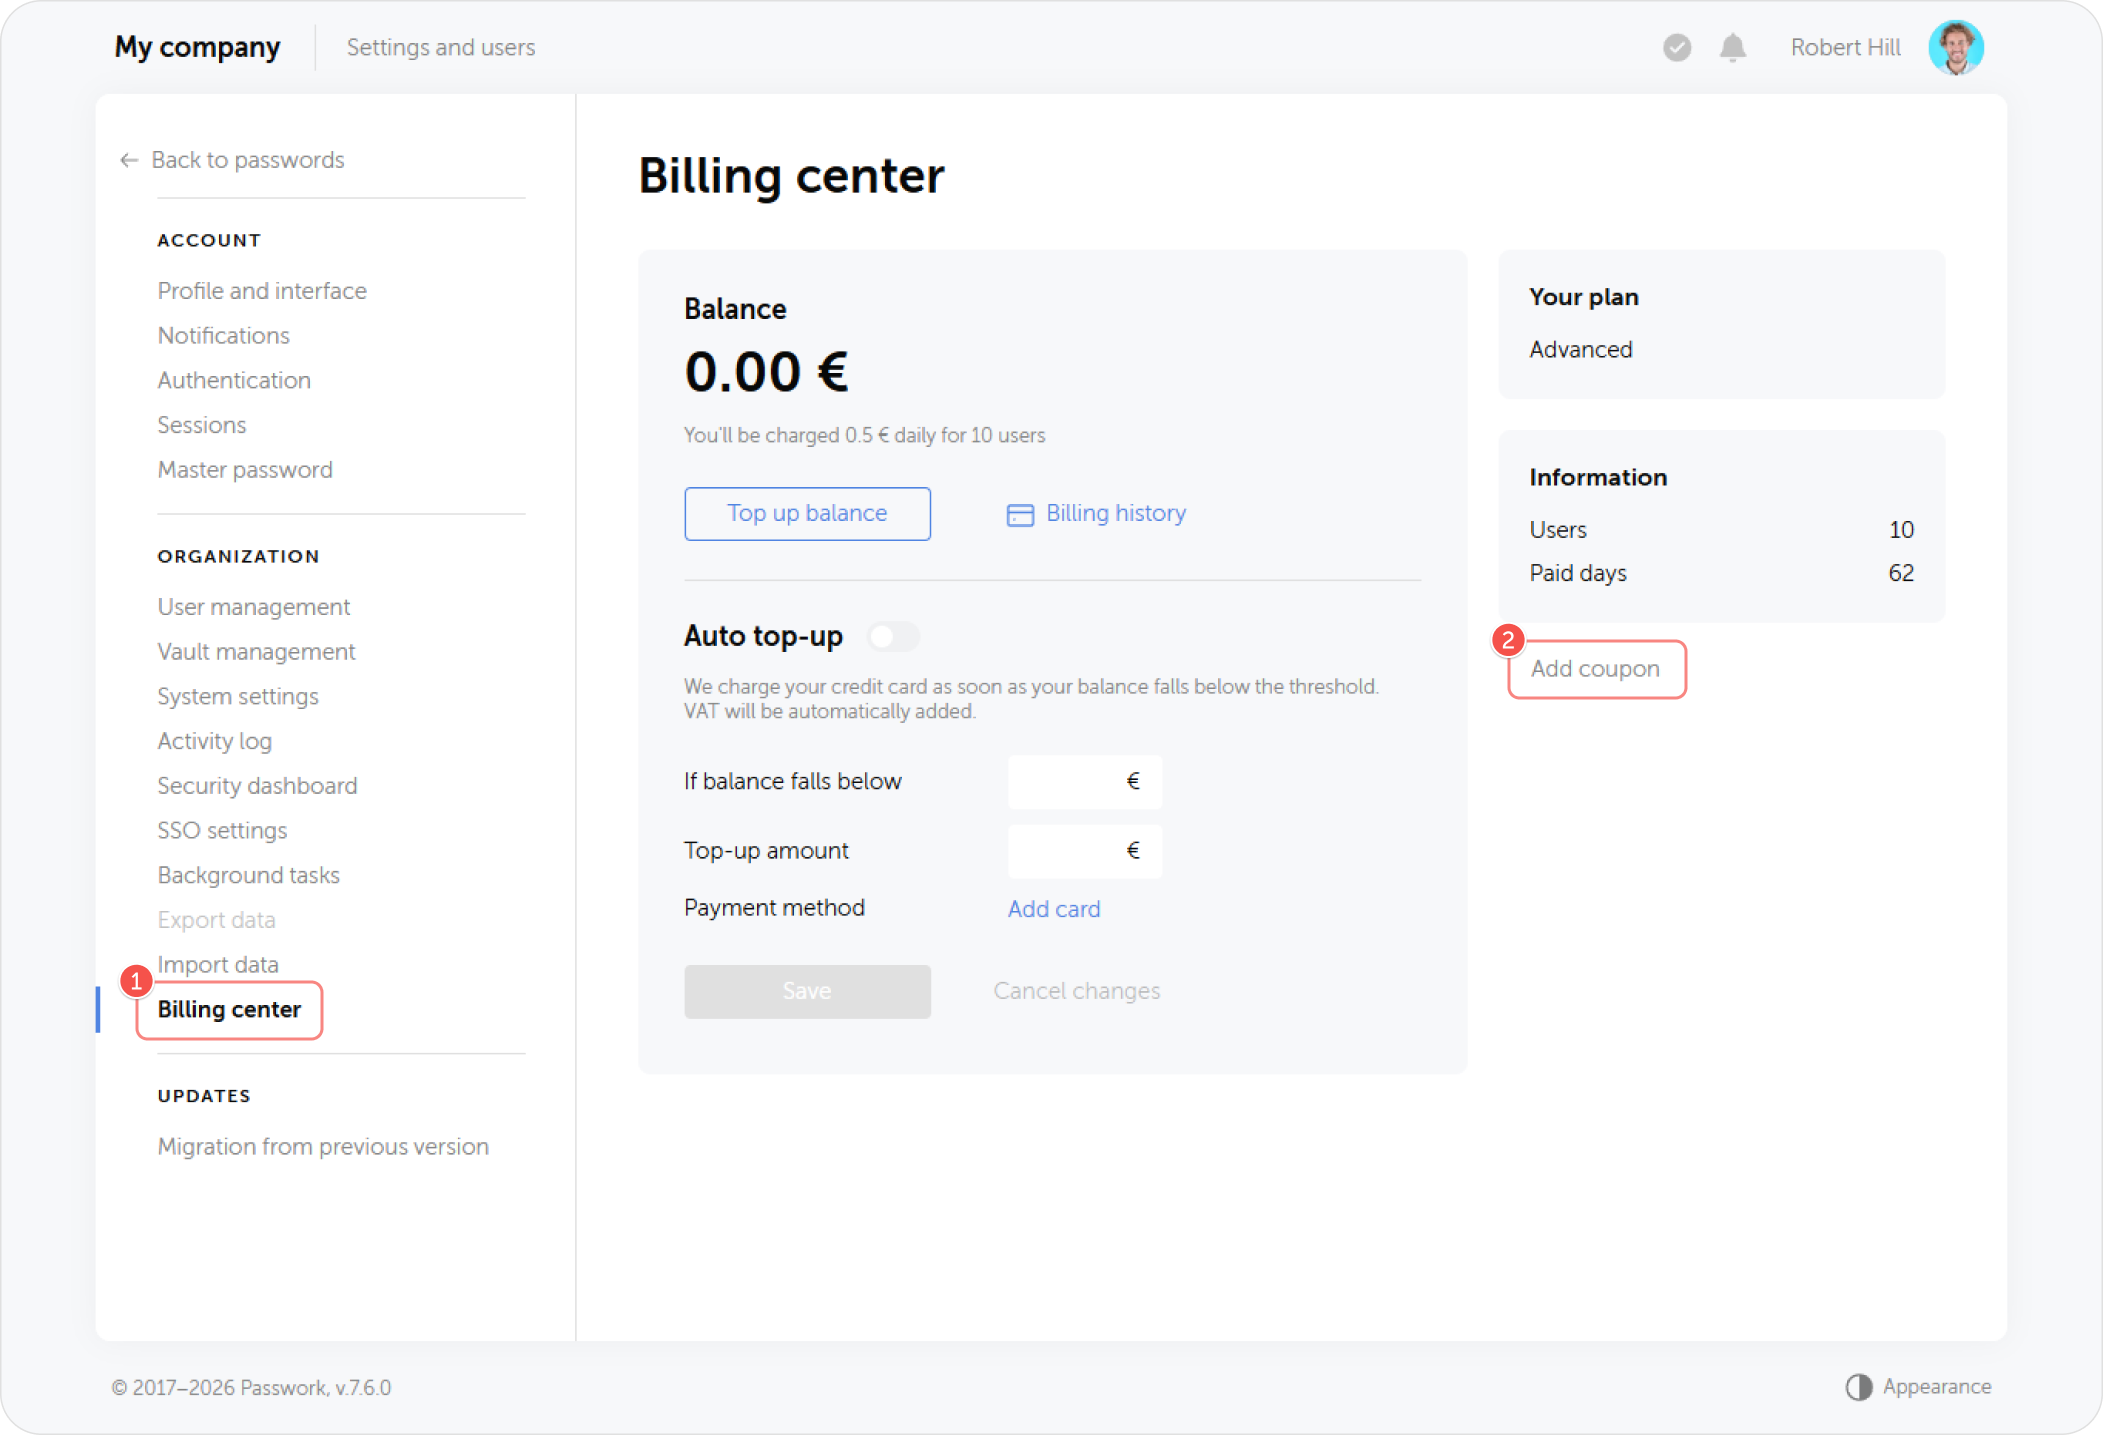
Paste the previously copied coupon in the pop-up window.
If you encountered any problems during the migration process, contact our Help Center