Import data
Passwork lets you quickly import passwords kept in JSON, KeePass XML and CSV formats into a specific vault, folder, or into the Passwork root directory. JSON and XML files are used to transfer structured information, while CSV stores raw data as plain text.
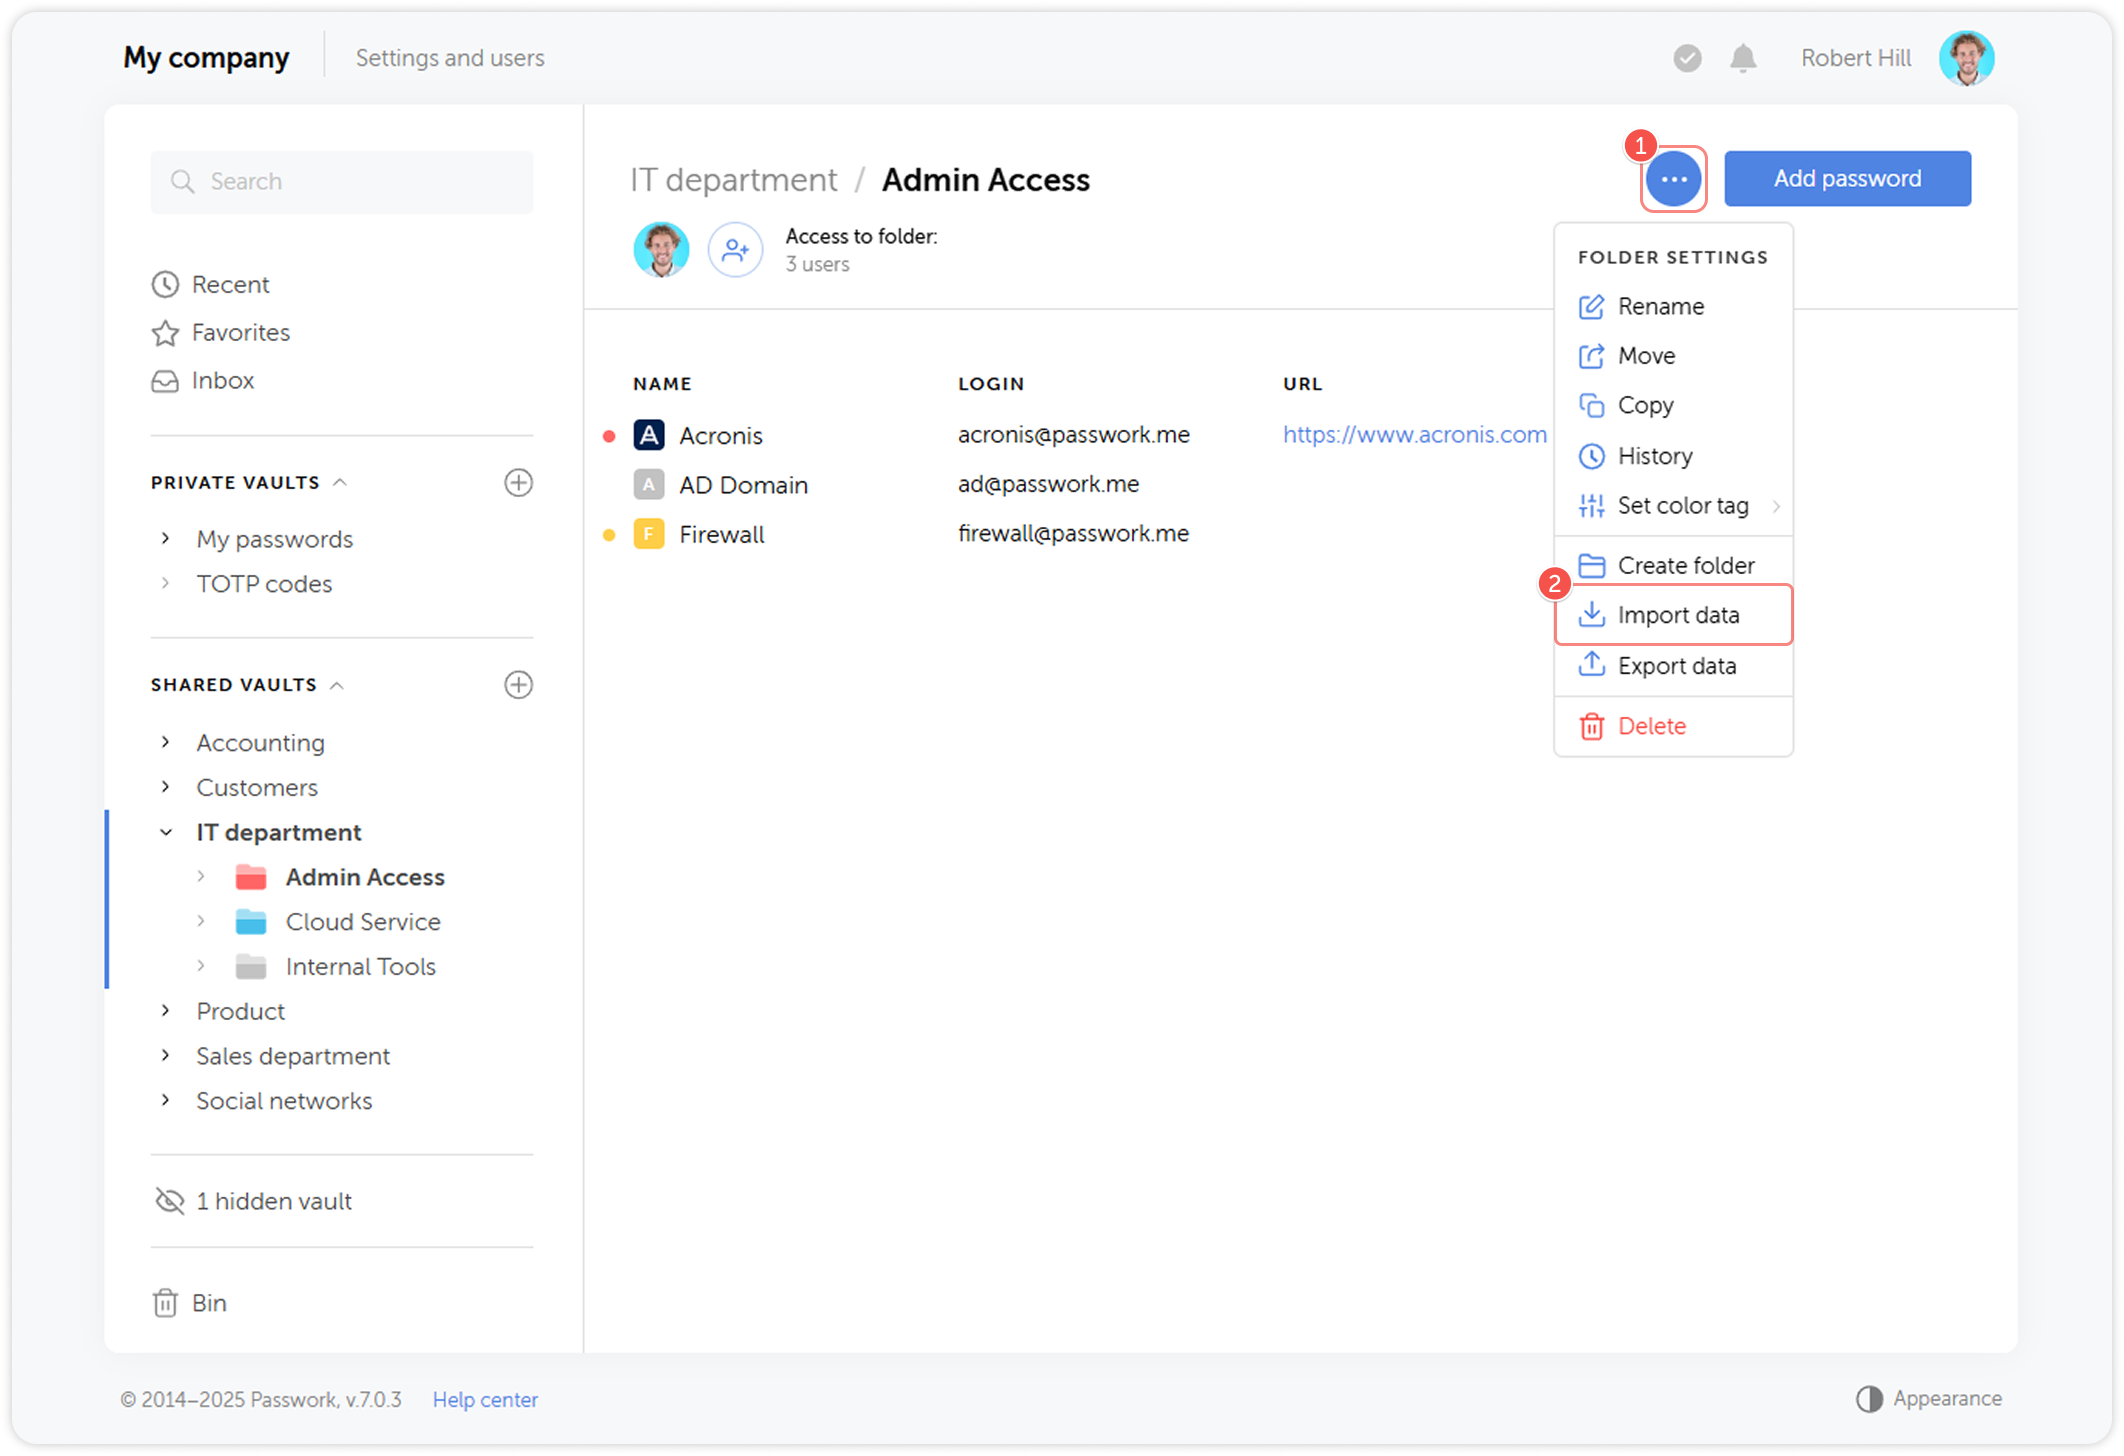
To use the import, open the Folder settings dropdown menu and click Import data:
You can import data both automatically from a file or via manual entry.
File import
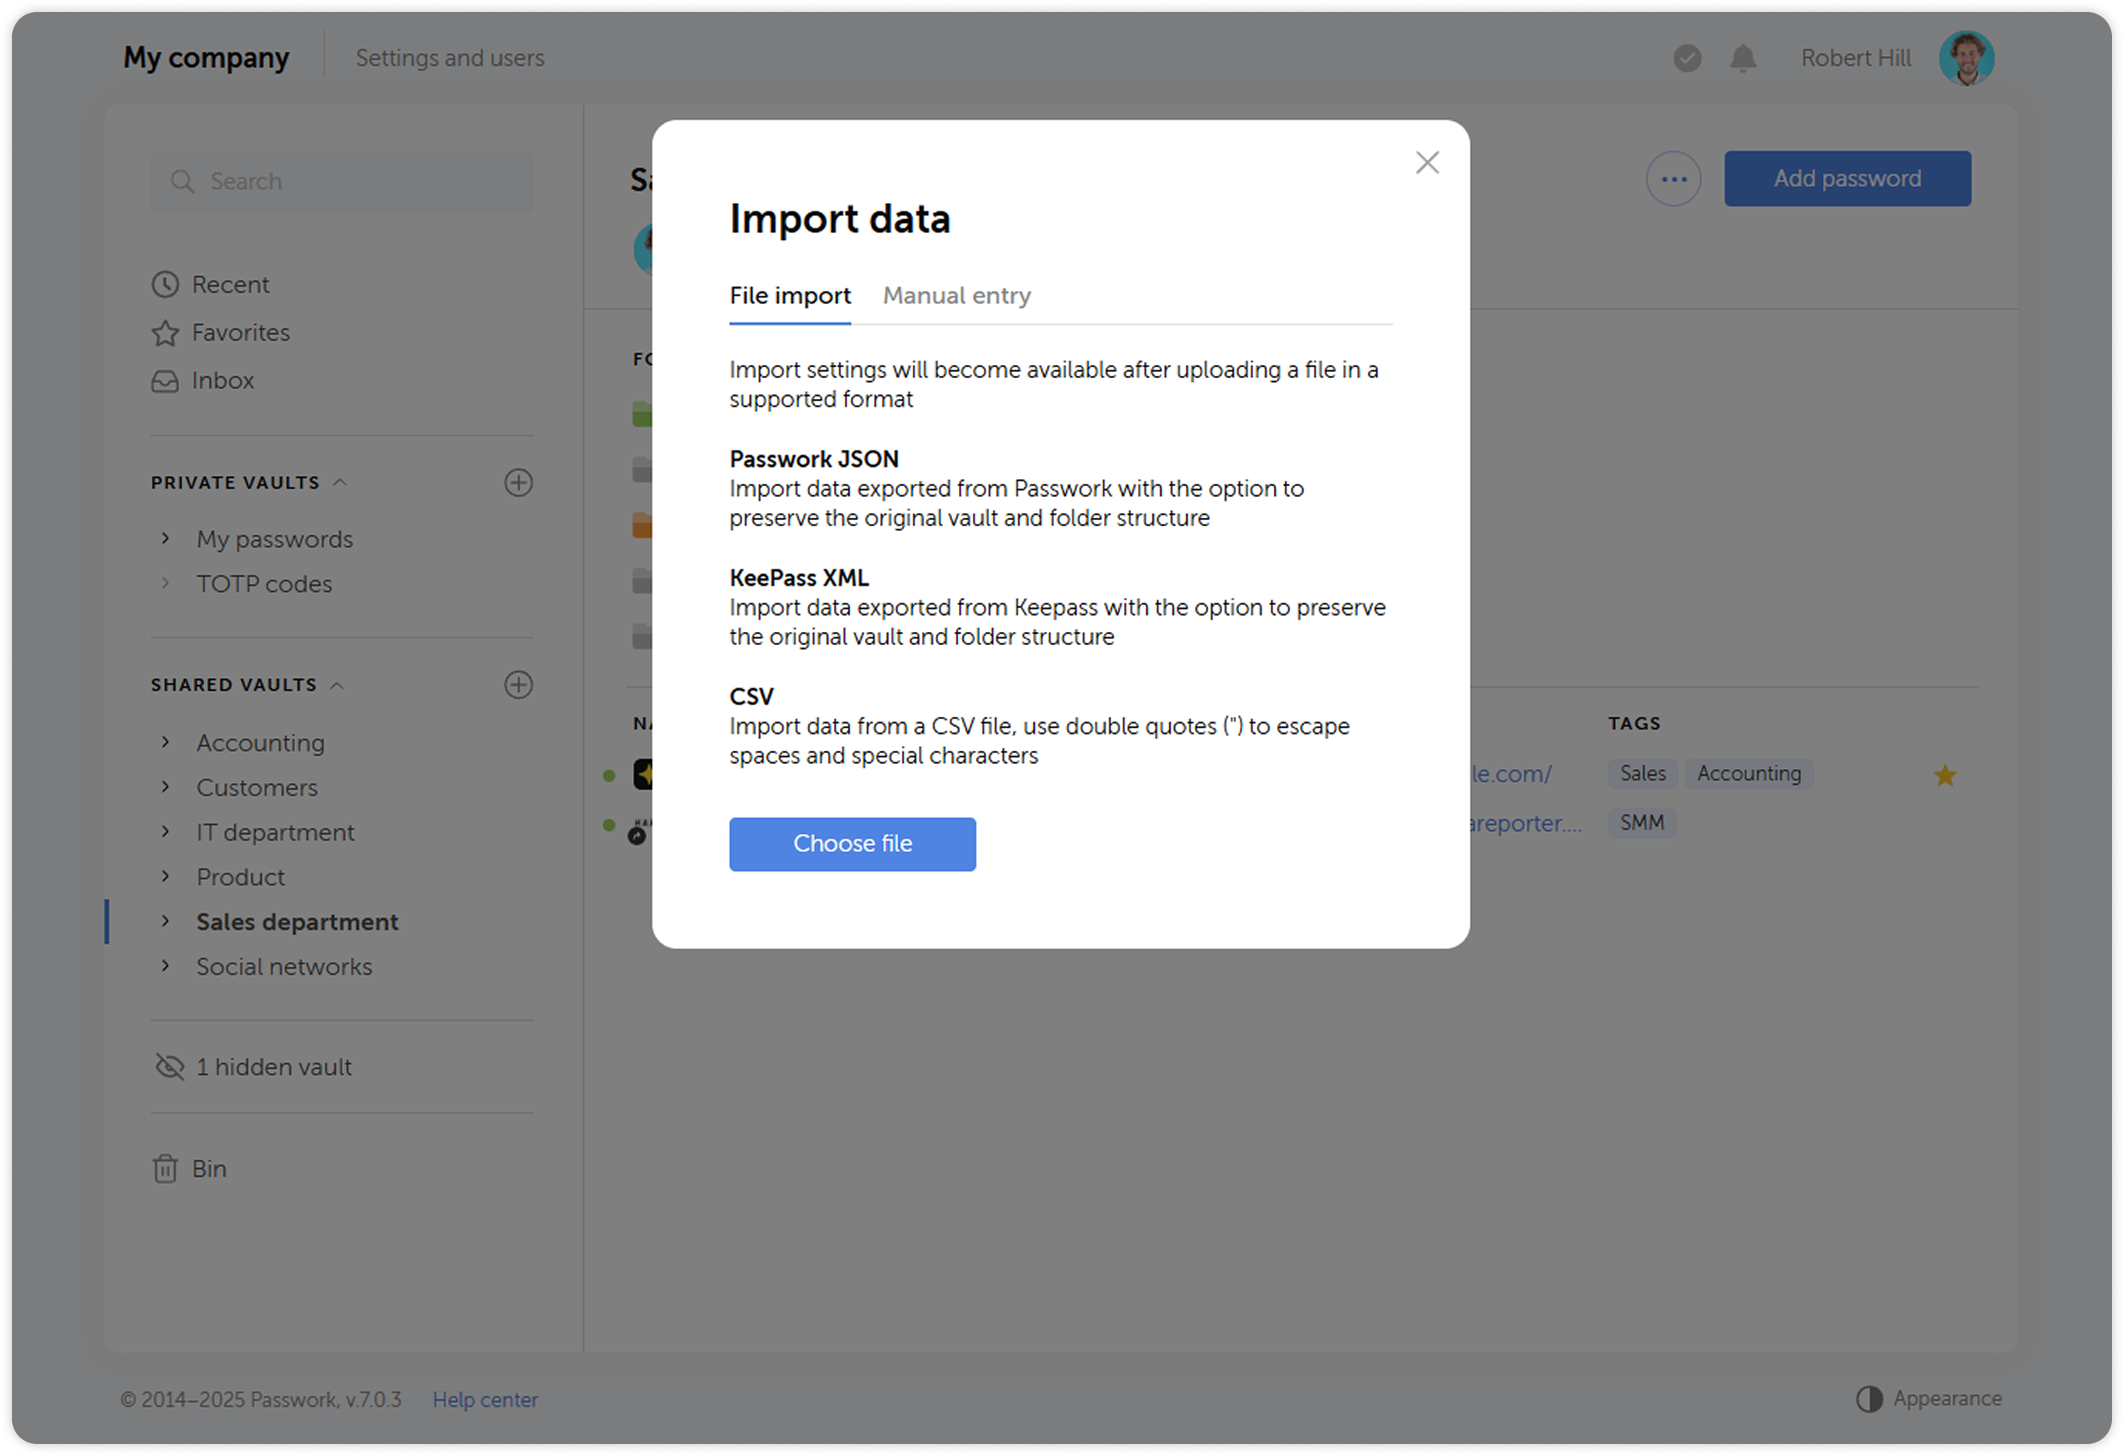
You can upload files in JSON, KeePass XML and CSV formats.
To do so, click Choose file button in the pop-up window:
JSON and KeePass XML
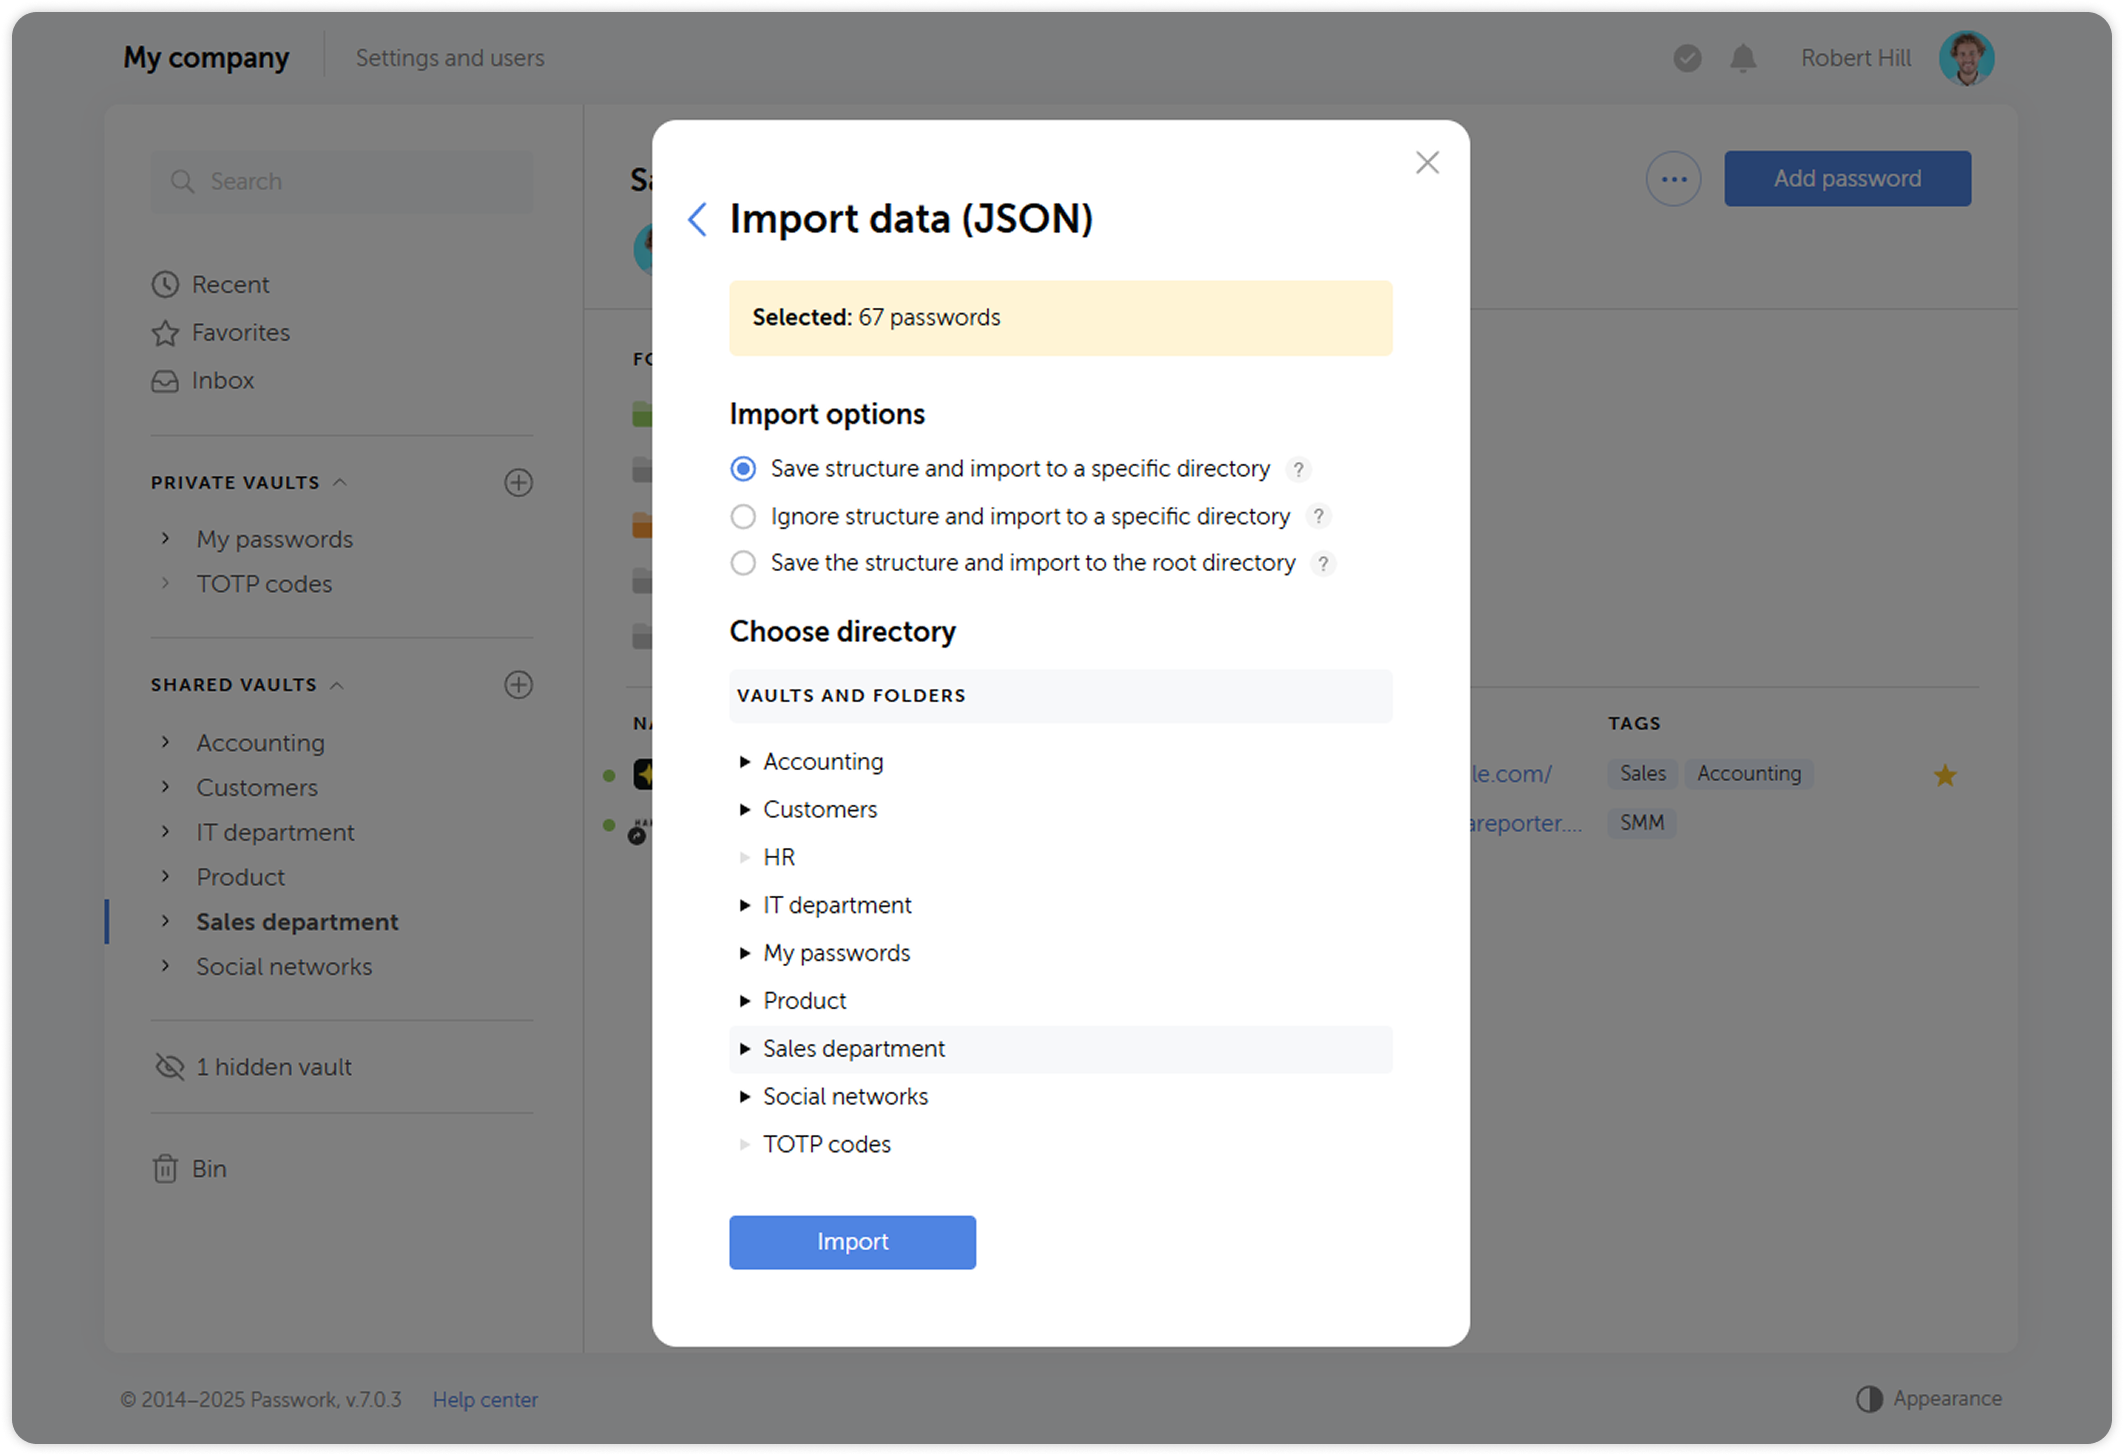
When you upload a JSON or KeePass XML file, you will be able to choose which vaults to import and choose the importing method.
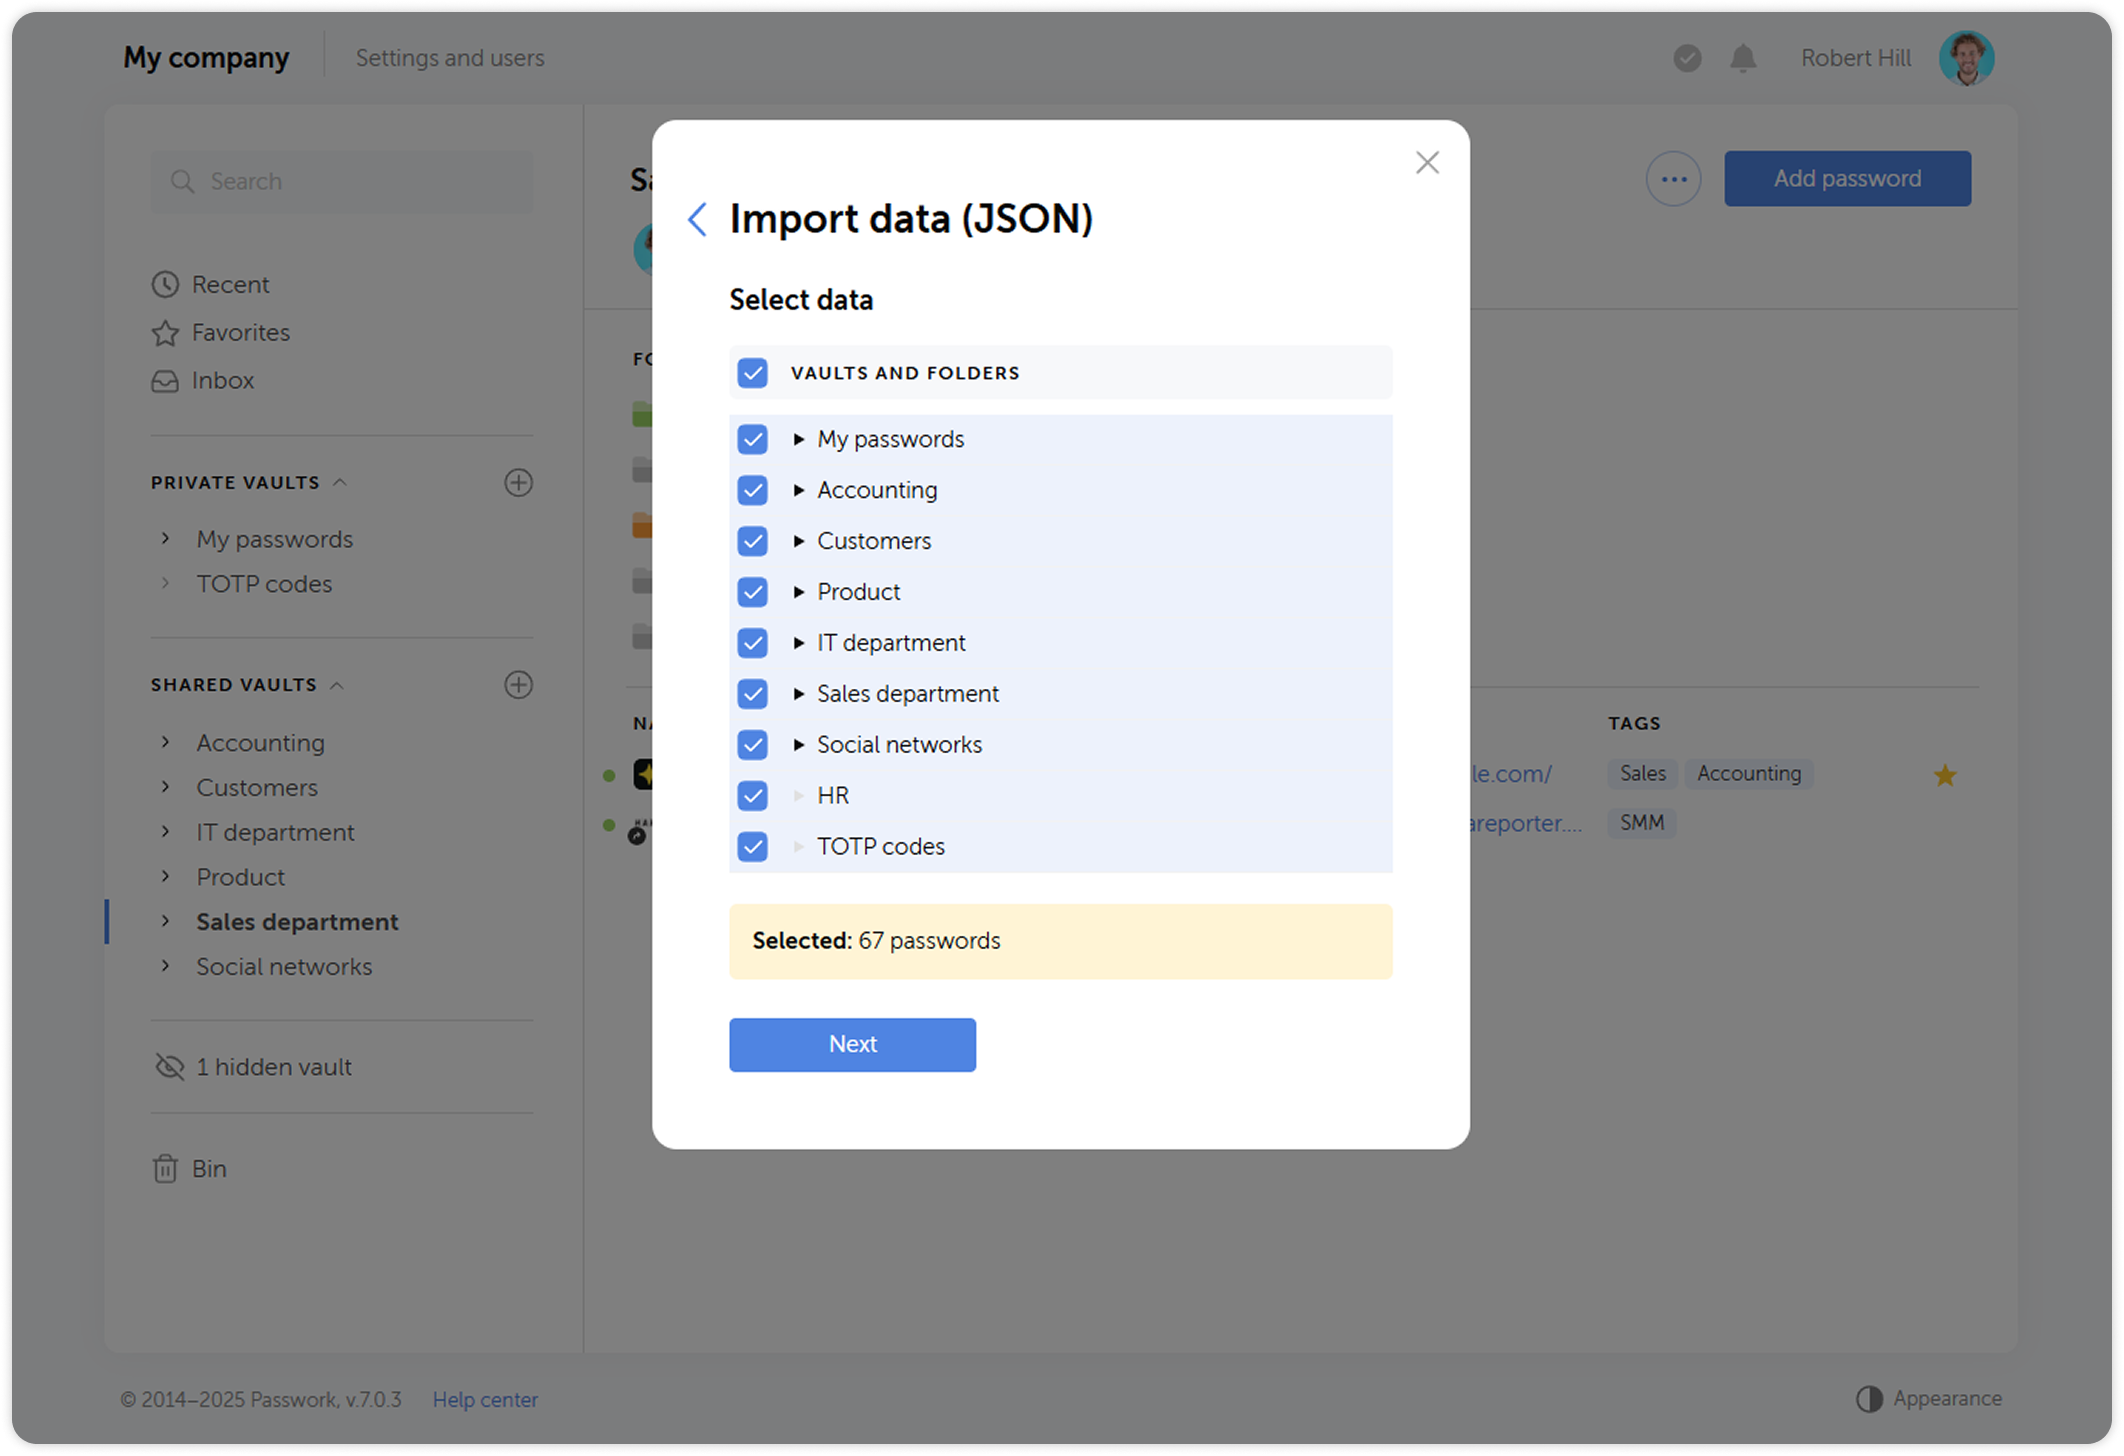
When choosing a target location, you will be able to:
- Save structure and import to a specific directory: All selected vaults will be turned into folders inside the target vault or folder. Folder structure will be restored and all passwords will remain in their original folders.
- Ignore structure and import to a specific directory: All passwords will be saved to a specific vault or folder and no structure will be recreated.
- Save structure and import to the root directory: All selected vaults and their structure will be recreated. Passwords will be saved in the folders they were exported from.
CSV
When you upload a CSV file, a data preview window will open. Here you will also need to choose a delimiter.
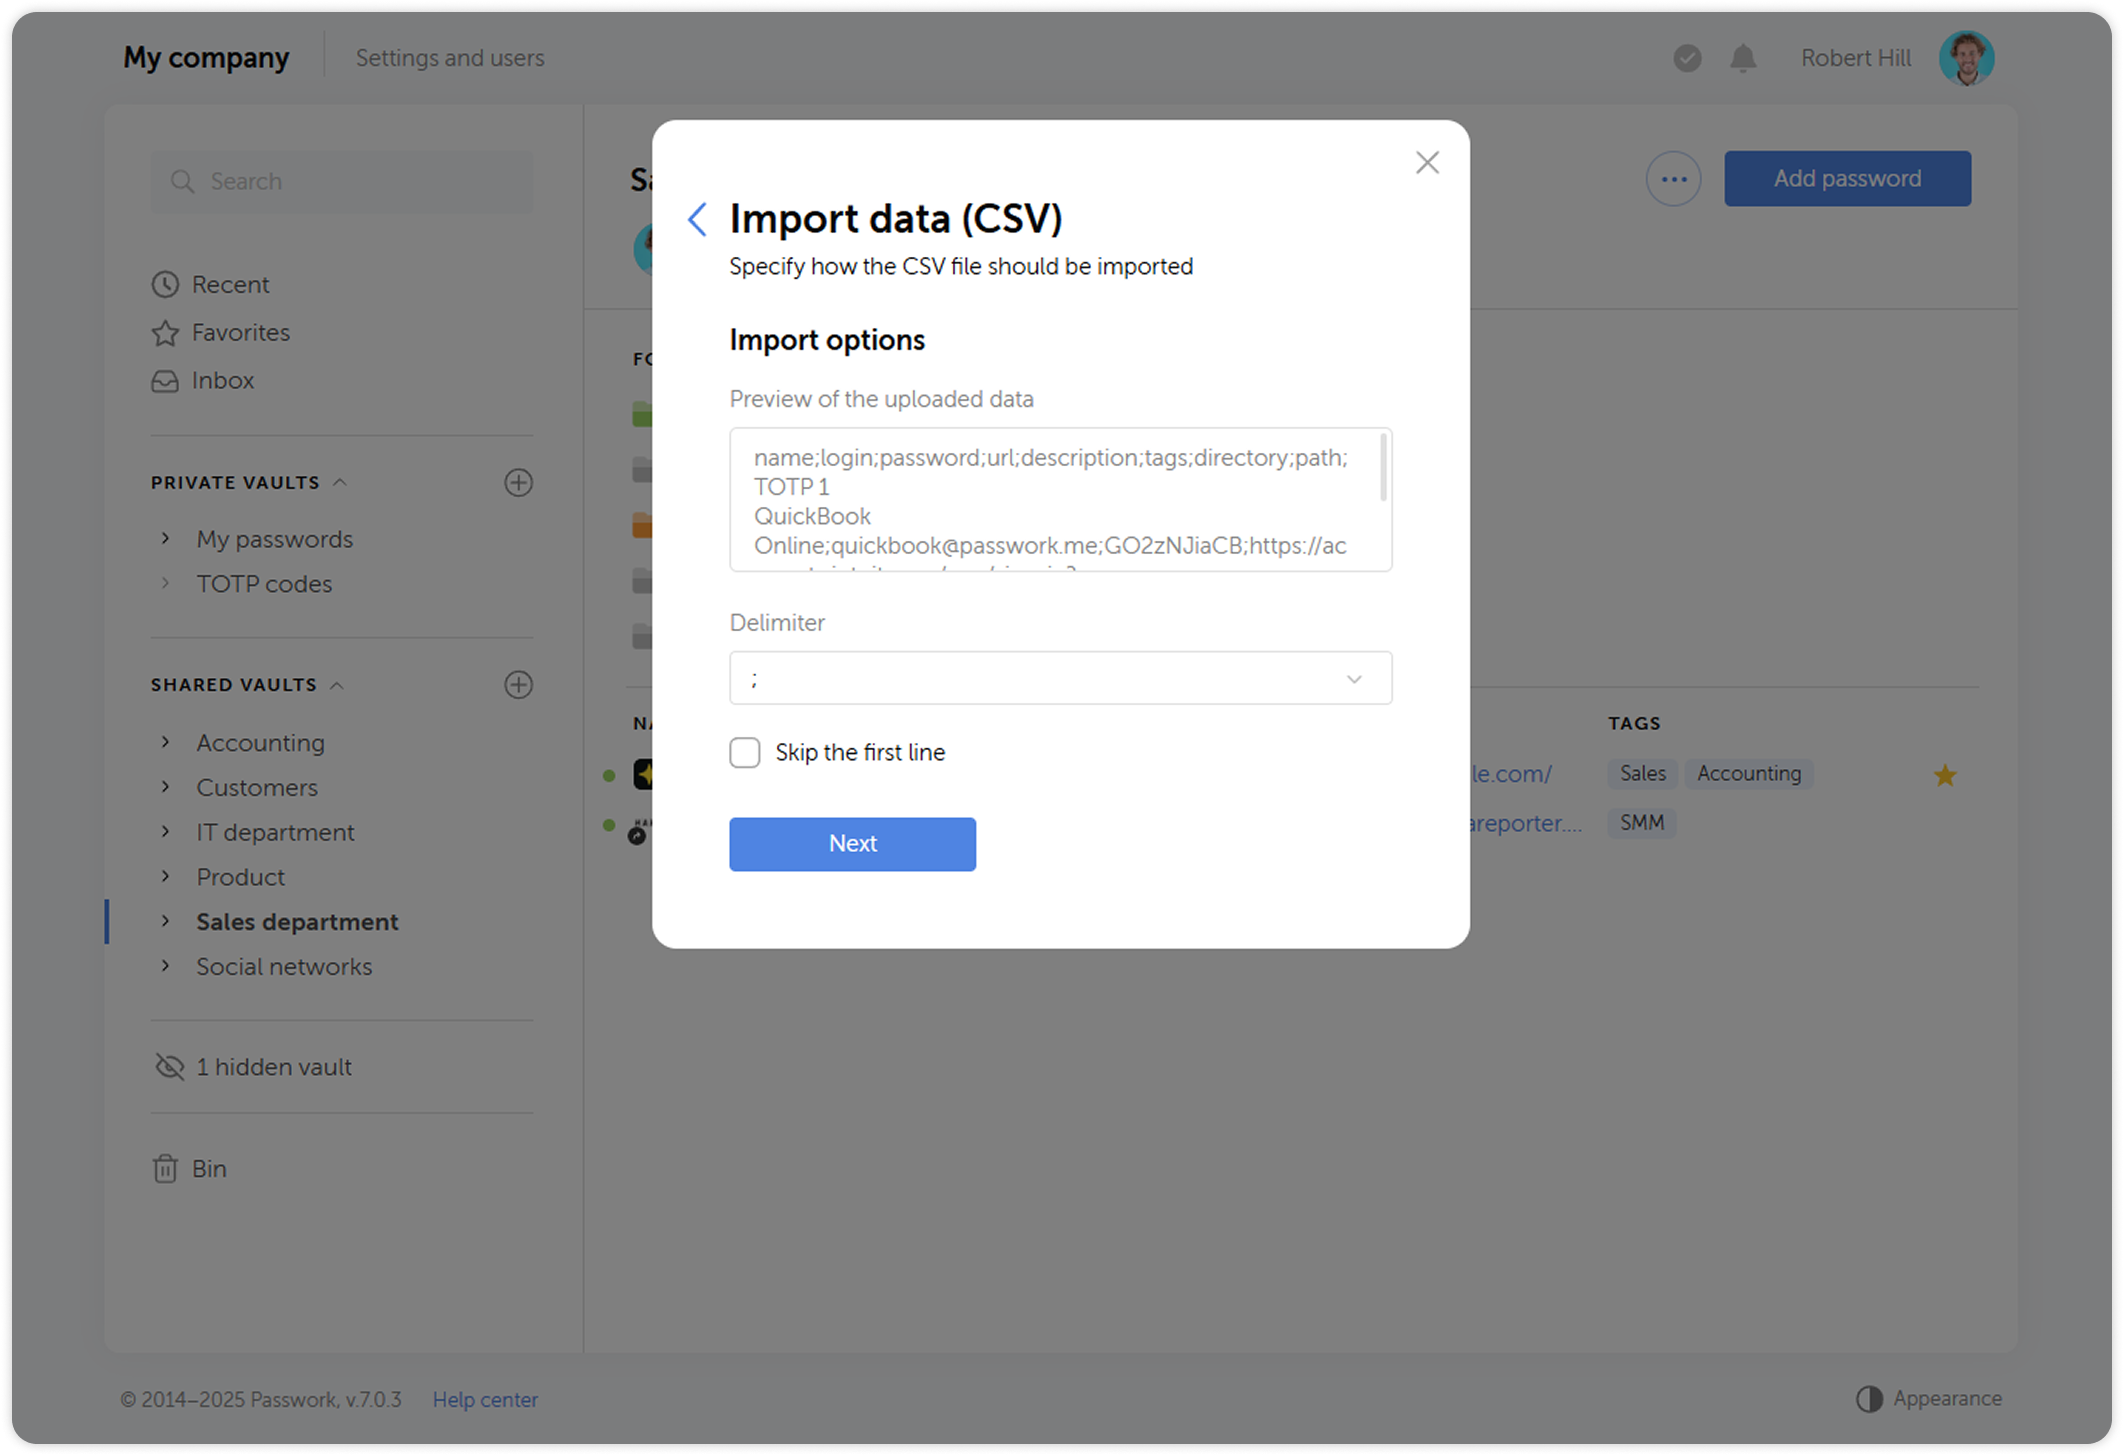
Subsequent steps of CSV file import are identical to the steps from the manual entry section.
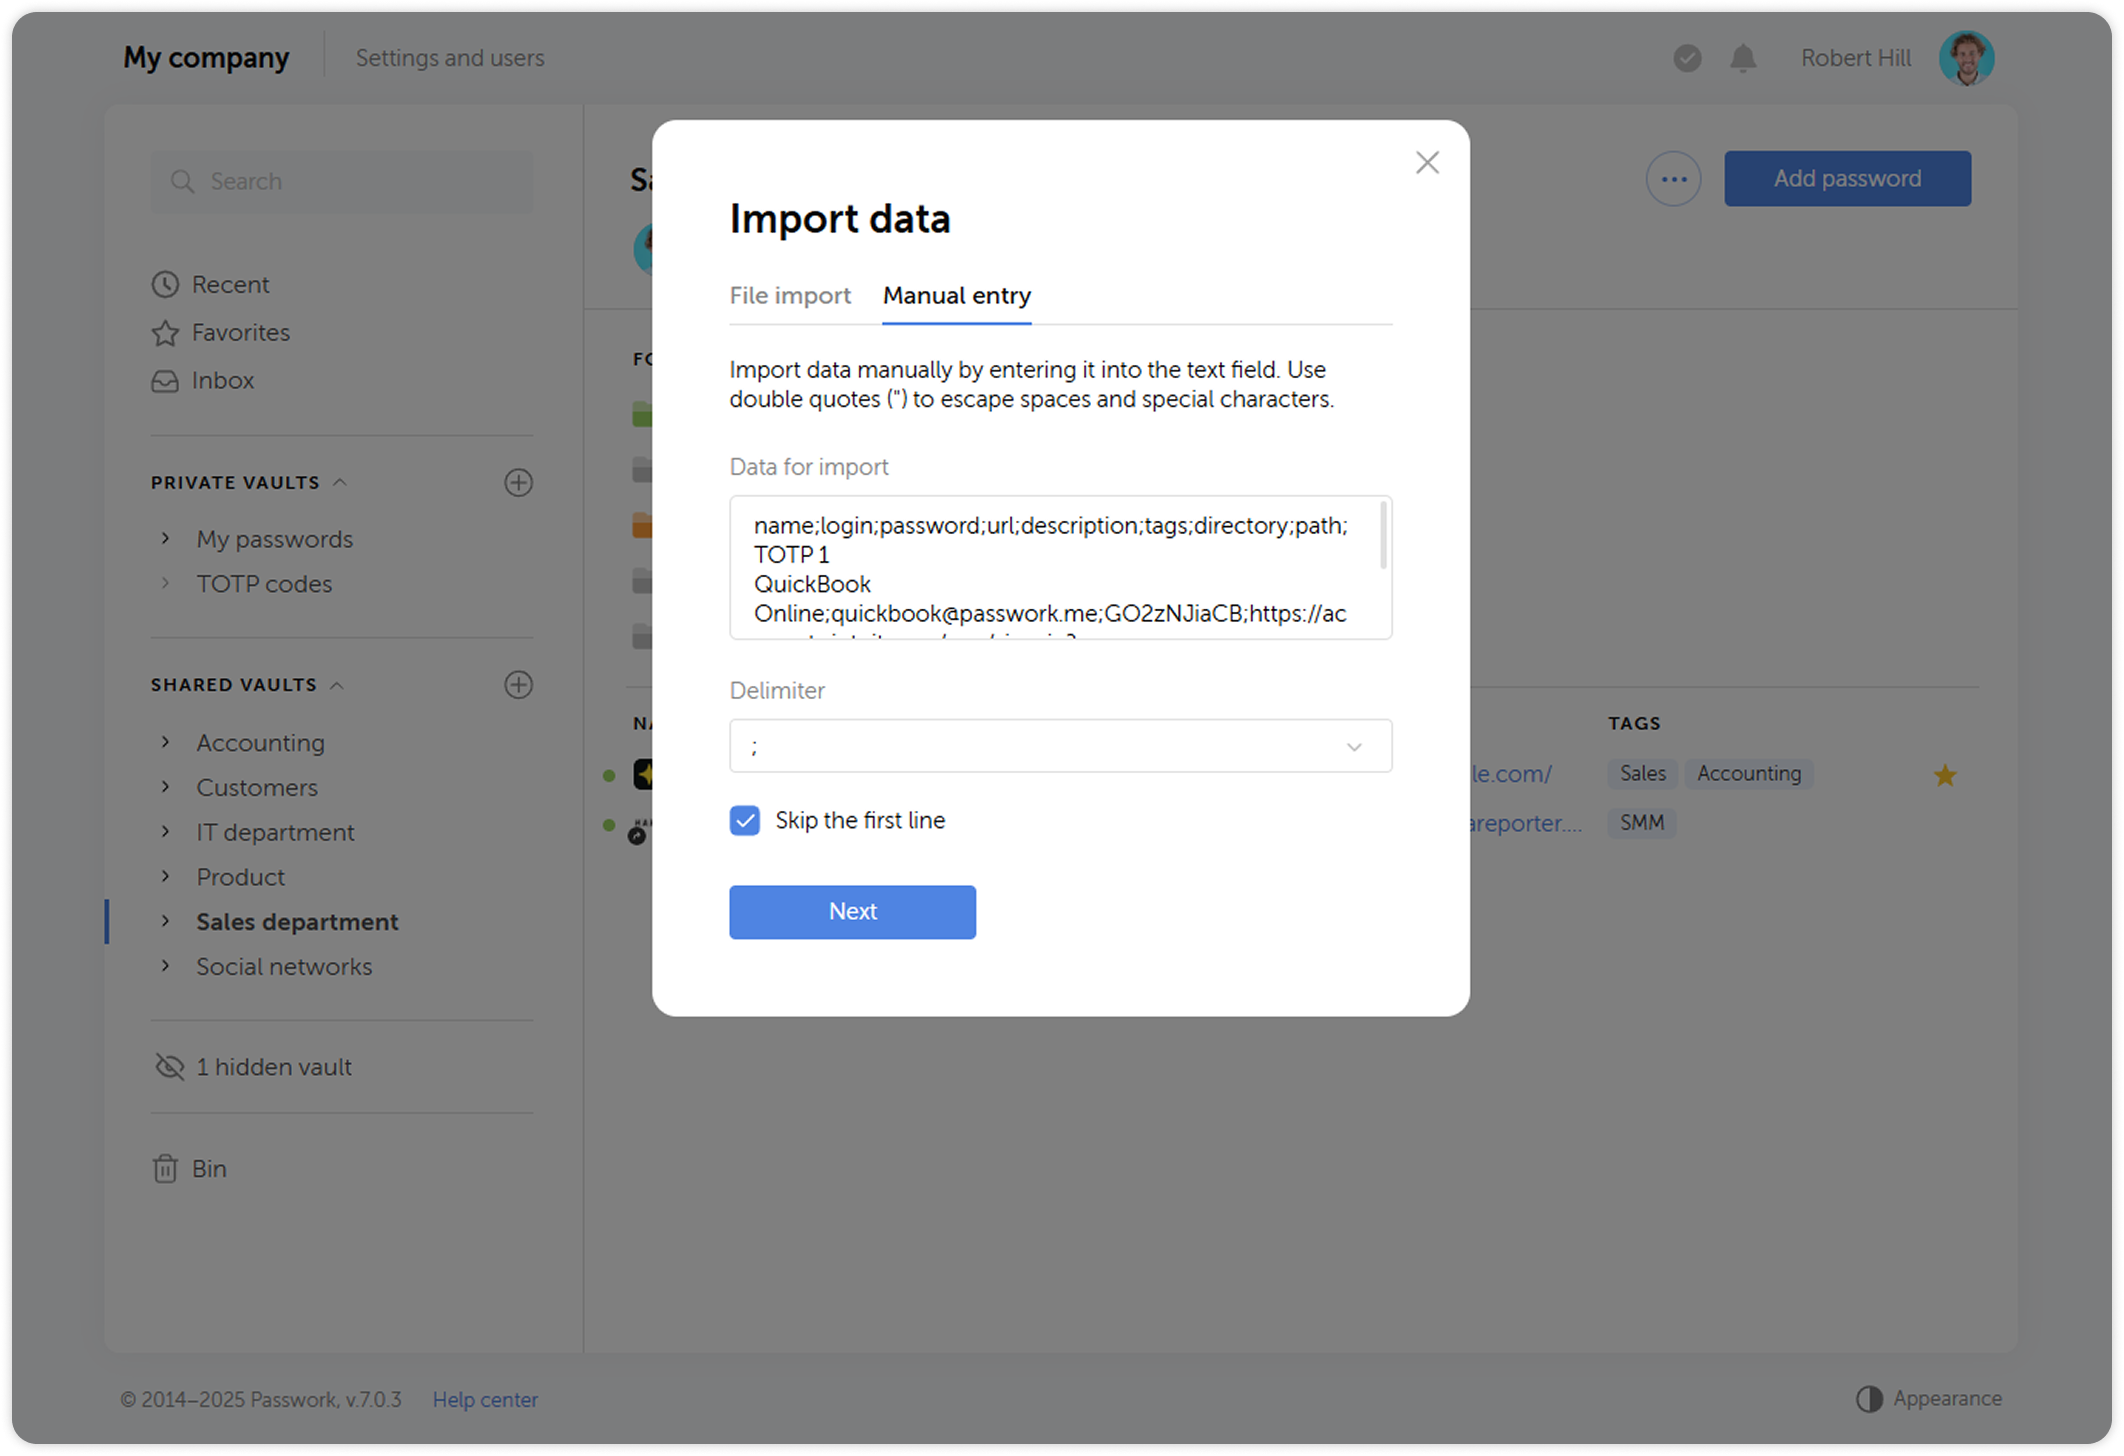
Manual entry
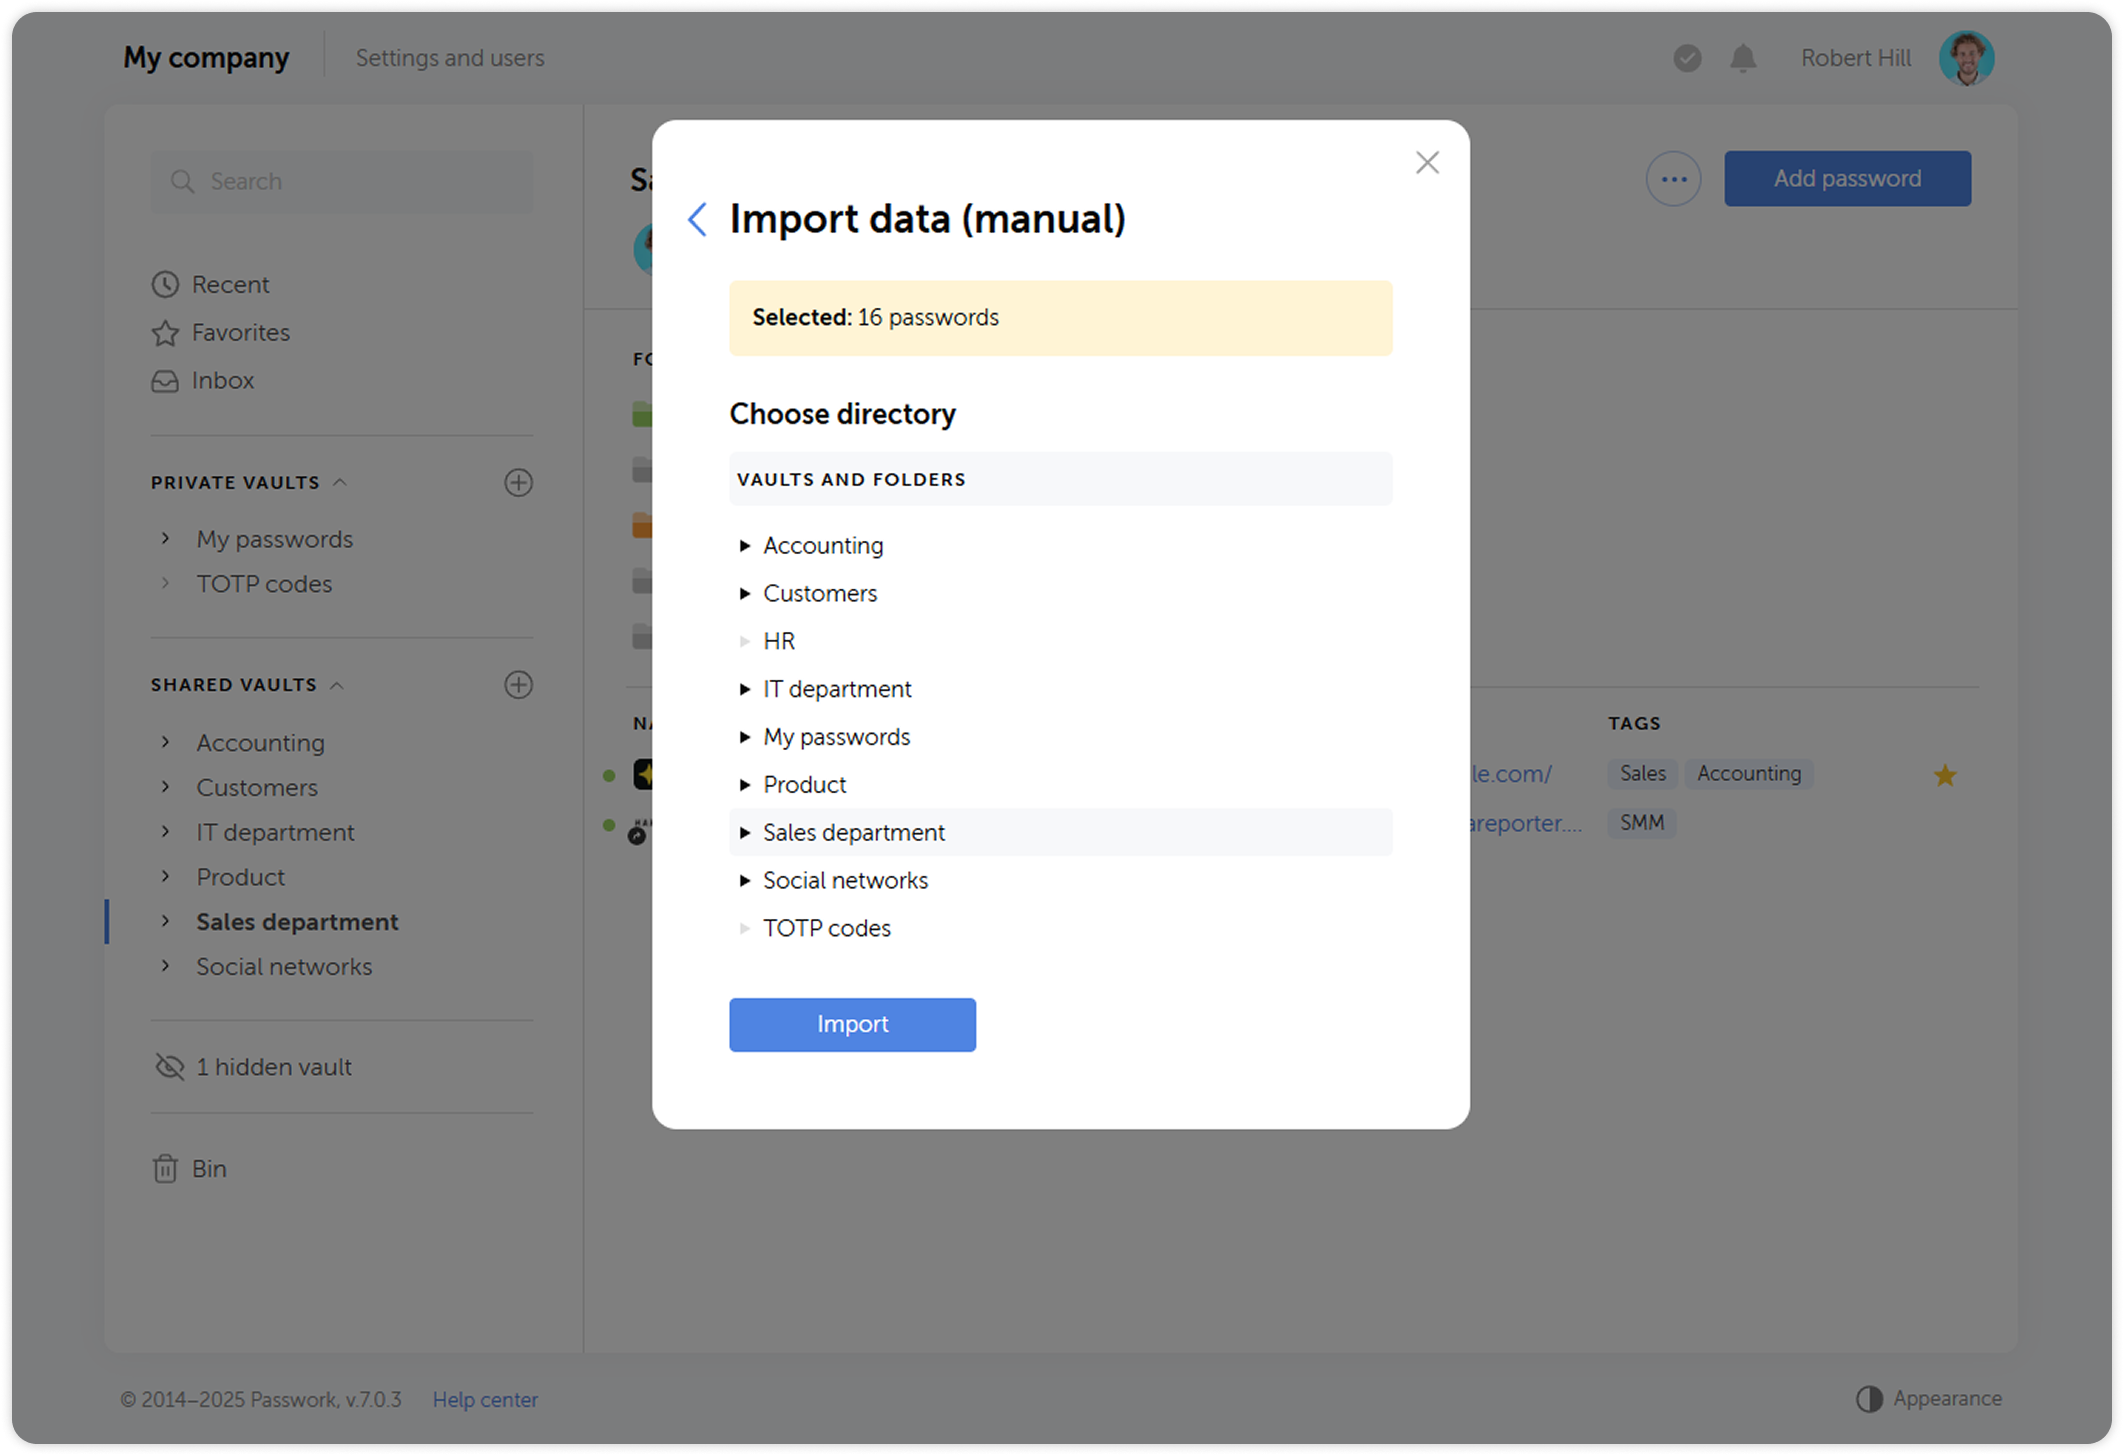
To import data manually, paste it into the text field on the Manual entry tab, and choose the delimiter.
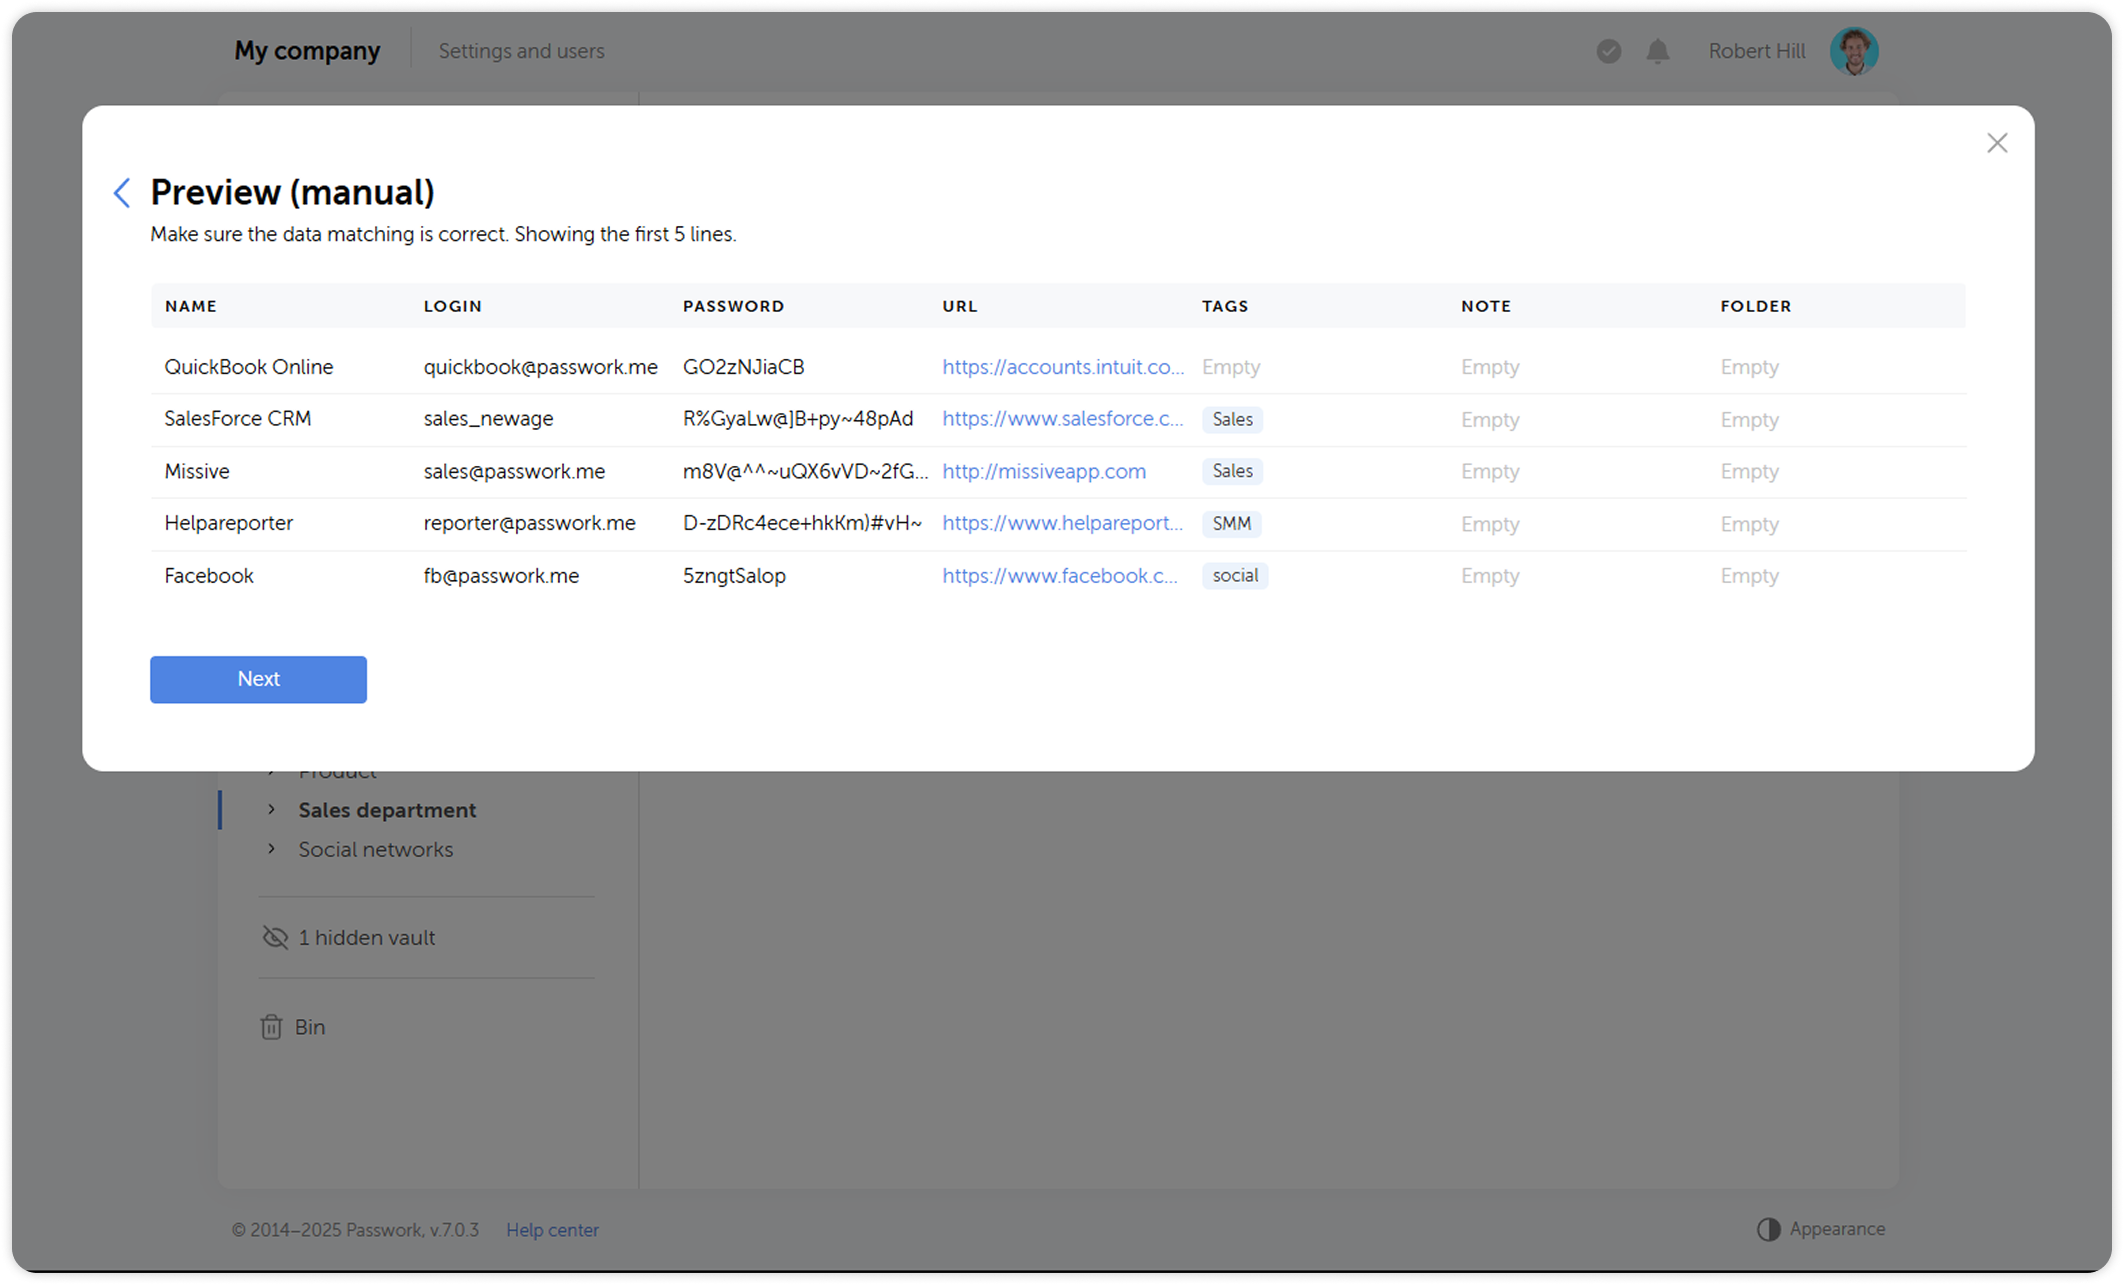
Match password card fields to data attributes.
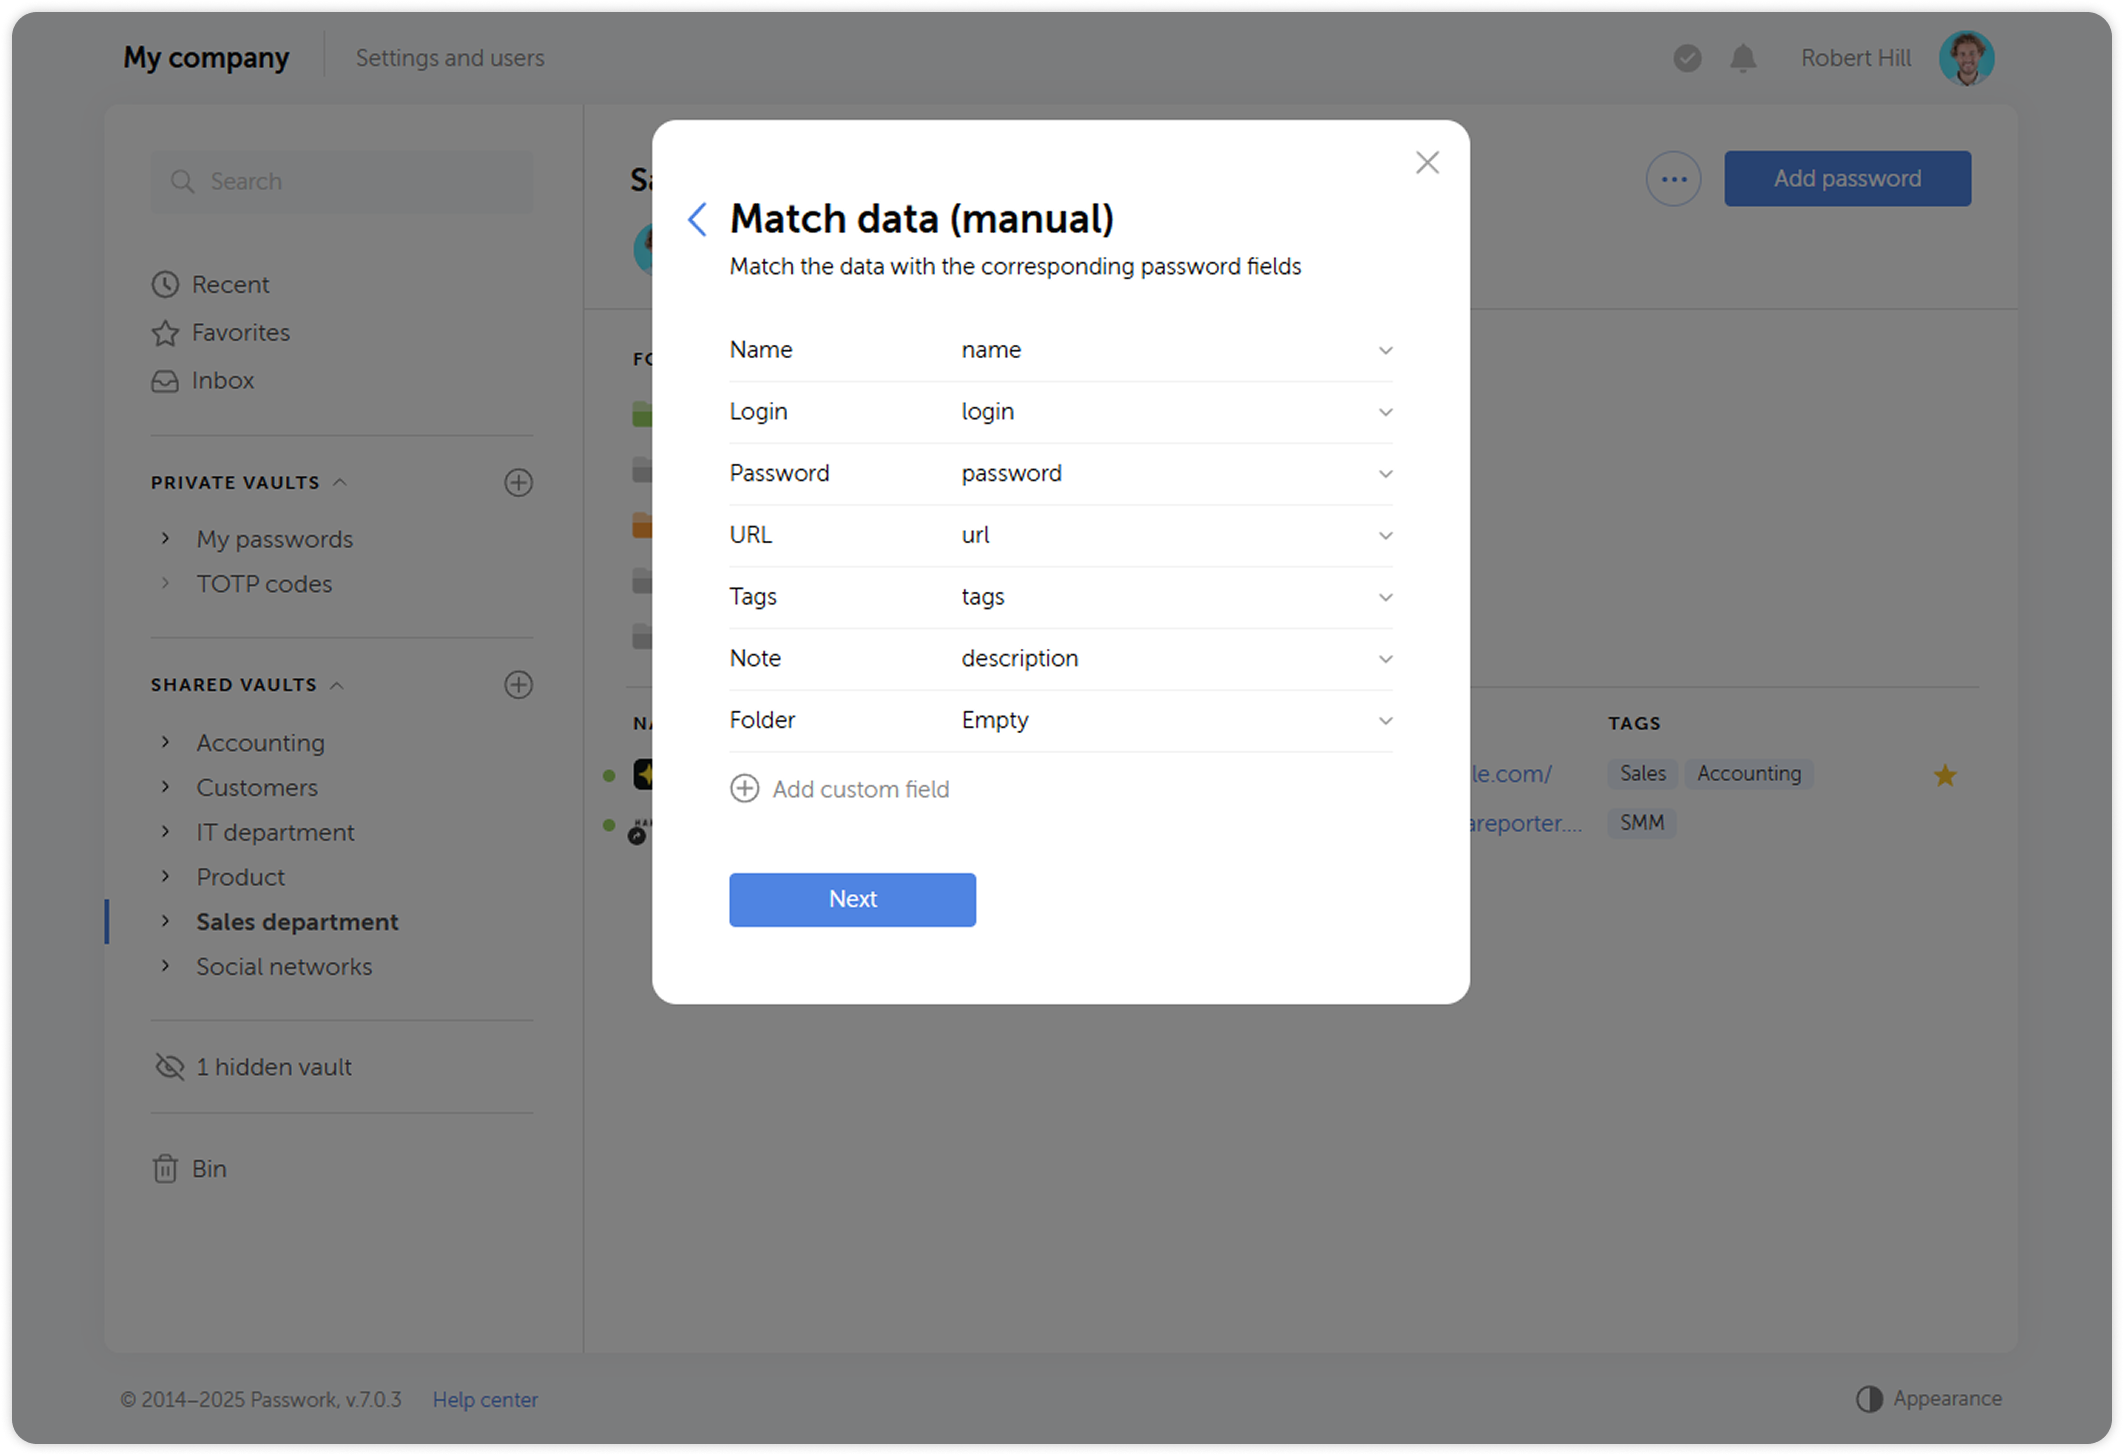
Check if everything matched correctly.
Then choose the destination for the imported data.