The new version adds a resizable note field, enhanced event descriptions in Action log, and several other improvements and bug fixes.
Improvements
- Added the capability to resize the Note field when creating and editing entries
- Changed the behavior of the Export data menu item: it now becomes inactive when there is no data to export
- Improved the description of user email confirmation events in the Activity log
Bug fixes
- Fixed an issue where passwords with special characters could be processed incorrectly when saving an LDAP server
- Fixed an issue where search results with an empty search query and no filters applied displayed incorrectly for a specified vault
- Fixed an issue where after exiting search in a selected vault, only folders were displayed while passwords and shortcuts did not load until re-entering the vault
- Fixed an issue where not all passwords were being exported during the data export process
- Fixed an issue where resetting a user's master password incorrectly required permission to manage master password complexity policies
- Fixed an issue where the sign-up form accessed via link returned a 401 error when self-registration was disabled
- Fixed an issue that prevented adding a WebAuthn credential with an empty transports field
Passwork 7.3.2 release
The new version adds a resizable note field, enhanced event descriptions in Action log, and several other improvements and bug fixes.

In the new version, we've added search filtering by current directory and made minor improvements to the import process, localization, and UI. The update is available in the Customer portal.
Search in vault or Inbox
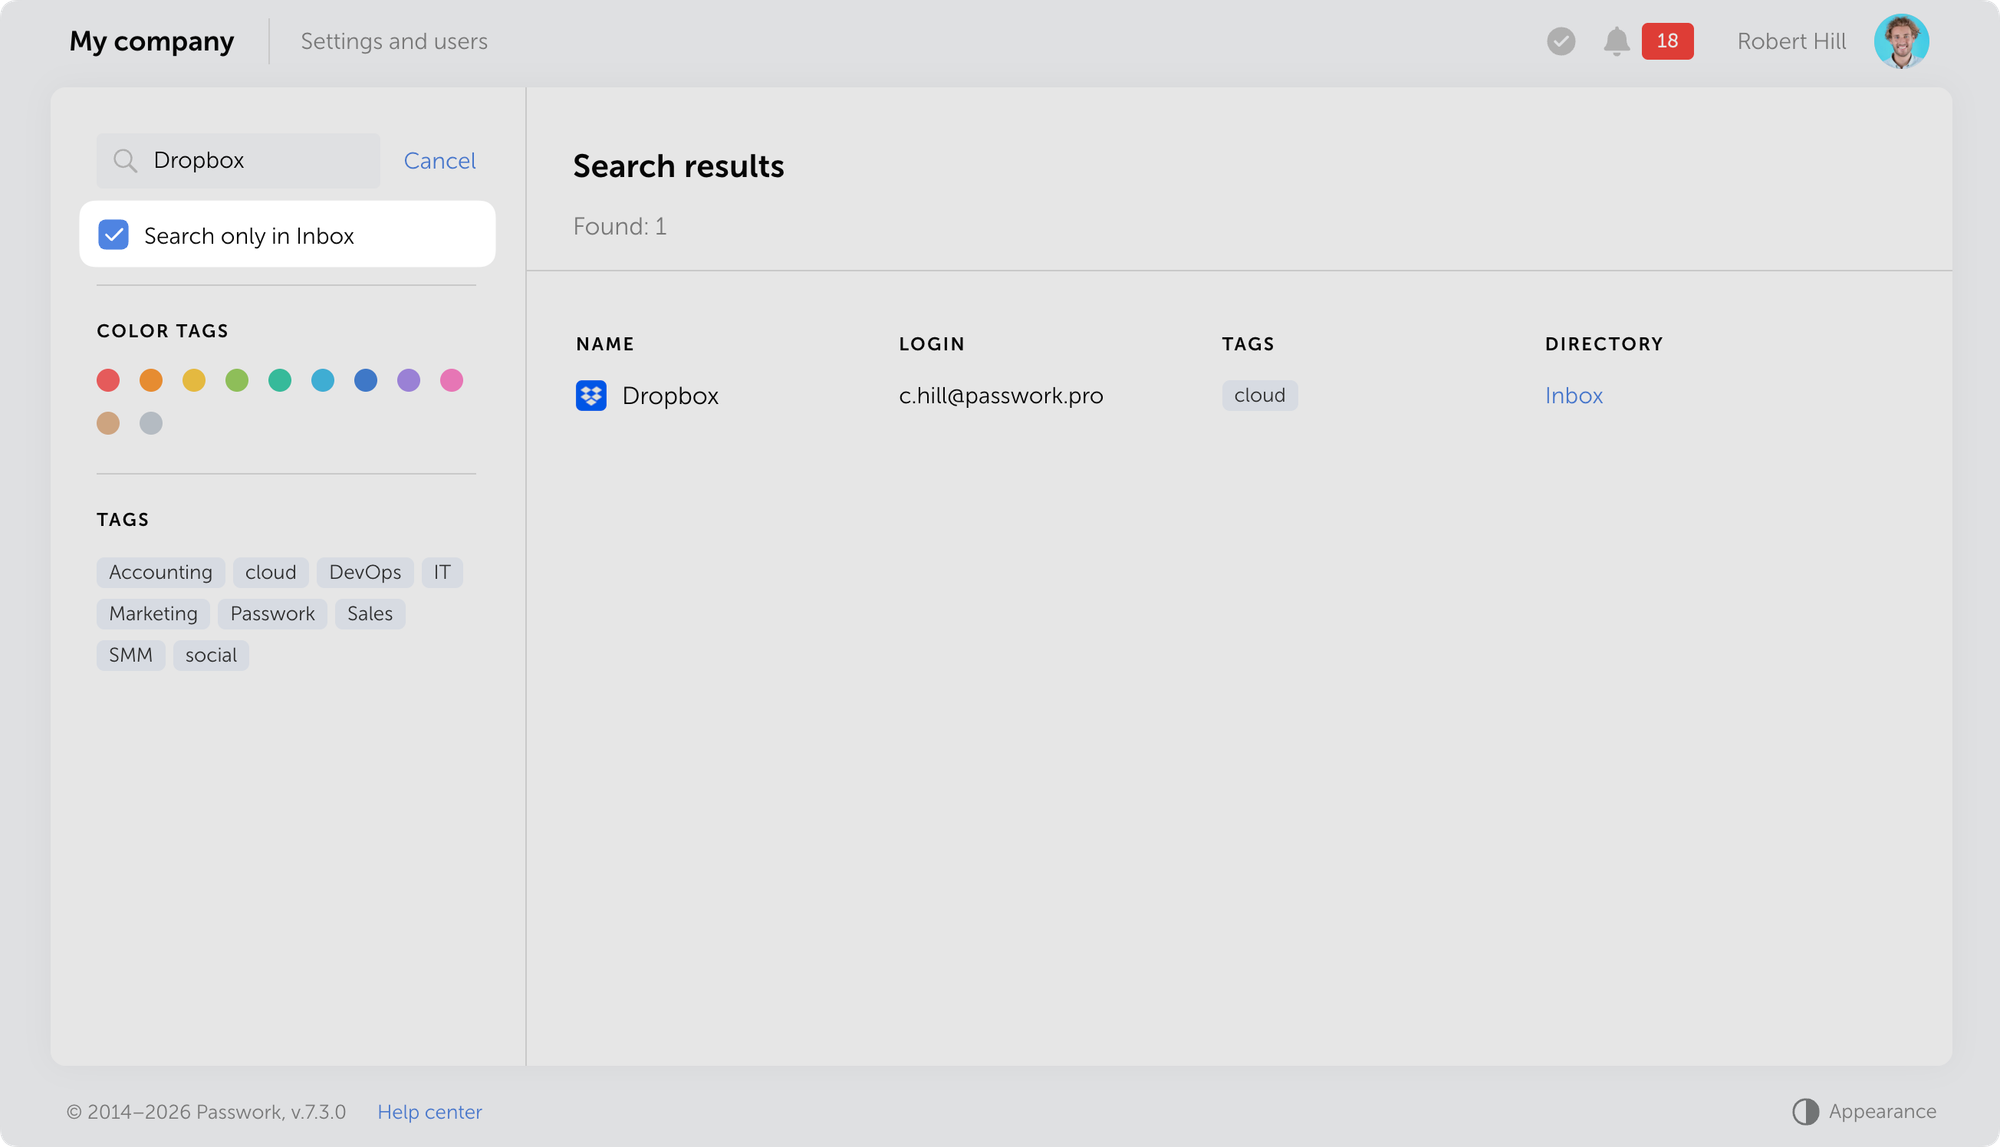
Added an option to limit search to the current vault or Inbox. A checkbox is now available below the search bar that, when enabled, restricts search to the selected area.
Other changes
- Fixed an issue where quickly switching between directories and Recents, Favorites, or Inbox pages could display an incorrect or empty password list
- Fixed an issue where importing files with long notes could cause the process to freeze
- Fixed an issue in MongoDB connection string handling
Passwork 7.3.1 release
In the new version, we've added search filtering by current directory and made minor improvements to the import process, localization, and UI. The update is available in the Customer portal.

The new version introduces biometric and passkey authentication, the option to add multiple URLs for a single password, email address verification for users, email-based authentication, and numerous other improvements and fixes.
Biometric authentication and passkeys
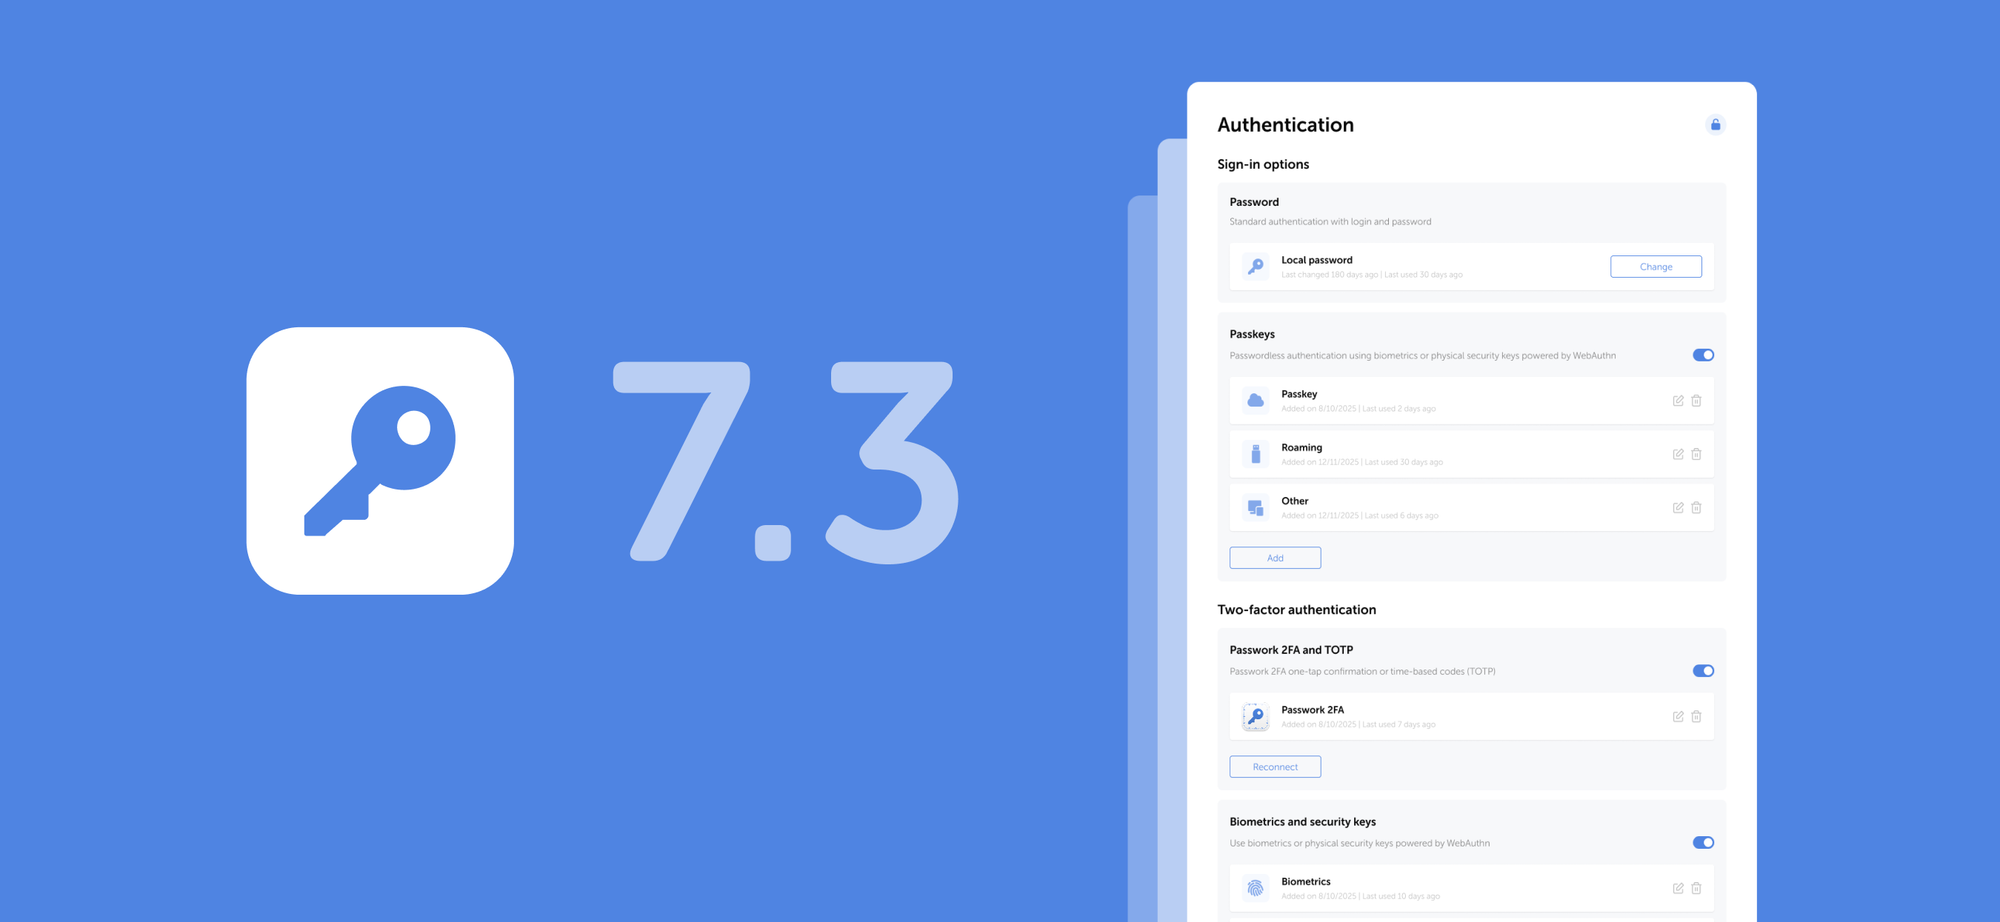
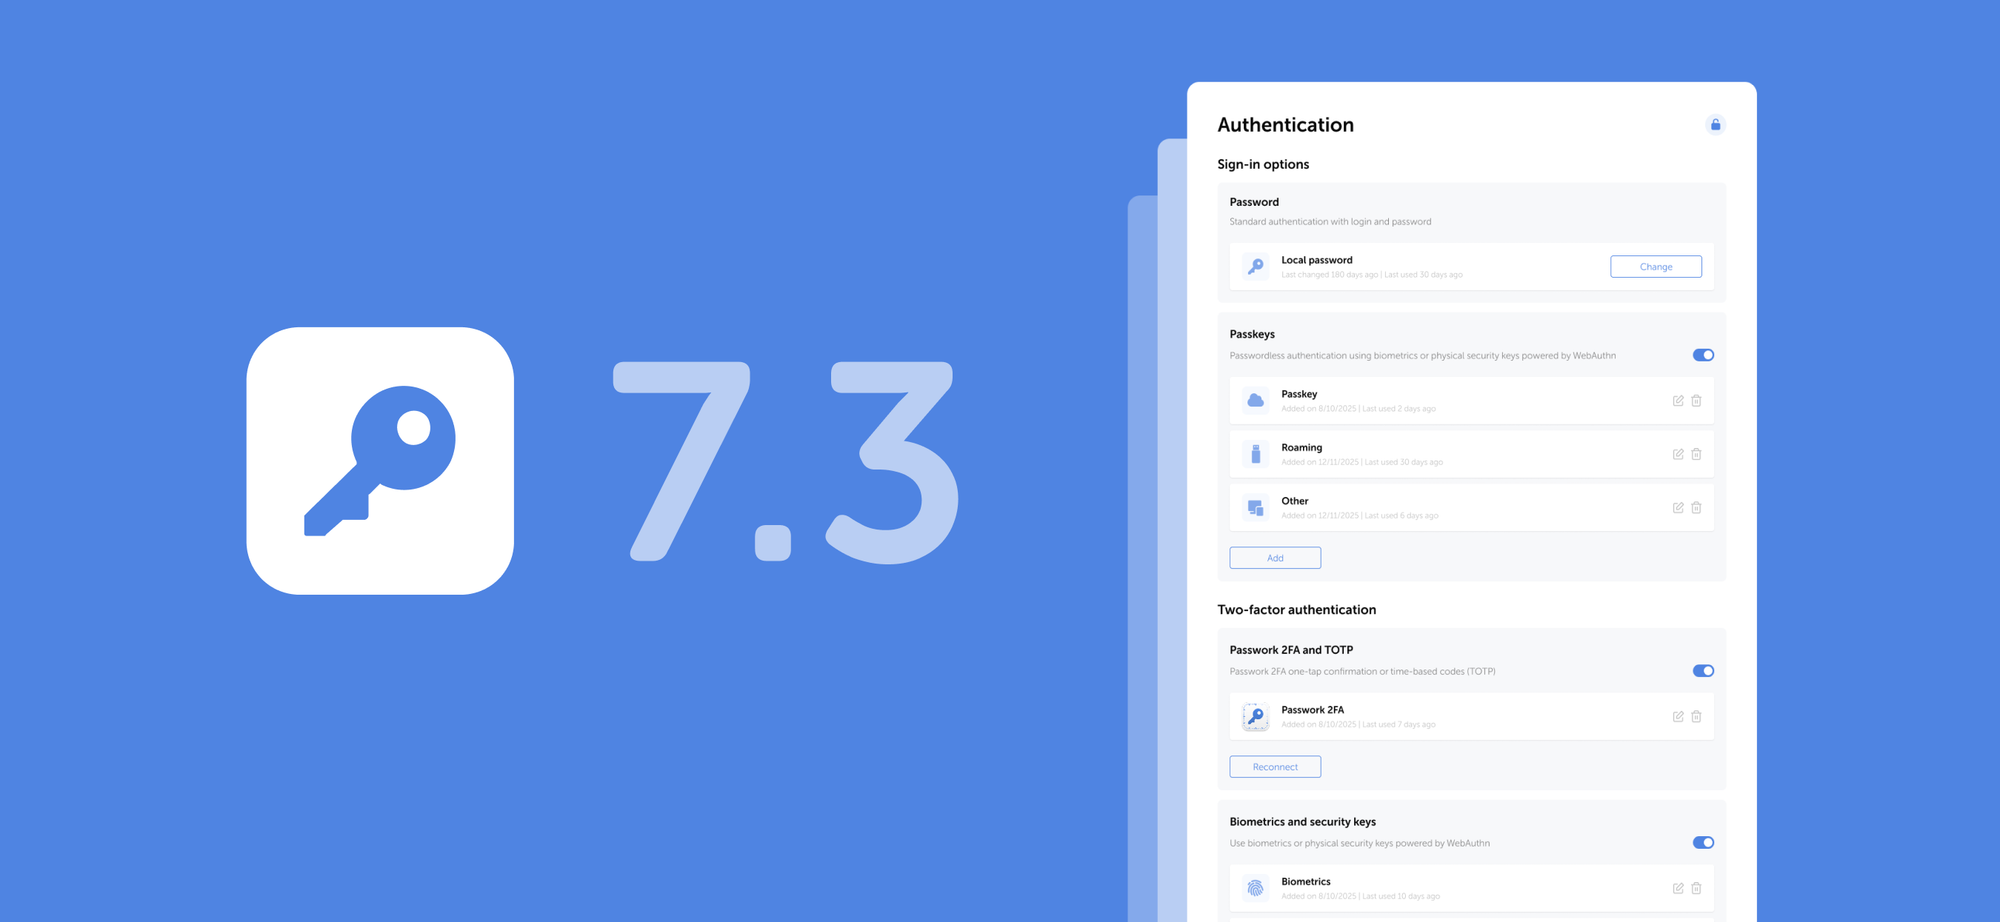
We've added support for biometric authentication, passkeys, and security keys based on the WebAuthn standard. You can now sign in to Passwork using your fingerprint, Face ID, PIN code, or a hardware security key (YubiKey and similar devices).
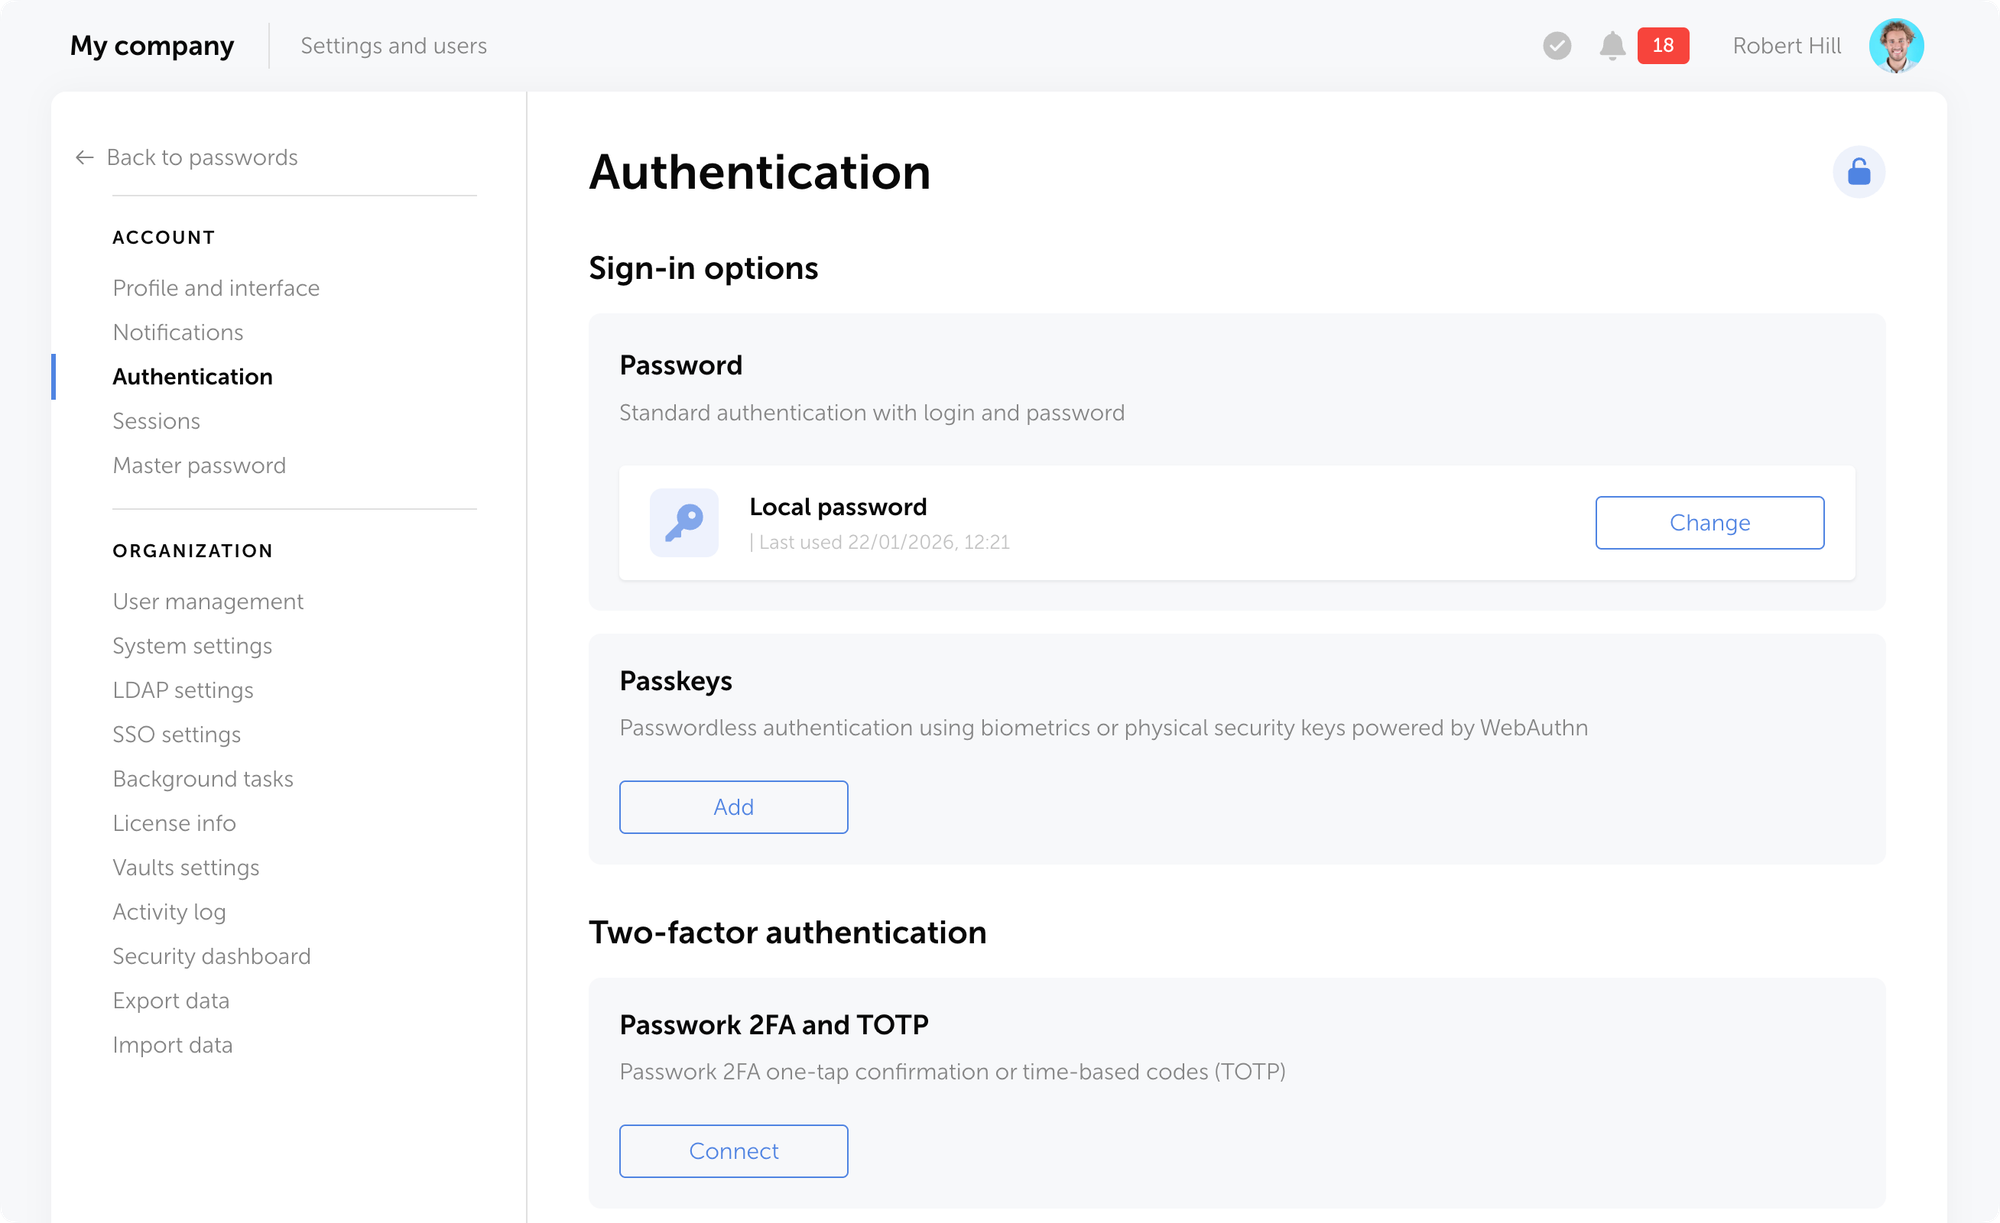
On the Authentication settings page, you can add new sign-in methods, manage existing ones, change your password, or enable passwordless authentication through biometrics or hardware security keys.
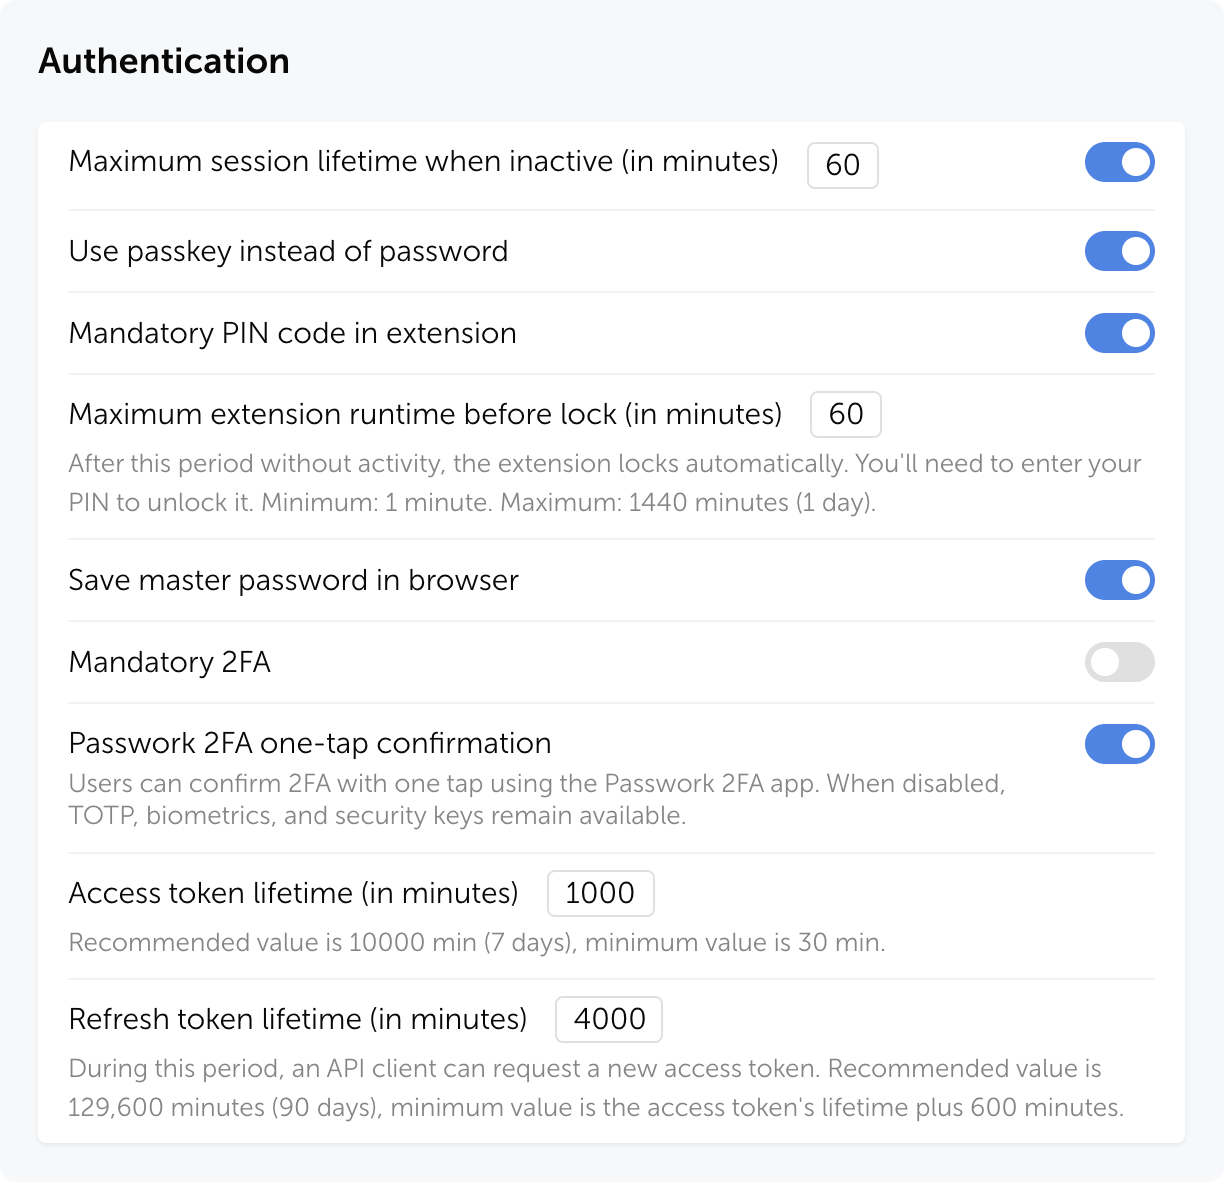
The new role setting Use passkey instead of password allows users to authenticate with a passkey instead of their local or domain password.
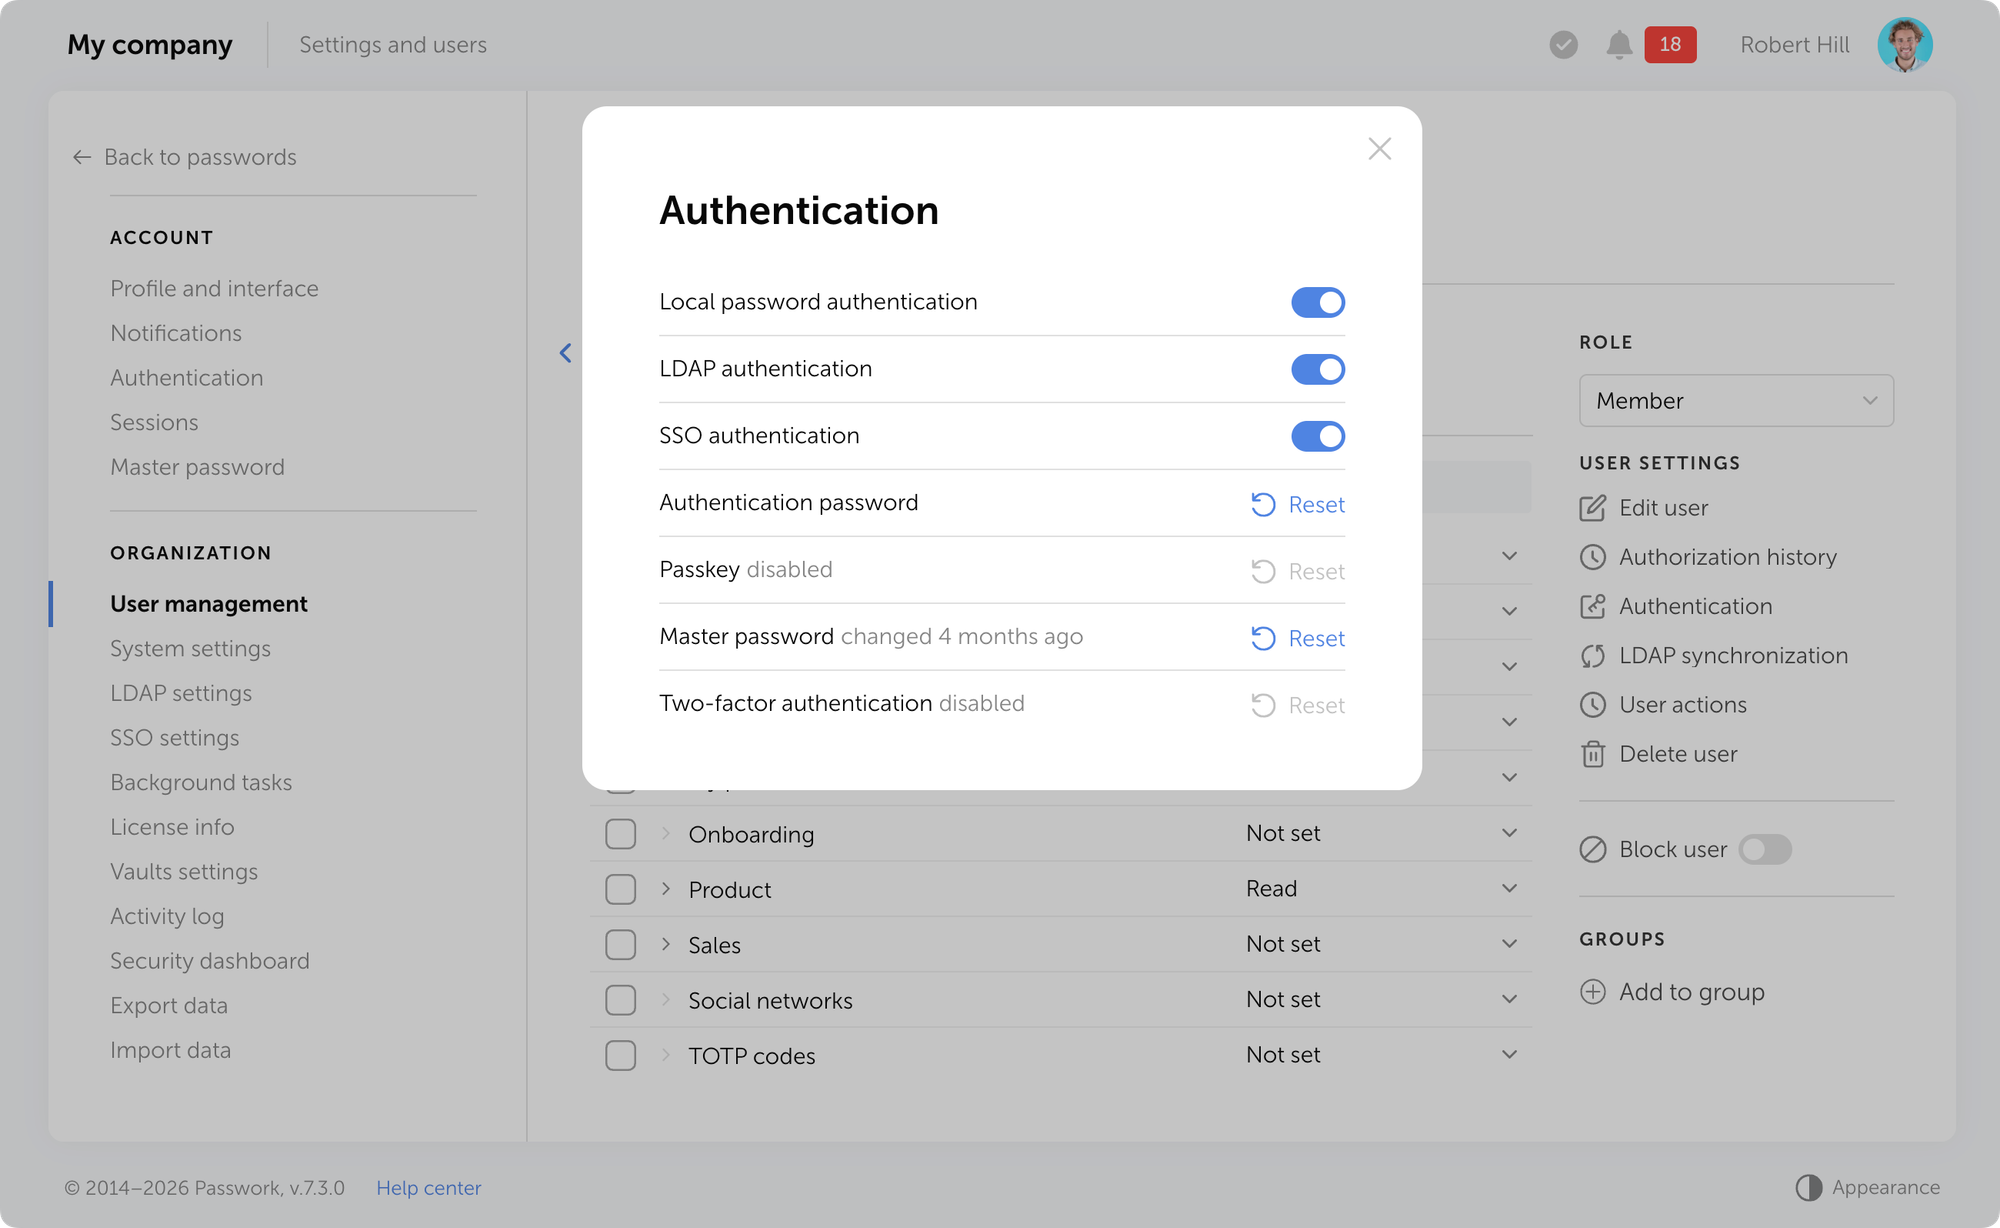
You can reset a passkey for an individual user on their page in the User management section through the Authentication modal window.
Learn more about authentication methods in our user manual.
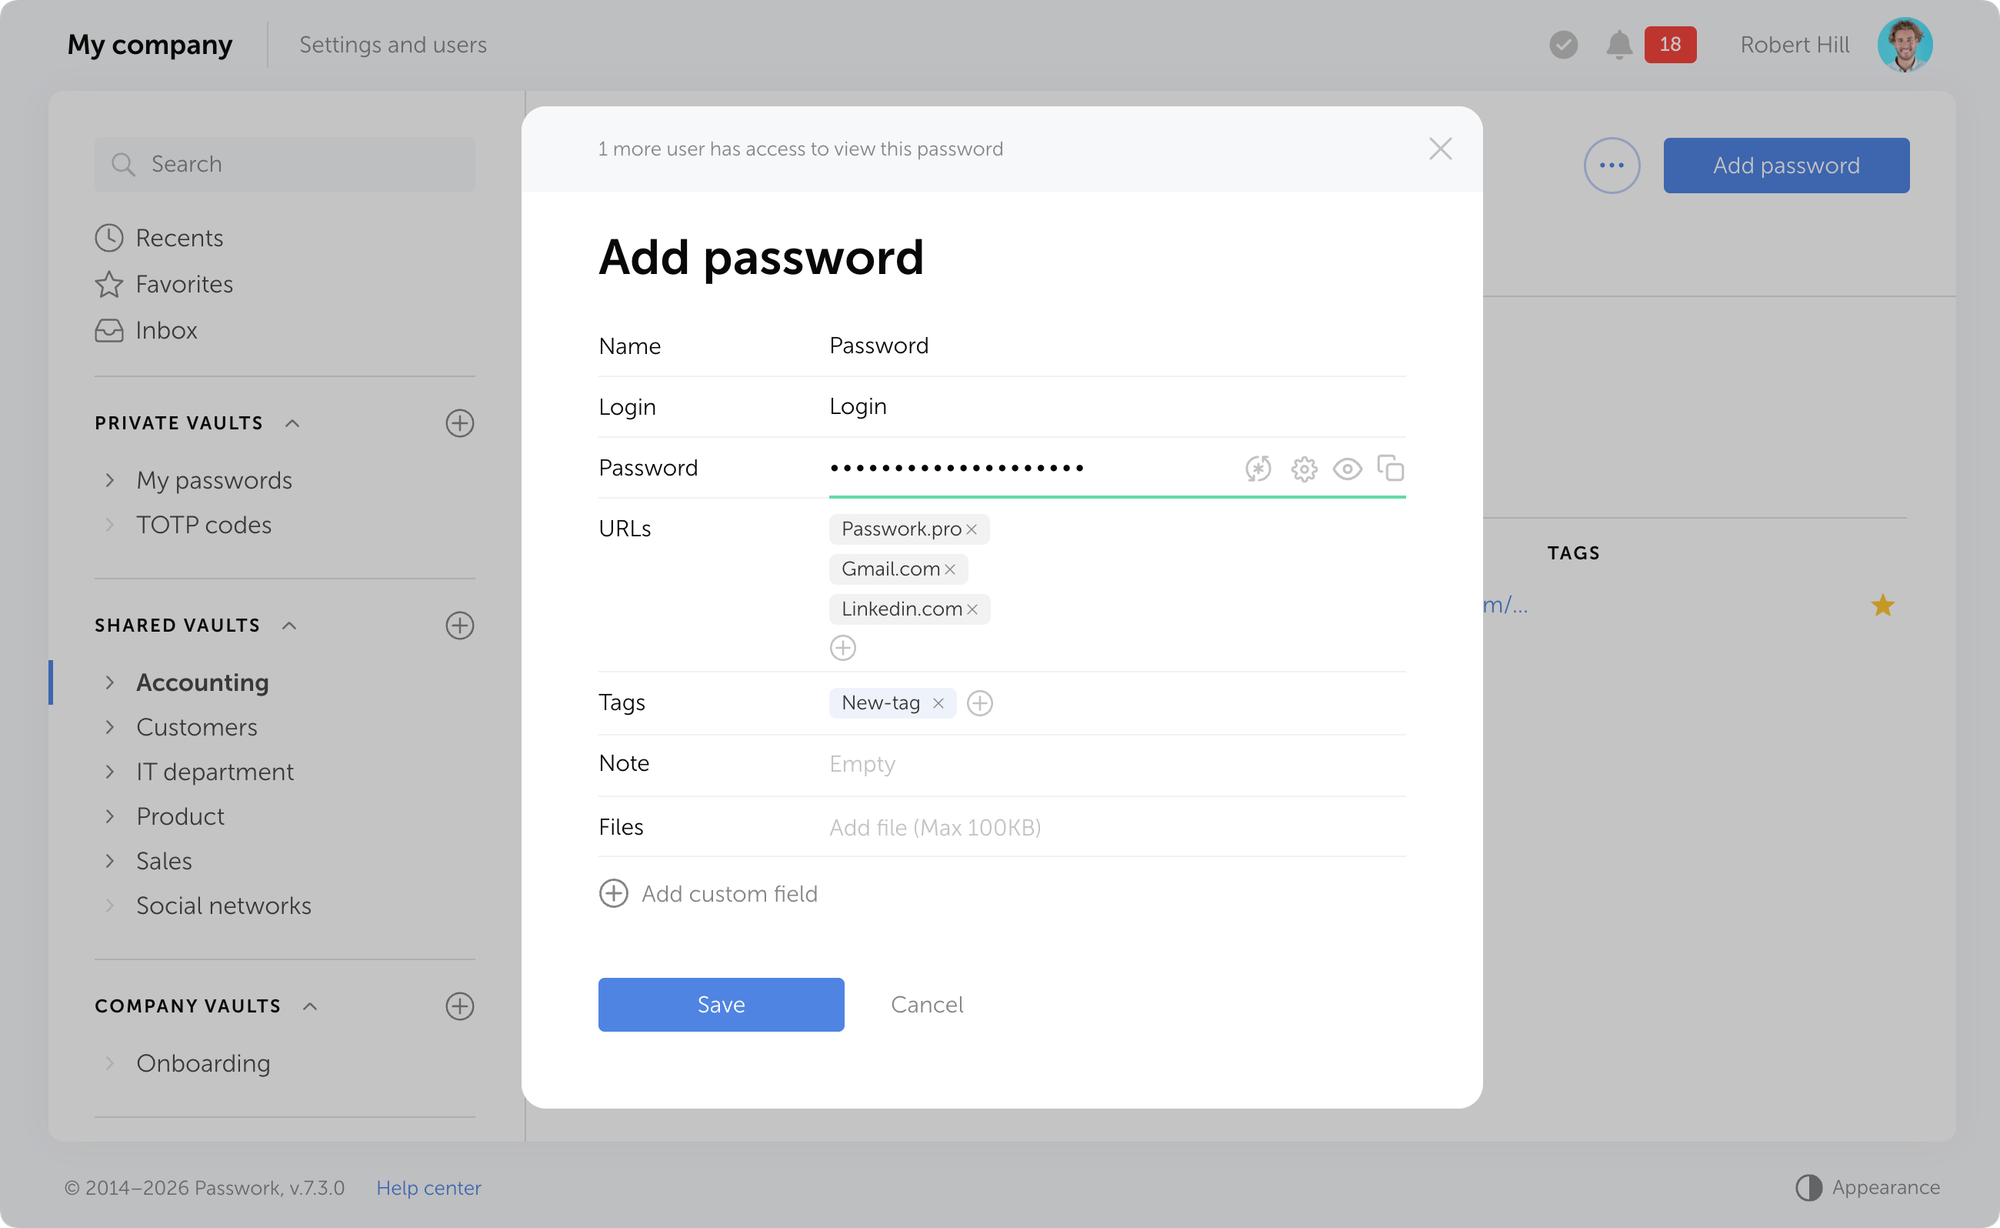
Multiple URLs per entry
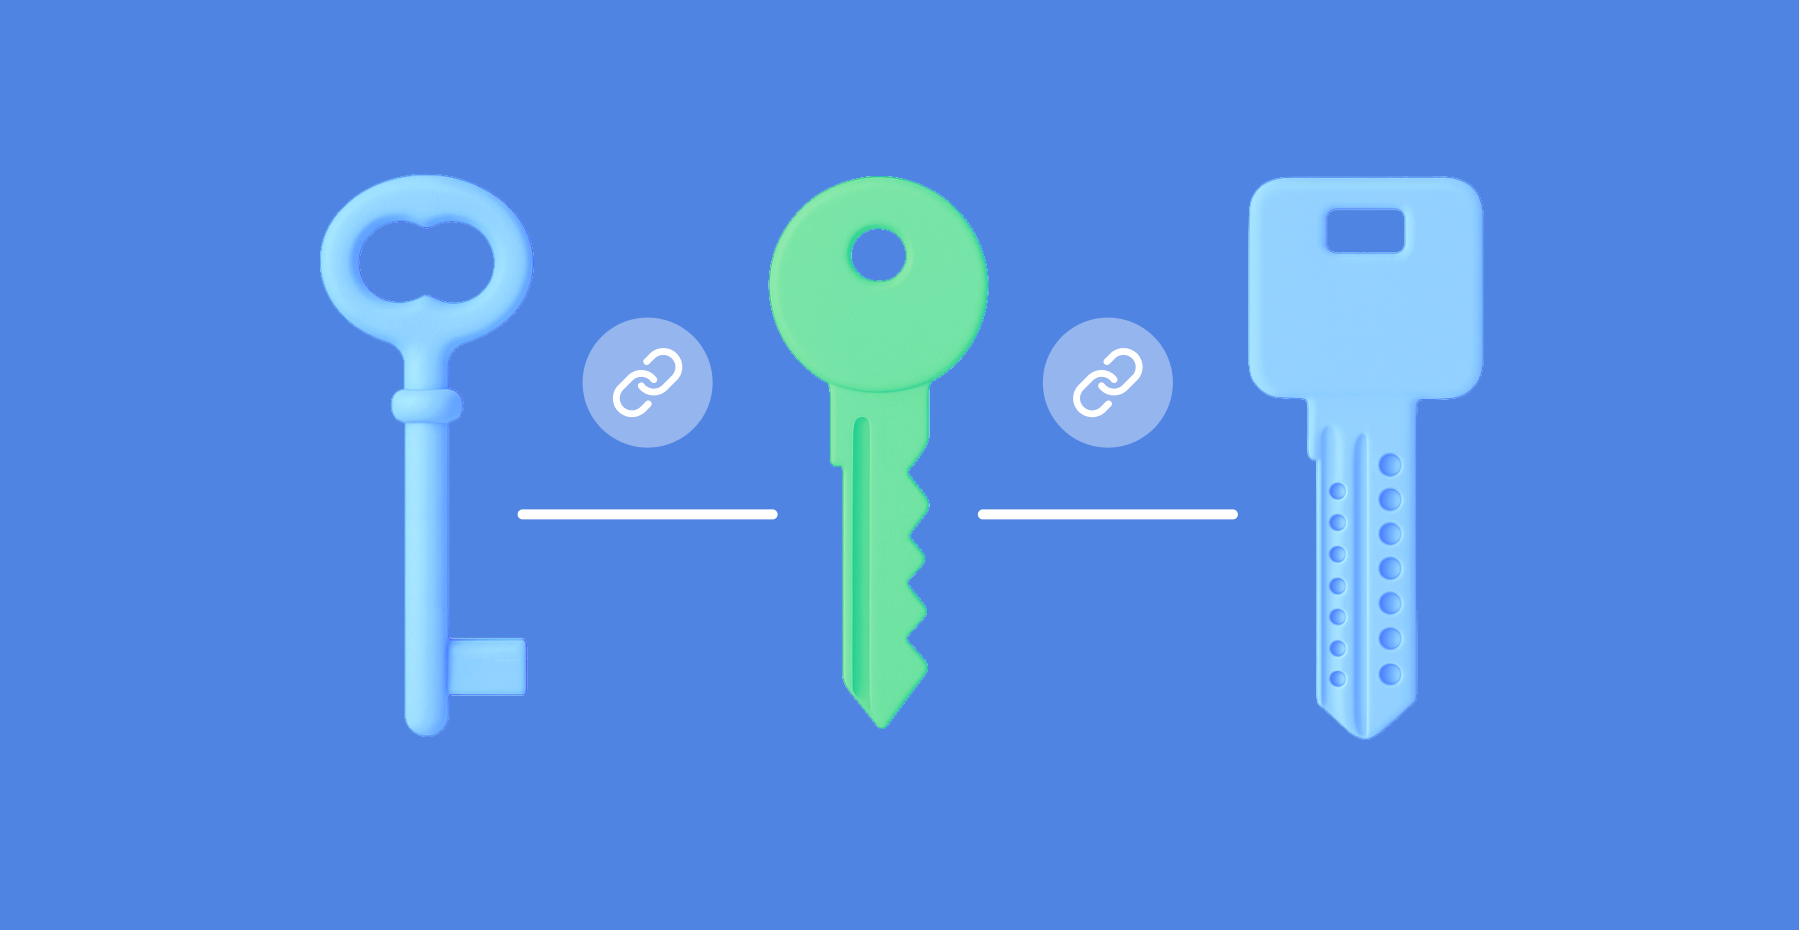
You can now add multiple URLs to a single entry. This is useful when one account is used to access different addresses: test and production environments, regional versions of a website, or related company services. The browser extension will automatically suggest filling in credentials on any of the specified URLs.
Email verification
Passwork now supports mandatory email verification for users. When a user adds or changes their email address, Passwork sends a verification email with a confirmation link.
You can enable mandatory email confirmation in System settings → Registration → Mandatory email confirmation.
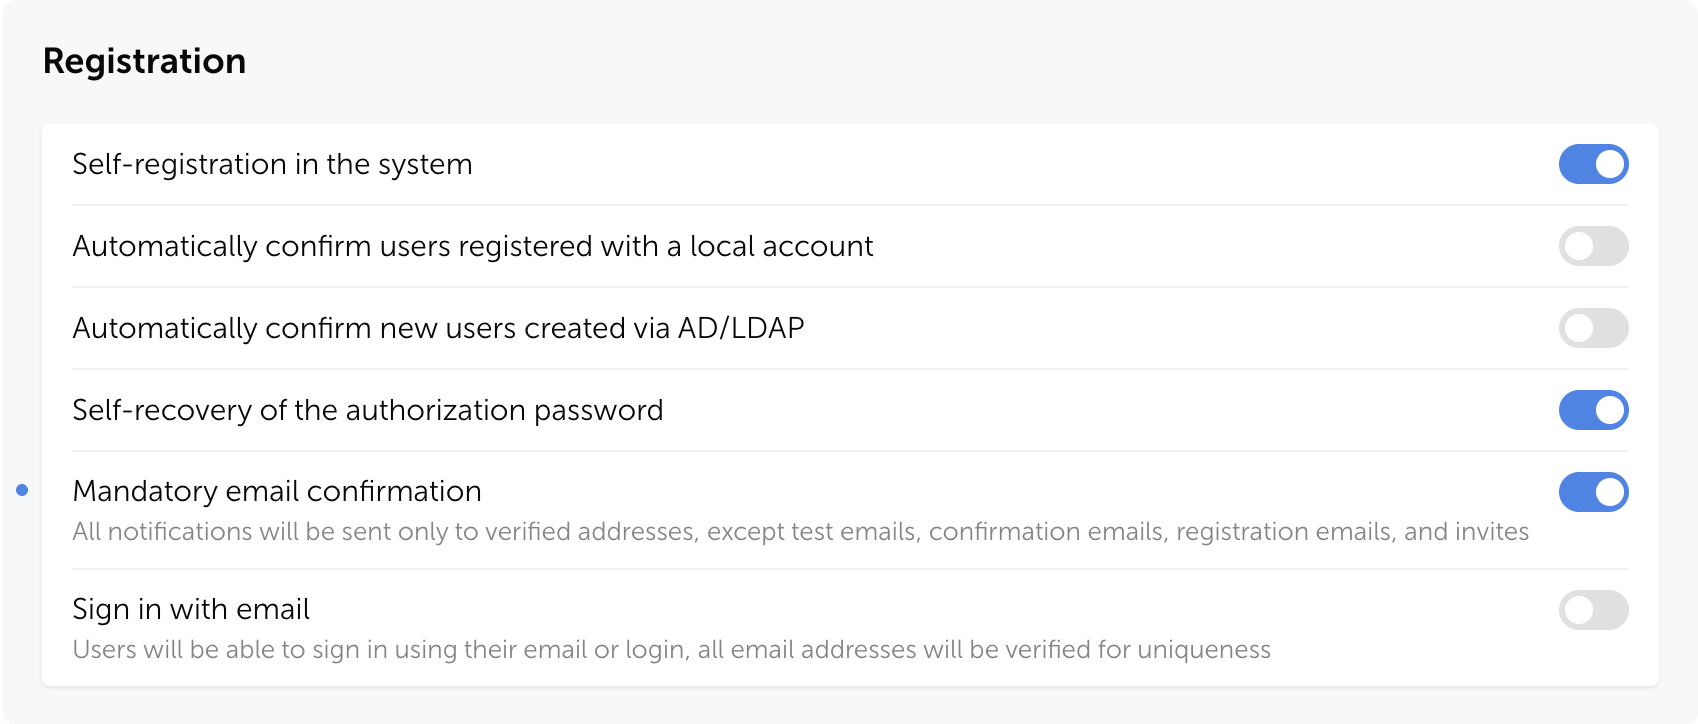
Without email verification, invalid addresses can appear in the system. This can create problems: notifications don't reach users, password reset fails, and security risks emerge. Email confirmation ensures that messages are delivered only to legitimate recipients.
Email-based authentication
We've added the ability to sign in to Passwork using a verified email address instead of a login to simplify authentication and reduce login errors. After enabling this setting, username-based sign-in remains available, and all email addresses will be checked for uniqueness in the system.
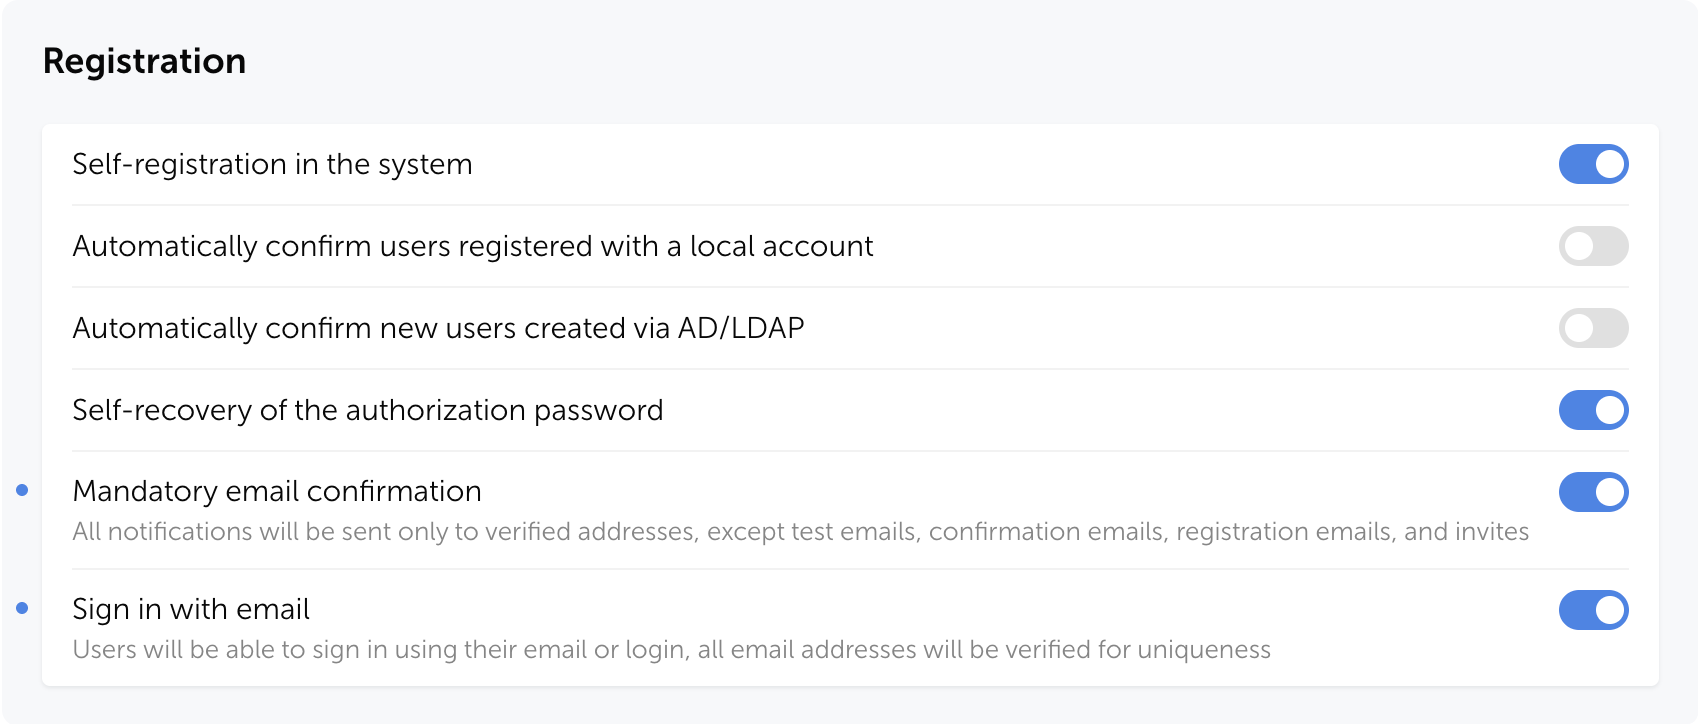
You can enable email-based authentication in Passwork in System settings → Registration→ Sign in with email.
Improvements
- Improved the user filter in the Activity log: search now considers not only the action initiator but also linked users
- Fixed an issue where the folder filter in Security dashboard and Activity log might not include data from nested subfolders when selecting a parent folder
- Added automatic locking of the authentication settings page after 5 minutes of inactivity
- Added an option to set a color for each shortcut individually without changing the color of the initial password
- Added Trusted Proxies support (see documentation for details)
- Made improvements to the UI and localization
Bug fixes
- Fixed an issue where the Edit option in User management was not activated when the "Edit user email" option was enabled in role settings
- Fixed incorrect display of the banner prompting to add a service account on the LDAP server edit page after reloading the page
- Fixed an issue where the Update button in the user edit modal could remain inactive when there were unsaved changes
- Fixed an issue in the setup wizard where an incorrect "Database already exists" message could be displayed on the database connection page
- Fixed an issue where after saving changes in the Vault access or Folder access modal, an incorrect "Discard changes?" message was displayed when attempting to close the window
- Fixed an issue where notifications about failed PIN code entry attempts in the browser extension might not be sent

Passwork 7.3 release
In the new version, we've added support for passkeys and biometrics, an email address verification mechanism for users, the option to specify multiple URLs for a single password, independent shortcut color customization, as well as numerous improvements and fixes.

The city of Melle, a municipality in Lower Saxony with more than 48,000 residents, is recognized for its modern approach to city administration and citizen services. The local government manages a wide range of responsibilities: urban development, education, social care, environmental protection, cultural initiatives, municipal infrastructure, and economic support for the region.
In recent years, Melle has invested heavily in digital transformation, introducing online citizen services, modernizing internal administrative workflows, and improving the technological foundation that supports daily municipal operations. The administration is known for its commitment to transparency, efficiency, and service quality — regularly receiving positive recognition from residents for its well-organized city services and proactive, solutions-oriented governance.
As a city institution, the administration is committed to upholding the highest standards of data protection and operational integrity. The city's IT team continuously seeks to implement modern technologies that streamline workflows, enhance security, and support its employees in their daily tasks. This commitment led them to reevaluate their password management approach, seeking a solution that would meet their security requirements while remaining user-friendly for employees.
Location: Lower Saxony, Germany
Industry: City administration
Company size: 450+ employees
Challenge: Unified password management without security risks

The city administration of Melle recognized a need to improve credential security across employee workflows. Different departments relied on various password management solutions, with most using the one integrated into Microsoft Edge. This resulted in isolated systems with limited central oversight, no visibility into user actions, and inconsistent security standards across the organization.
Beyond security, the IT team wanted to simplify password management for employees. The city administration employs people with varying levels of technical proficiency, so ease of use was just as important as protection.
"That was especially important to us so that we wouldn't have an additional password, another hurdle for people. So really just their Windows password and then the PIN for the browser extension at the end of the day." — Andre Kahlen, system administrator
This meant finding a solution with LDAP support — allowing users to authenticate with their existing Windows credentials and eliminating an additional barrier to adoption. This led the IT team to make a strategic decision to evaluate and introduce a centrally managed, enterprise-grade password management solution.
The main objective was to find a platform that combined three core requirements:
- Security: high security that aligns with strict data protection regulations and internal security policies.
- Usability: exceptional user-friendliness with seamless integration into existing IT infrastructure.
- Control: simple, centralized administration that keeps data accessible while providing fast technical support.
The city of Melle required a service that could unify the workflows across all departments, establish transparent access management, and ensure secure password storage.
Solution: Building a resilient infrastructure

To select a password manager, the IT team conducted a thorough analysis of the available solutions on the market. After careful consideration, they chose Passwork for its security features, granular control, and user-friendly interface — all of which closely matched their criteria.
Passwork's ability to provide centralized control while still offering a secure space for users was beneficial to the IT team. The vault structure was also considered a deciding factor.
"We want to maintain control, since we assign many people, especially those outside of IT, to deal with passwords. One of the advantages of Passwork is centralized management."
This level of control was essential for the municipality, as administrators handle a vast amount of sensitive data and require protection that effectively prevents unauthorized access to confidential information.
The team successfully tested all the declared functions and analyzed database-level security. The decision was based on an intensive three- to four-month testing phase involving about eight members of the IT department. The entire Passwork implementation process, from initial selection to final implementation, took over a year.
Technical Integration

LDAP integration was essential to minimize user friction. After testing, the city administration deployed Passwork within its infrastructure with the following setup:
- LDAP integration for centralized user management based on Active Directory
- The self-hosted solution with an additional instance for employees with heightened security requirements in an isolated network segment
- Snapshot-based and classic backups to ensure data can be quickly restored in case of an incident
"We set up LDAP integration to centrally manage user accounts and permissions, which was highly important. We decided to split the solutions into several instances. Access is heavily restricted this way."
After the successful implementation, the IT team needed to structure the employees' work in the new system.
Organizing work with data in Passwork
The goal was to build a balanced and flexible system that combined control with the freedom of personal information space for employees. The IT team established a clear governance structure:
- Centralized administration — IT admins automatically granted access to all vaults to maintain control
- Personalized training on secure password export and import procedures to ensure safe data migration
- Onboarding sessions for each user during setup to build confidence and ensure smooth adoption
- Clear guidelines on what information belongs in shared organizational vaults and personal vaults
With Passwork, users gained the flexibility to create and organize vaults based on their workflow requirements.
User onboarding
During the rollout, the IT team discovered that centralized training sessions were ineffective — many employees found it challenging to absorb the information all at once. A new method was chosen instead: a personalized approach intended to encourage users to accept the product, use strong, generated passwords, share credentials securely, and learn to use Passwork effectively.
"Passwork adoption is getting very good: employees are taking to new features easily. There is a personal briefing for every user we set up. This also covers security requirements and guides how to effectively utilize the tool. Employees are already organizing their space to fit their structure, thinking about how to design vaults."
Staff always have access to user instructions, and the IT department provides ongoing support to address any questions that arise.
Result: Security and efficiency in workflows

After more than a year in use, the City of Melle remains highly satisfied with Passwork. The solution is actively used by office employees today. The following points were highlighted as particularly positive.
Unified secure space for data storage
The municipality has abandoned browser-based solutions: all passwords are now stored in a secure system with multi-level encryption. Access to them is strictly controlled and logged — this helps prevent leaks and enables incident investigation if necessary.
Positive user acceptance
Many employees have embraced the tool and are proactively thinking about how to structure organizational vaults.
Reliable customer support
The Passwork support team played an important role in the successful implementation and upgrade from version 6 to the recently released Passwork 7.
"Customer support has been excellent so far with its fast responses. I always have answers to my questions, always with the right scripts included or the right syntax I needed to enter, everything already prepared. Perfect."
The City of Melle plans to continue rolling out Passwork until all users are successfully onboarded. The IT team has begun systematically gathering feature requests to refine the system to meet the specific requirements of the city administration's IT infrastructure and to ensure it aligns with their operational needs.
Conclusion

Passwork has improved the internal security at the City of Melle by creating a reliable system for password management. Through careful evaluation and a security-focused implementation strategy, the deployment proceeded smoothly. A tailored onboarding approach drove high user adoption, while the platform's reliability and responsive technical support solidified its position as an essential tool in daily administrative operations.


The city of Melle: How Passwork сentralized password management

Password management is the practice of securely creating, storing, organizing, and controlling access to passwords and other authentication credentials. It combines human processes with specialized software tools to ensure that every account uses a strong, unique password without requiring users to memorize them all.
Whether you're an individual trying to secure your online life or an IT administrator protecting your organization's digital assets, understanding password management is essential.
This guide explains everything you need to know: what password management is, why it matters, how it works, and how to implement it effectively. You'll learn about different types of password managers, key features to look for, and best practices that protect you from the most common security threats.
Understanding password management
At its core, password management addresses a fundamental challenge: humans are terrible at creating and remembering secure passwords. We default to predictable patterns, recycle familiar combinations across accounts, and prioritize convenience over security.
Password management systems compensate for these inherent limitations by assuming the cognitive burden and complexity on our behalf. As both a practice and a technology, password management encompasses several key functions:
- Password generation: Creating strong, random passwords that meet security requirements and resist common attack methods like brute force and dictionary attacks.
- Secure storage: Encrypting and storing passwords in a protected vault that only authorized users can access.
- Organization: Categorizing and managing credentials across hundreds of accounts, making them easy to find when needed.
- Access control: Determining who can access which passwords, particularly important in team and enterprise environments.
- Autofill and automation: Automatically entering credentials into login forms, reducing friction while maintaining security.
- Audit trails: Recording who accessed which credentials and when, allowing security teams to detect suspicious activity, investigate incidents, and maintain compliance with regulatory requirements.
Password management has evolved from rudimentary practices to sophisticated security infrastructure. The first generation of digital password managers introduced basic encryption (like Blowfish algorithm) and centralized storage, addressing immediate security gaps but lacking the granular controls enterprises required.
Modern password management systems represent a fundamental shift: they combine military-grade encryption, zero-knowledge architecture, role-based access controls, and comprehensive audit capabilities. Today's solutions enforce security policies, detect anomalies, integrate with existing infrastructure, and provide the visibility organizations need to maintain compliance and respond to threats in real time.
Why is password management important?
According to Verizon's 2025 Data Breach Investigations Report, stolen credentials served as the initial access vector in 22% of all confirmed breaches, with that figure jumping to 88% for basic web application attacks.
In the first half of 2025 alone, over 8,000 global data breaches exposed approximately 345 million records, demonstrating the persistent and catastrophic scale of credential-based attacks. Behind these statistics lies a fundamental incompatibility between human cognition and modern security demands.
The human factor
Our brains simply weren't designed for this pace of information. Psychological research shows that humans can reliably remember only 7±2 pieces of data in working memory. Yet we're expected to manage hundreds of unique, complex passwords — each a random string of uppercase letters, lowercase letters, numbers, and symbols.
Faced with this impossible task, people develop coping mechanisms that undermine security:
- Predictable patterns: Adding "123" or "!" to meet complexity requirements.
- Password reuse: Over 60% of people reuse passwords across multiple accounts.
- Writing passwords down: Sticky notes on monitors remain surprisingly common.
- Simple passwords: "password," "123456," and "qwerty" still rank among the most common passwords globally.
This behavior isn't laziness. It's a rational response to an overwhelming cognitive burden. Password fatigue is real, and it leads to security shortcuts.
The consequences of poor password hygiene
When password security fails, the consequences cascade:
- For individuals: Identity theft, financial fraud, privacy violations, and the time-consuming process of recovering compromised accounts. The average victim of identity theft spends 200 hours resolving the issue.
- For businesses: Data breaches cost an average of $4.44 million per incident, according to IBM's Cost of a Data Breach Report. Beyond direct financial losses, organizations face regulatory fines, legal liability, reputational damage, and loss of customer trust.
- For IT teams: Password-related help desk tickets consume 20-50% of IT support resources in typical organizations. Every "forgot password" request represents time that could be spent on strategic initiatives.
The benefits of effective password management
Implementing proper password management delivers measurable improvements:
- Enhanced security: Unique, strong passwords for every account eliminate the domino effect of credential reuse. Even if one password is compromised, your other accounts remain secure.
- Reduced cognitive load: You remember one master password instead of hundreds. The mental relief is immediate and significant.
- Time savings: Autofill eliminates the minutes spent typing or resetting passwords. For organizations, this translates to thousands of hours of productivity annually.
- Compliance support: Many regulations (GDPR, HIPAA, SOC 2) require organizations to demonstrate proper credential management. Password managers provide the audit trails and controls needed for compliance.
- Improved user experience: Seamless access to accounts without the friction of password resets or account lockouts.
How does password management work?
Understanding the mechanics of password management helps you appreciate both its security and its usability. Modern password managers balance strong encryption with user-friendly access.
The master password concept
Everything starts with your master password — the single password you need to remember. This password unlocks your encrypted vault containing all your other credentials.
Many users create master passwords using passphrases, random words strung together like correct-horse-battery-staple, which are both secure and memorable.
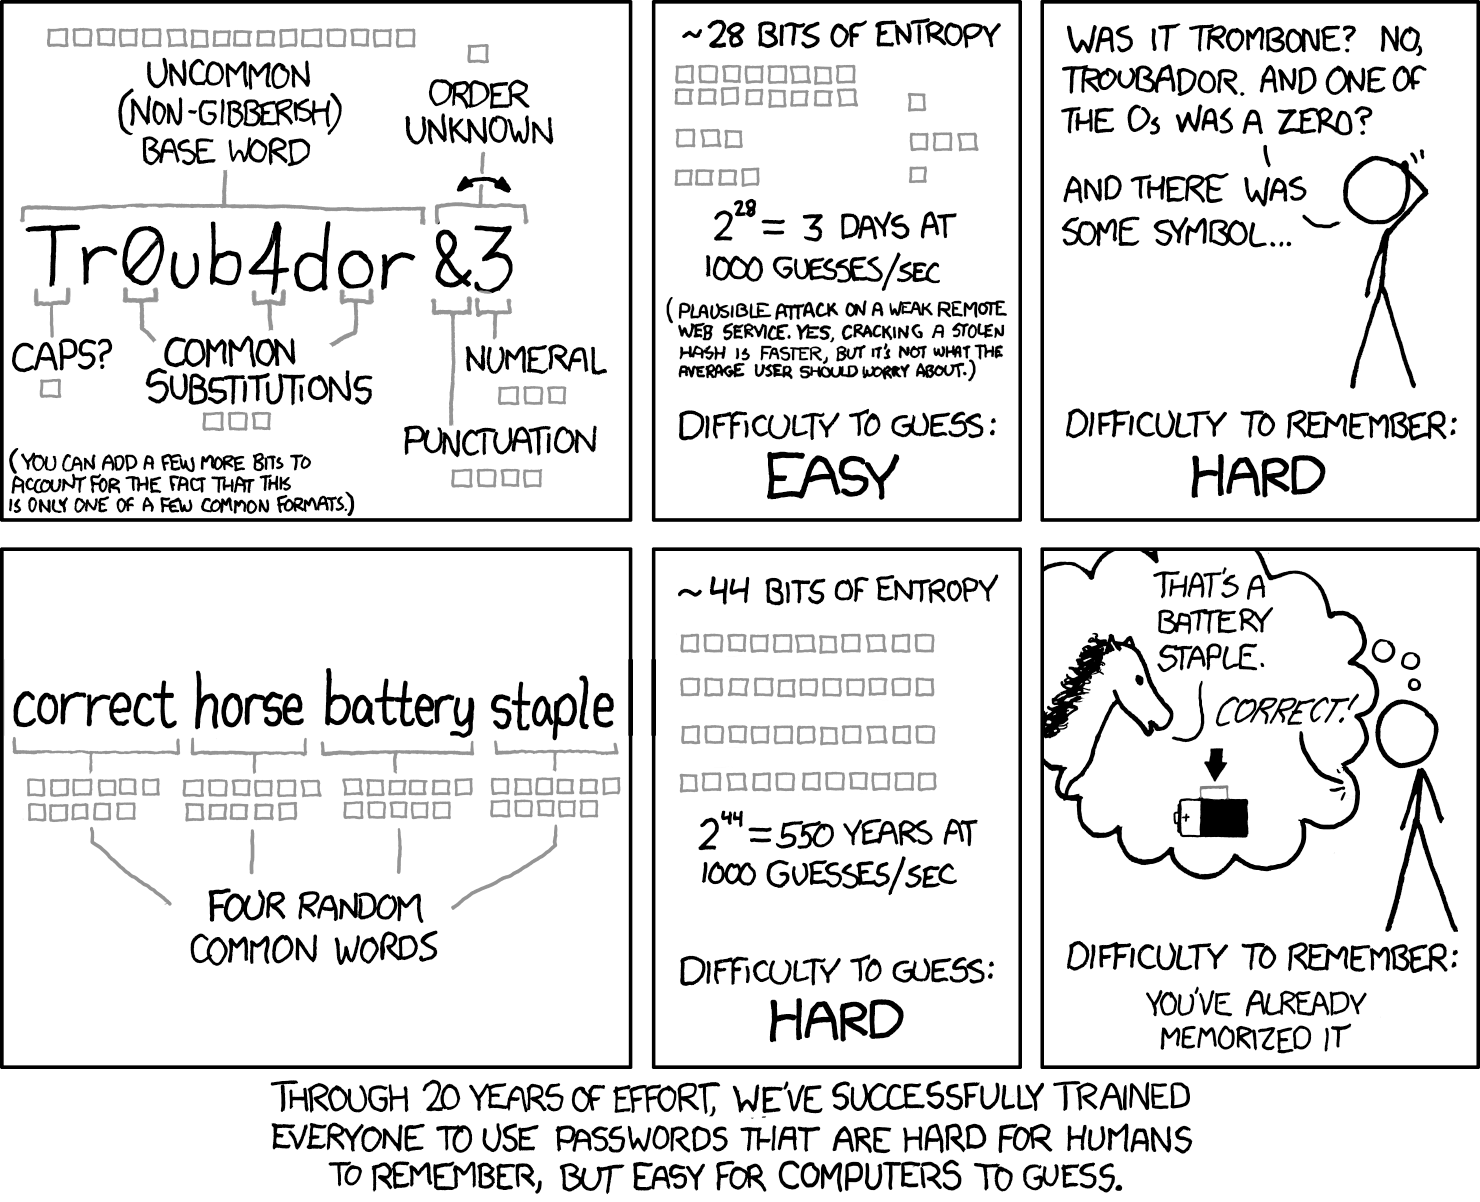
The XKCD comic that popularized this concept demonstrated a crucial insight: four or five random common words create more entropy (randomness) than a shorter complex password, while being far easier to remember.
The encrypted vault
Your password vault is an encrypted database that stores all your credentials, notes, and other sensitive information. Modern password managers use AES-256 encryption, the same standard used by governments and militaries worldwide.
Here's what makes it secure:
- Encryption at rest: Your data is encrypted before it leaves your device. Even the password manager company cannot read your vault contents.
- Zero-knowledge architecture: The service provider never has access to your master password or unencrypted data. If their servers are breached, your passwords remain protected.
- Encryption in transit: When syncing across devices, your encrypted vault travels through secure channels (TLS/SSL), adding another layer of protection.
The user journey
Here's how password management works in practice:
- Initial setup: You create your master password, set up your account and security settings — multi-factor authentication, access controls, and vault parameters.
- Adding passwords: As you log into existing accounts, the password manager detects login forms and offers to save your credentials. You can also manually add passwords or import them from browsers or other password managers.
- Password generation: When creating new accounts, the password manager generates strong, random passwords according to the site's requirements. You never need to think about password creation again.
- Autofill: When you visit a login page, the password manager recognizes the site and offers to fill in your credentials. One click, and you're logged in.
- Syncing: Your encrypted vault syncs across all your devices — phone, tablet, laptop, desktop. Changes made on one device appear everywhere.
- Secure sharing: When you need to share credentials with family members or team members, the password manager encrypts and transmits them securely, without exposing them in plain text.
Types of password managers
Password managers vary significantly in architecture, security model, and deployment options. Understanding these differences is essential for selecting the right solution.
Browser-based password managers
Built into web browsers like Chrome, Firefox, Safari, and Edge, these password managers offer basic functionality without additional software.
Pros:
- Free and immediately available
- Seamless integration with the browser
- Automatic syncing across devices using the same browser
- No learning curve
Cons:
- Limited to browser-only passwords
- Basic security features compared to dedicated solutions
- Vulnerable if browser account is compromised
- Limited sharing capabilities
- Inconsistent cross-browser functionality
Best for: Casual users with simple needs who primarily use one browser ecosystem.
Standalone password managers
These applications store your encrypted password vault locally on your device rather than in the cloud. Designed for individual use, they prioritize local control over multi-device convenience.
Pros:
- Complete control over your data
- No reliance on cloud services
- Works offline
- Maximum privacy
Cons:
- Manual syncing across devices
- Risk of data loss if device fails without backups
- Less convenient for multi-device users
- Requires more technical knowledge
Best for: Privacy-conscious users, those with limited internet connectivity, or anyone who prefers local data storage.
Cloud-based password managers
The most popular category, these services store your encrypted vault on their servers and sync it across all your devices.
Pros:
- Seamless syncing across unlimited devices
- Accessible from anywhere with internet
- Automatic backups
- Rich feature sets (sharing, auditing, breach monitoring)
- User-friendly interfaces
- Mobile apps with biometric authentication
Cons:
- Requires trust in the service provider
- Subscription costs for premium features
- Dependent on internet connectivity
- Potential target for attackers (though encryption protects data)
Best for: Most individual users, families, and small teams who want convenience and comprehensive features.
Enterprise password managers
Designed for organizations, these solutions add administrative controls, compliance features, integration with corporate systems and are deployed on-premise. This architecture eliminates dependencies on external providers. You define the security perimeter, manage access controls, and maintain complete operational independence.
Pros:
- Complete data sovereignty
- Zero external dependencies or cloud service providers
- Automatic compliance with data residency regulations
- Integration with Active Directory, LDAP, and SSO systems
- Centralized administration with granular policy enforcement
- Role-based access controls and privileged access management
- Comprehensive audit logs and compliance reporting
- Automated onboarding/offboarding workflows
- Protection from provider-side security incidents
Cons:
- Higher upfront infrastructure and licensing costs
- More complex setup and administration
- May require IT expertise
- Organization manages backups and disaster recovery
Best for: Businesses of all sizes, IT teams managing shared credentials, organizations with compliance requirements.
Key features of password managers
Modern password managers offer far more than basic password storage. Understanding these features helps you evaluate solutions and maximize their value.
Core features
- Password generation: Creates strong, random passwords based on customizable criteria (length, character types, symbol inclusion). The best generators create passwords that resist brute force attacks for centuries.
- Secure storage: Encrypted vault for passwords, with many managers also storing secure notes, credit card information, identity documents, and other sensitive data.
- Autofill: Automatically detects login forms and fills credentials with one click or tap. Advanced autofill distinguishes between similar sites to prevent phishing attacks.
- Cross-platform syncing: Keeps your vault synchronized across Windows, macOS, Linux, iOS, Android, and web browsers.
- Browser extensions: Integrations for Chrome, Firefox, Safari, Edge, and other browsers that enable autofill and password capture.
- Mobile apps: Full-featured applications for smartphones and tablets, often with biometric authentication.
Security features
- Multi-factor authentication (MFA): Adds a second verification step beyond your master password. Options include authenticator apps (TOTP), SMS codes, hardware keys (YubiKey), or biometric verification.
- Biometric authentication: Unlock your vault using fingerprint, face recognition, or other biometric methods on supported devices.
- Security dashboard: Analyzes your passwords and identifies:
- Weak passwords that don't meet security standards
- Reused passwords across multiple accounts
- Old passwords that haven't been changed recently
- Zero-knowledge architecture: Ensures that even the password manager company cannot access your unencrypted data.
- Emergency access: Designates trusted contacts who can access your vault after a waiting period if you become incapacitated.
Sharing and collaboration features
- Secure sharing: Share individual passwords or entire folders with family members or team members without exposing passwords in plain text.
- Team accounts: Organize passwords by department, project, or access level with role-based permissions.
- Access controls: Define who can view, use, or modify specific passwords.
- Sharing history: Track when passwords were shared, accessed, or modified.
Advanced features
- Password history: Maintains previous versions of passwords, allowing you to revert if needed.
- Secure notes: Store sensitive information beyond passwords — software licenses, WiFi credentials, server details, recovery codes.
- File attachments: Attach encrypted files to vault items (contracts, certificates, documents).
- API access: For developers and power users, programmatic access to the password manager.
- CLI tools: Command-line interfaces for integrating password management into development workflows.
- Audit logs: Detailed records of all vault activities for security monitoring and compliance.
Password management best practices
Having a password manager is only the first step. Following these best practices ensures you're using it effectively and securely.
1. Create an unbreakable master password
Your master password is the single point of failure for your entire password security. Make it count:
- Use at least 16 characters (longer is better)
- Combine random words into a memorable passphrase
- Avoid personal information (names, dates, addresses)
- Never reuse a password you've used anywhere else
2. Enable multi-factor authentication
Add a second layer of security to your password manager account. Even if someone discovers your master password, they can't access your vault without the second factor. Authenticator apps (Passwork 2FA, Google Authenticator, Authy) are more secure than SMS codes. Hardware security keys (YubiKey) offer the strongest protection.
3. Use unique passwords for every account
This is the fundamental rule of password security. Your password manager makes it effortless — let it generate a unique password for each account. If one site is breached, your other accounts remain secure.
4. Generate long, complex passwords
When creating passwords, maximize length and complexity:
- Aim for 16-20 characters minimum
- Use all character types (uppercase, lowercase, numbers, symbols)
- Let the password manager generate them randomly
5. Conduct regular password audits
Schedule quarterly reviews using your password manager's security dashboard:
- Update weak passwords
- Eliminate reused passwords
- Change old passwords (especially for critical accounts)
- Remove passwords for accounts you no longer use
6. Respond immediately to breach alerts
When your password manager notifies you of a compromised password, change it immediately. Don't wait, breached credentials are often exploited within hours.
7. Organize your vault thoughtfully
Create a logical structure:
- Use folders or tags to categorize passwords (Work, Personal, Finance, etc.)
- Add notes to passwords with security questions, account numbers, or other relevant information
- Mark critical accounts for easy identification
8. Back up your vault regularly
While cloud-based password managers handle backups automatically, consider:
- Exporting an encrypted backup periodically
- Storing the backup in a separate secure location
- Testing your backup to ensure it works
9. Set up emergency access
Designate a trusted person who can access your vault if something happens to you. Most password managers offer emergency access features with configurable waiting periods.
10. Use secure sharing features
When sharing passwords with team members:
- Use the password manager's built-in sharing features
- Never send passwords via email, text, or messaging apps
- Revoke access immediately when no longer needed
- Regularly review who has access to shared passwords
11. Keep your password manager updated
Enable automatic updates to ensure you have the latest security patches and features. This applies to browser extensions, mobile apps, and desktop applications.
12. Avoid common mistakes
- Don't store your master password in your vault (circular dependency)
- Don't share your master password with anyone, ever
- Don't use password manager autofill on public or shared computers
- Don't ignore security warnings from your password manager
- Don't assume you're completely secure — stay vigilant
Frequently Asked Questions

Are password managers safe?
Yes, when properly implemented, password managers are significantly safer than the alternatives (reusing passwords, writing them down, or using weak passwords). They use military-grade AES-256 encryption and zero-knowledge architecture, meaning even the password manager company cannot access your unencrypted data. While no system is 100% invulnerable, password managers have proven track records and are recommended by security experts, including the NSA and CISA.
Can password managers be hacked?
While password managers can theoretically be targeted by attackers, successful attacks are extremely rare and typically require sophisticated techniques. The encryption used is virtually unbreakable with current technology. Most "password manager breaches" you hear about involve compromised user accounts (weak master passwords, no MFA) rather than flaws in the password manager itself. Using a strong master password and enabling multi-factor authentication makes your password manager highly resistant to attacks.
Should I use a free or paid password manager?
Free password managers provide adequate security for basic needs. Paid password managers offer additional features like advanced sharing, priority support, dark web monitoring, and more storage. For individuals, free options are often sufficient. For families and businesses, paid plans provide better collaboration tools and administrative controls. The most important factor is choosing a reputable password manager and using it consistently, regardless of whether it's free or paid.
Can I share passwords safely with family or team members?
Yes, modern password managers include secure sharing features that encrypt passwords before transmission. You can share individual passwords or entire folders with specific people, and you can revoke access at any time. This is far safer than sending passwords via email, text, or messaging apps. Family plans typically allow each person to have their own vault plus shared family folders. Business plans offer more granular permission controls.
Do I need a password manager if I use two-factor authentication?
Yes. Two-factor authentication (2FA) and password managers serve complementary purposes. 2FA adds a second verification step beyond your password, providing protection even if your password is compromised. However, you still need strong, unique passwords for each account — which is what password managers provide. In fact, many password managers can also store and autofill 2FA codes, making the combination even more convenient.
Can I use a password manager on public or shared computers?
It's generally not recommended to use your password manager on public computers (libraries, internet cafes) or shared computers (hotel business centers) due to the risk of keyloggers or other malware. If you must access accounts from a public computer, use your password manager's web vault in a private/incognito browser window, log out completely when finished, and change your master password afterward.
Conclusion
Password management isn't optional anymore — it's essential infrastructure for digital life. The average person manages hundreds of accounts, each requiring secure authentication. Trying to remember unique, strong passwords for every account is impossible, and the alternatives — password reuse, weak passwords, or written notes — create serious security vulnerabilities.
Password managers solve this problem. They generate strong passwords, store them securely with military-grade encryption, and autofill them when needed. You remember one master password; the password manager handles everything else.
The benefits extend beyond security. Password managers save time, reduce frustration, improve productivity, and support compliance requirements. For businesses, they reduce help desk burden and protect against the costly consequences of data breaches.
With on-premise deployment at its core, Passwork ensures complete data ownership, zero-knowledge encryption, and compliance with industry regulations — backed by ISO 27001 certification.
Further reading


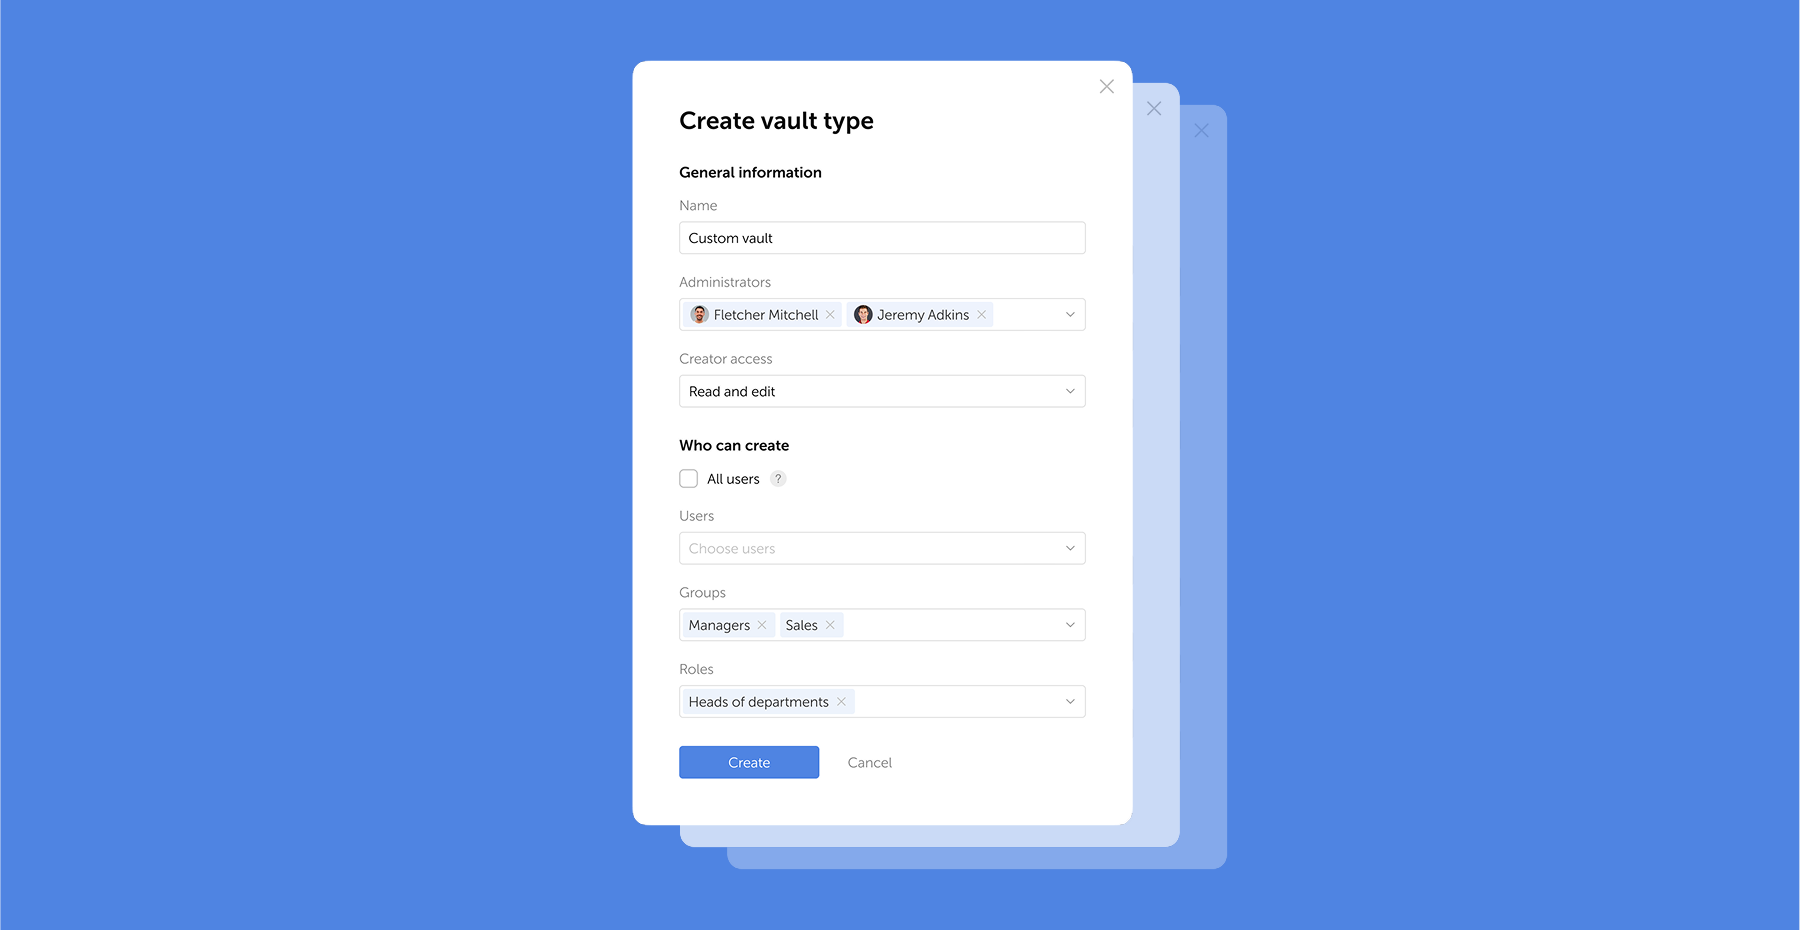
What is password management?

Every time you connect to a Wi-Fi network, send a message through an encrypted app, or access your bank account online, you're relying on encryption to keep your data safe. At the heart of this digital security infrastructure stands the Advanced Encryption Standard (AES) — the encryption algorithm trusted by everyone from individual users to intelligence agencies protecting classified information.
AES is a symmetric-key encryption algorithm that transforms readable data (plaintext) into an unreadable format (ciphertext) using a secret key. Since its adoption by the National Institute of Standards and Technology (NIST) in 2001, AES has become the global standard for data encryption, trusted by governments, financial institutions, and technology companies worldwide.
This guide will walk you through everything you need to know about AES: from its fundamental principles to advanced implementation strategies, regulatory compliance, and its resilience against emerging quantum computing threats.
What is the Advanced Encryption Standard (AES)?
The Advanced Encryption Standard (AES) is a symmetric-key block cipher that encrypts data in fixed-size blocks of 128 bits using keys of 128, 192, or 256 bits. Originally known as the Rijndael cipher, AES was developed by Belgian cryptographers Vincent Rijmen and Joan Daemen and selected by NIST in 2001 to replace the aging Data Encryption Standard (DES).
Unlike asymmetric encryption algorithms such as RSA, which use different keys for encryption and decryption, AES uses the same secret key for both operations. This symmetric approach makes AES exceptionally fast and efficient, particularly for encrypting large volumes of data.
The U.S. National Security Agency (NSA) approved AES-256 for protecting information classified as TOP SECRET, cementing its status as a military-grade encryption standard. Today, AES is mandated by the Federal Information Processing Standard (FIPS 197) and has been adopted globally as the de facto encryption standard for both commercial and government applications.
From DES to AES: A brief history
By the mid-1990s, the Data Encryption Standard (DES), which had served as the primary encryption standard since 1977, was showing its age. With a key length of only 56 bits, DES had become vulnerable to brute-force attacks as computing power increased. In 1997, NIST launched a public competition to select a new encryption standard that would be secure, efficient, and flexible enough to meet the needs of the 21st century.
The AES competition attracted 15 submissions from cryptographers around the world. After three years of rigorous analysis, testing, and public scrutiny, the Rijndael cipher emerged as the winner. NIST officially adopted AES as a federal standard in November 2001, and it was published as FIPS 197 in December of that year.
The selection of Rijndael was based on its superior combination of security, performance, and versatility. Unlike many competing algorithms, Rijndael could efficiently operate on various hardware platforms — from high-performance servers to resource-constrained embedded systems — while maintaining strong cryptographic properties.
How AES encryption works?

AES operates as a substitution-permutation network, performing multiple rounds of transformations on the data. The number of rounds depends on the key size: 10 rounds for AES-128, 12 rounds for AES-192, and 14 rounds for AES-256.
Before encryption begins, the algorithm expands the original key into a series of round keys through a process called key expansion. Each round then applies four distinct operations to scramble the data:
- SubBytes: This step provides non-linear substitution by replacing each byte in the data block with a corresponding value from a fixed substitution table called the S-box. This operation is crucial for AES's resistance to cryptanalysis, as it introduces confusion into the encryption process.
- ShiftRows: The bytes in each row of the data matrix are cyclically shifted by different offsets. The first row remains unchanged, the second row shifts one position to the left, the third row shifts two positions, and the fourth row shifts three positions. This operation provides diffusion by spreading the data across the entire block.
- MixColumns: Each column of the data matrix is transformed using a mathematical operation in the Galois Field GF(2^8). This step combines the bytes within each column, ensuring that changes to a single input byte affect multiple output bytes. The MixColumns operation is skipped in the final round.
- AddRoundKey: The round key is combined with the data block using a bitwise XOR operation. This step incorporates the secret key material into the encrypted data, ensuring that without the correct key, the ciphertext cannot be decrypted.
After all rounds are complete, the output is the encrypted ciphertext. Decryption reverses this process using inverse operations in the opposite order.
AES key sizes: 128, 192, or 256 Bits?
AES supports three key lengths, each offering different levels of security and performance characteristics:
- AES-128 uses a 128-bit key and performs 10 encryption rounds. It provides 128 bits of security, which translates to 2^128 possible key combinations — approximately 340 undecillion possibilities. For context, testing one billion keys per second would require billions of years to exhaust all possibilities. AES-128 is suitable for most commercial applications and offers the best performance of the three variants.
- AES-192 uses a 192-bit key and performs 12 rounds. While less commonly implemented than AES-128 or AES-256, it offers an intermediate security level for organizations that want additional protection without the performance overhead of AES-256.
- AES-256 uses a 256-bit key and performs 14 rounds. Often referred to as "military-grade encryption," AES-256 is approved by the NSA for protecting TOP SECRET information. The 256-bit key space provides 2^256 possible combinations, making it computationally infeasible to break through brute-force attacks, even with future advances in computing technology.
For most applications, AES-128 provides more than adequate security. However, organizations handling highly sensitive data, operating in regulated industries, or concerned about long-term data protection often choose AES-256. The performance difference between AES-128 and AES-256 is minimal on modern hardware, particularly on processors with AES-NI (AES New Instructions) hardware acceleration.
Understanding AES modes of operation
While AES encrypts data in 128-bit blocks, real-world applications typically need to encrypt data that's much larger than a single block. Modes of operation define how AES processes multiple blocks of data and how it handles data that doesn't fit evenly into 128-bit blocks.
- ECB (Electronic Codebook) is the simplest mode, encrypting each block independently with the same key. However, ECB has a critical weakness: identical plaintext blocks produce identical ciphertext blocks, revealing patterns in the encrypted data. ECB should never be used for encrypting anything beyond single blocks of random data.
- CBC (Cipher Block Chaining) addresses ECB's weakness by XORing each plaintext block with the previous ciphertext block before encryption. This creates a chain effect where each block depends on all previous blocks. CBC requires an initialization vector (IV) — a random value used to encrypt the first block. While CBC is widely used and secure when implemented correctly, it cannot be parallelized and is vulnerable to padding oracle attacks if not properly implemented.
- GCM (Galois/Counter Mode) is the recommended mode for most modern applications. GCM combines the counter mode of encryption with Galois field multiplication to provide both confidentiality and authentication. Unlike CBC, GCM can be parallelized for better performance and produces an authentication tag that verifies data integrity. This authenticated encryption approach protects against tampering and certain types of attacks that can compromise CBC implementations.
- CTR (Counter Mode) turns AES into a stream cipher by encrypting a counter value and XORing the result with the plaintext. CTR mode is parallelizable and doesn't require padding, making it efficient for high-performance applications. However, CTR alone doesn't provide authentication, so it's often combined with a separate authentication mechanism.
For new implementations, security experts recommend using AES-GCM. Its combination of encryption and authentication in a single operation, along with its performance characteristics, makes it the preferred choice for protocols like TLS 1.3, IPsec, and modern VPN implementations.
Why AES remains the global standard

More than two decades after its adoption, AES continues to dominate the encryption landscape for several compelling reasons:
- Unbroken Security: Despite extensive cryptanalysis by researchers worldwide, no practical attack has been found that can break properly implemented AES encryption. The best known attacks against AES-256 are theoretical and require computational resources far beyond anything currently available.
- Exceptional Performance: AES is designed for efficiency on both hardware and software implementations. Modern processors include dedicated AES-NI instructions that accelerate AES operations by up to 10 times compared to software-only implementations. The hardware encryption market, which includes AES-accelerated processors, is projected to grow from $359.5 million in 2025 to $698.7 million by 2032.
- Widespread Adoption: According to a 2025 survey, 46.2% of U.S. Managed Service Providers favor AES as their primary encryption method. This widespread adoption creates a virtuous cycle: more implementations lead to better-tested code, more hardware support, and increased interoperability.
- Regulatory Compliance: AES is mandated or recommended by numerous regulatory frameworks, including FIPS 197, GDPR, HIPAA, and PCI DSS. This regulatory acceptance makes AES the safe choice for organizations operating in regulated industries.
Real-world applications of AES
AES encryption protects data across virtually every digital domain:
- Network Security: AES secures internet communications through HTTPS (using TLS/SSL protocols), protects VPN connections, and encrypts Wi-Fi networks through WPA2 and WPA3 standards. Every time you see a padlock icon in your browser, AES is likely protecting your data in transit.
- Data Storage: Operating systems use AES for full-disk encryption (BitLocker on Windows, FileVault on macOS, LUKS on Linux). Cloud storage providers encrypt data at rest using AES-256, with the cloud encryption market holding a 69% share in 2024.
- Mobile Devices: Smartphones use AES to encrypt stored data, secure messaging applications, and protect mobile payment transactions. The encryption happens transparently in the background, with dedicated hardware accelerators ensuring minimal impact on battery life.
- Financial Services: Banks and payment processors rely on AES to protect financial transactions, secure ATM communications, and encrypt sensitive customer data. The Payment Card Industry Data Security Standard (PCI DSS) specifically requires strong encryption for cardholder data.
- Healthcare: Medical institutions use AES-256 to protect electronic Protected Health Information (ePHI) as required by HIPAA regulations. The 2025 HIPAA updates mandate encryption for ePHI, with AES as the de facto standard and requirements for Hardware Security Modules (HSMs) for key management.
- Password Managers: Modern password managers like Passwork rely on AES-256 encryption to protect your stored credentials, ensuring that even if someone gains access to your password vault file, they cannot read its contents without your master password.
- Government and Military: AES-256 is approved for protecting classified information up to the TOP SECRET level, making it the encryption standard for government communications, military operations, and intelligence agencies.
AES and regulatory compliance
For organizations operating in regulated industries, AES encryption is often a compliance requirement:
- FIPS 197 is the official NIST standard that defines AES. Organizations working with the U.S. federal government must use FIPS 197-validated cryptographic modules, ensuring that their AES implementations meet rigorous security standards.
- GDPR requires organizations to implement "appropriate technical and organizational measures" to protect personal data. While GDPR doesn't mandate specific encryption algorithms, AES-256 is widely recognized as meeting the regulation's requirements for strong encryption.
- HIPAA mandates encryption for electronic Protected Health Information (ePHI). The 2025 HIPAA updates specifically require encryption both in transit and at rest, with AES-256 recommended as the standard and HSMs required for secure key management.
- PCI DSS requires merchants and service providers to encrypt cardholder data during transmission and storage. AES is explicitly mentioned as an acceptable encryption algorithm for meeting PCI DSS
The future of AES: Quantum computing and beyond
The emergence of quantum computing has raised questions about the future of encryption. Quantum computers leverage quantum mechanical phenomena to perform certain calculations exponentially faster than classical computers. Shor's algorithm, running on a sufficiently powerful quantum computer, could break RSA and other asymmetric encryption schemes that rely on the difficulty of factoring large numbers.
However, symmetric encryption algorithms like AES are significantly more resistant to quantum attacks. The primary quantum threat to AES comes from Grover's algorithm, which can search through possible keys faster than classical brute-force attacks. Grover's algorithm effectively halves the security level of symmetric encryption — meaning AES-256 would provide 128 bits of security against quantum attacks, and AES-128 would provide 64 bits.
This is why security experts recommend AES-256 for data that needs long-term protection. Even in a post-quantum world, AES-256 will remain secure, providing the equivalent of 128-bit security — still far beyond the reach of any conceivable quantum computer.
In August 2024, NIST released the first three finalized Post-Quantum Cryptography (PQC) standards: FIPS 203, 204, and 205. These standards focus on quantum-resistant asymmetric algorithms for key exchange and digital signatures. The recommended approach for the quantum era is hybrid encryption: using post-quantum algorithms to securely exchange keys, then using AES to encrypt the actual data.
Frequently Asked Questions

Is AES encryption breakable?
No practical attack exists that can break properly implemented AES encryption. The best known attacks are theoretical and require resources far beyond current capabilities. AES-256, in particular, is considered computationally infeasible to break through brute-force methods.
How long would it take to crack AES-256?
Using current technology, a brute-force attack on AES-256 would require testing 2^256 possible keys. Even if you could test one trillion keys per second, it would take longer than the age of the universe to try all possibilities.
What is the difference between AES and RSA?
AES is a symmetric encryption algorithm that uses the same key for encryption and decryption, making it fast and efficient for encrypting large amounts of data. RSA is an asymmetric algorithm that uses different keys for encryption and decryption, making it suitable for secure key exchange and digital signatures but much slower than AES.
Can quantum computers break AES?
Quantum computers pose less threat to AES than to asymmetric algorithms like RSA. While Grover's algorithm can speed up brute-force attacks, it only halves the effective key length. AES-256 remains secure even against quantum attacks, providing 128 bits of effective security.
What is the best AES mode to use?
For most modern applications, AES-GCM is the recommended mode. It provides both encryption and authentication, can be parallelized for better performance, and is the standard mode used in TLS 1.3 and other modern protocols.
Is AES-128 still secure in 2025?
Yes, AES-128 remains secure for most applications. It provides 128 bits of security, which is computationally infeasible to break with current or foreseeable technology. However, organizations handling highly sensitive data or concerned about long-term protection often choose AES-256.
Conclusion
The Advanced Encryption Standard has proven to be one of the most successful cryptographic standards in history. More than two decades after its adoption, AES remains unbroken, widely implemented, and continues to protect the vast majority of encrypted data worldwide.
As we move into an era of quantum computing and increasingly sophisticated cyber threats, AES-256 stands ready to continue its role as the workhorse of data encryption. Its combination of strong security, excellent performance, and regulatory acceptance ensures that AES will remain the encryption standard of choice for years to come.
Whether you're a developer implementing encryption in your applications, a business leader ensuring compliance, or simply someone who wants to understand how your data is protected, AES represents the gold standard in modern cryptography. By using strong encryption, maintaining secure key management practices, and staying informed about emerging threats, you can leverage AES to protect your most sensitive data in an increasingly connected world.

Guide to Advanced Encryption Standard (AES)

Passwork 7.2.4 update is available in the Customer portal.
- Fixed an issue in the Security dashboard where the threat warning about a password being viewed via an expired link disappeared after deleting that link: the threat warning now persists until the password is changed
- Fixed an issue where after setting up 2FA, authentication apps (e.g., Google Authenticator) displayed incorrect text instead of the user's login
- Fixed PIN logic in the browser extension: now when a PIN is deleted or after three failed attempts, only the current session is reset
- Fixed an issue where the Enter key was incorrectly handled in the "Background task history retention period" field
- Fixed an issue where a folder would only open after double-clicking on its name
- Fixed an issue where email notifications could be sent to blocked and unconfirmed users when vault access was changed
- Fixed an issue where the directory filter reset button did not work in the Activity log
- Minor improvements to UI and localization
Passwork 7.2.4 release
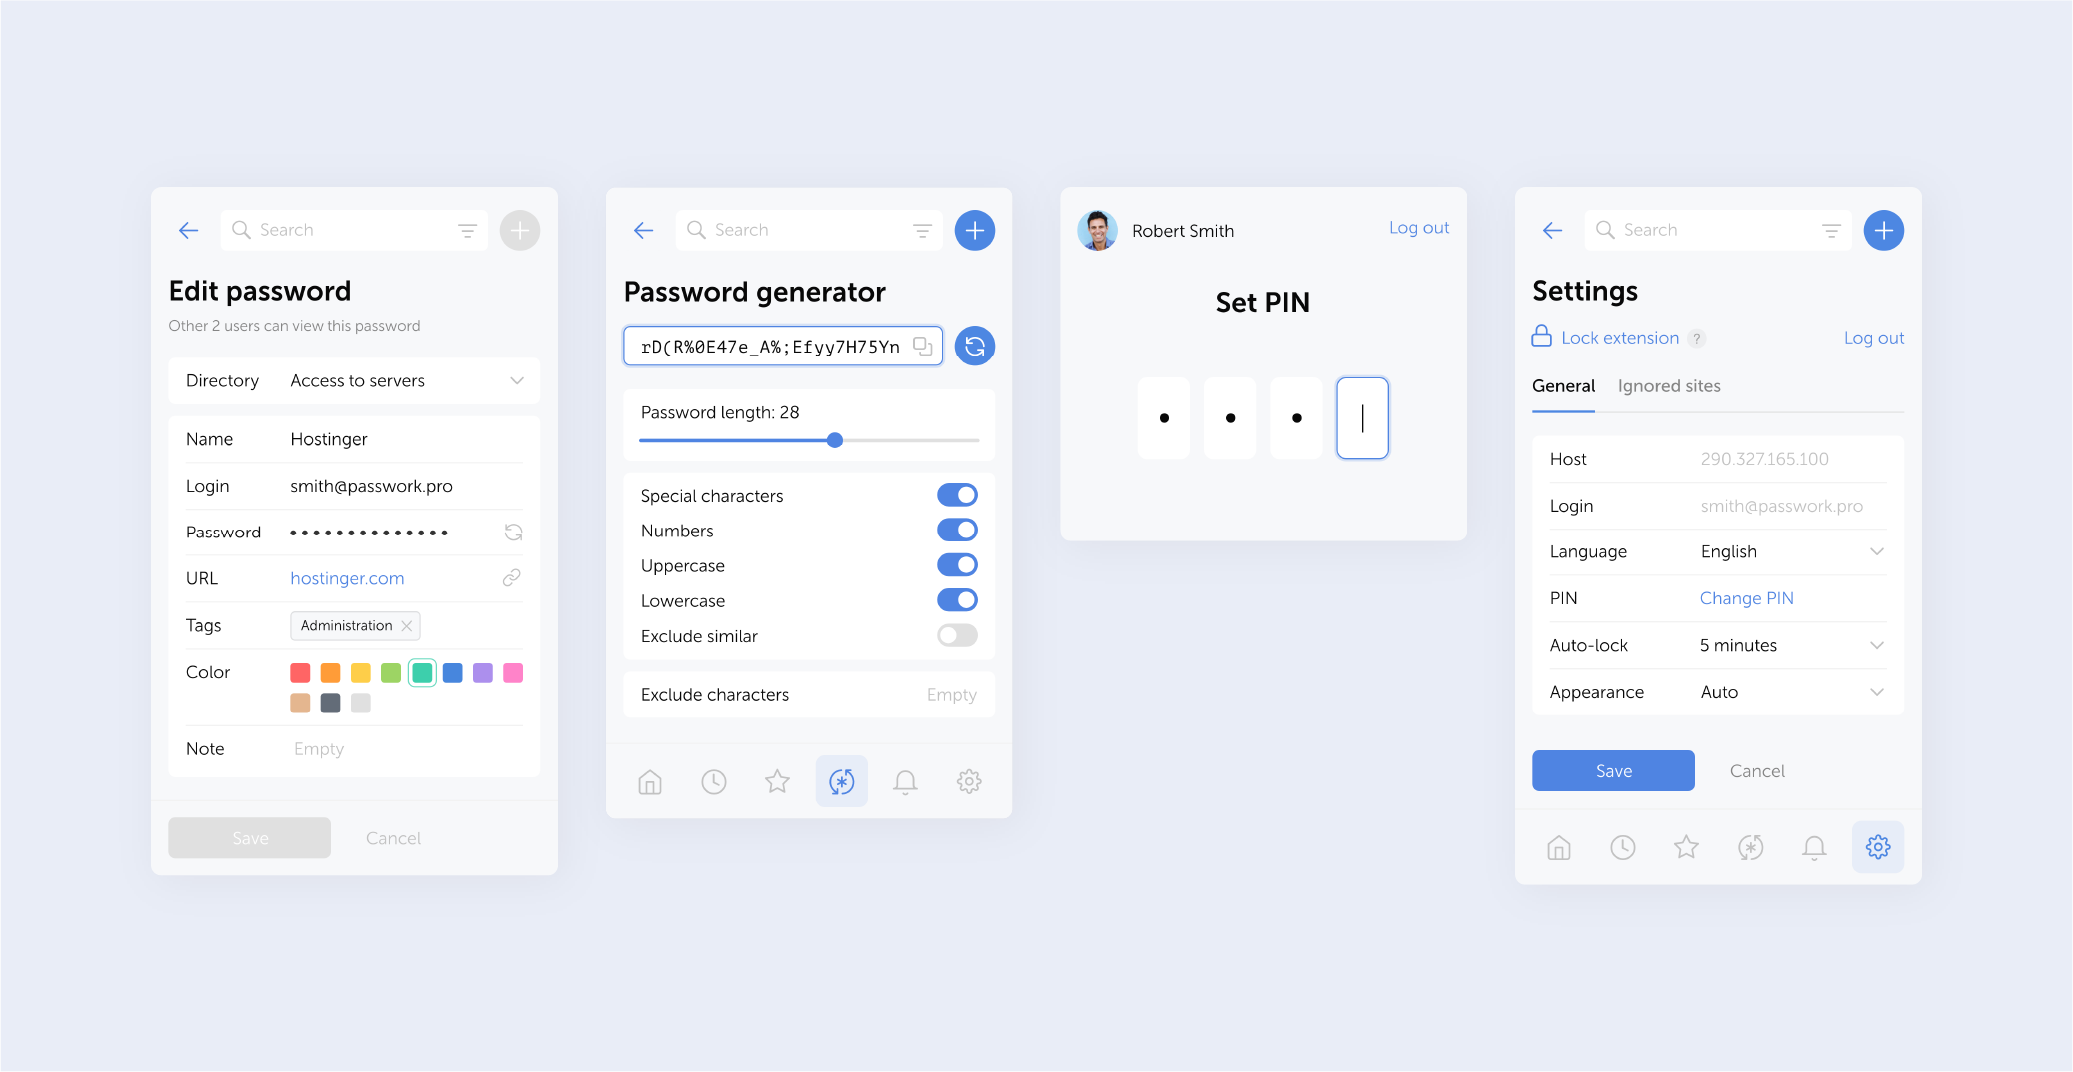
The browser extension is available for Google Chrome, Microsoft Edge, Mozilla Firefox, and Safari.
- Improved autofill: now you can autofill login forms directly from the extension's main screen when only one password is found for a website
- Added a time unit indicator (minutes) to the auto-lock settings field
- Removed the prompt to set up a PIN code in the extension when it is not mandatory
- Fixed session timeout issue
Further reading

Browser extension 2.0.29 release

Passwork 7.2.3 update is available in the Customer portal.
- Improved search functionality: password names are now indexed with case sensitivity and numbers
- Extended the display period for passwords and shortcuts in Recents from 30 to 90 days
- Fixed an issue where deleted passwords and folders from subfolders could appear in the Bin of vault administrators with group-based access, even if they didn't have access to those subfolders (these items could not be restored or deleted)
- Fixed issues with password editions migration
Further reading

